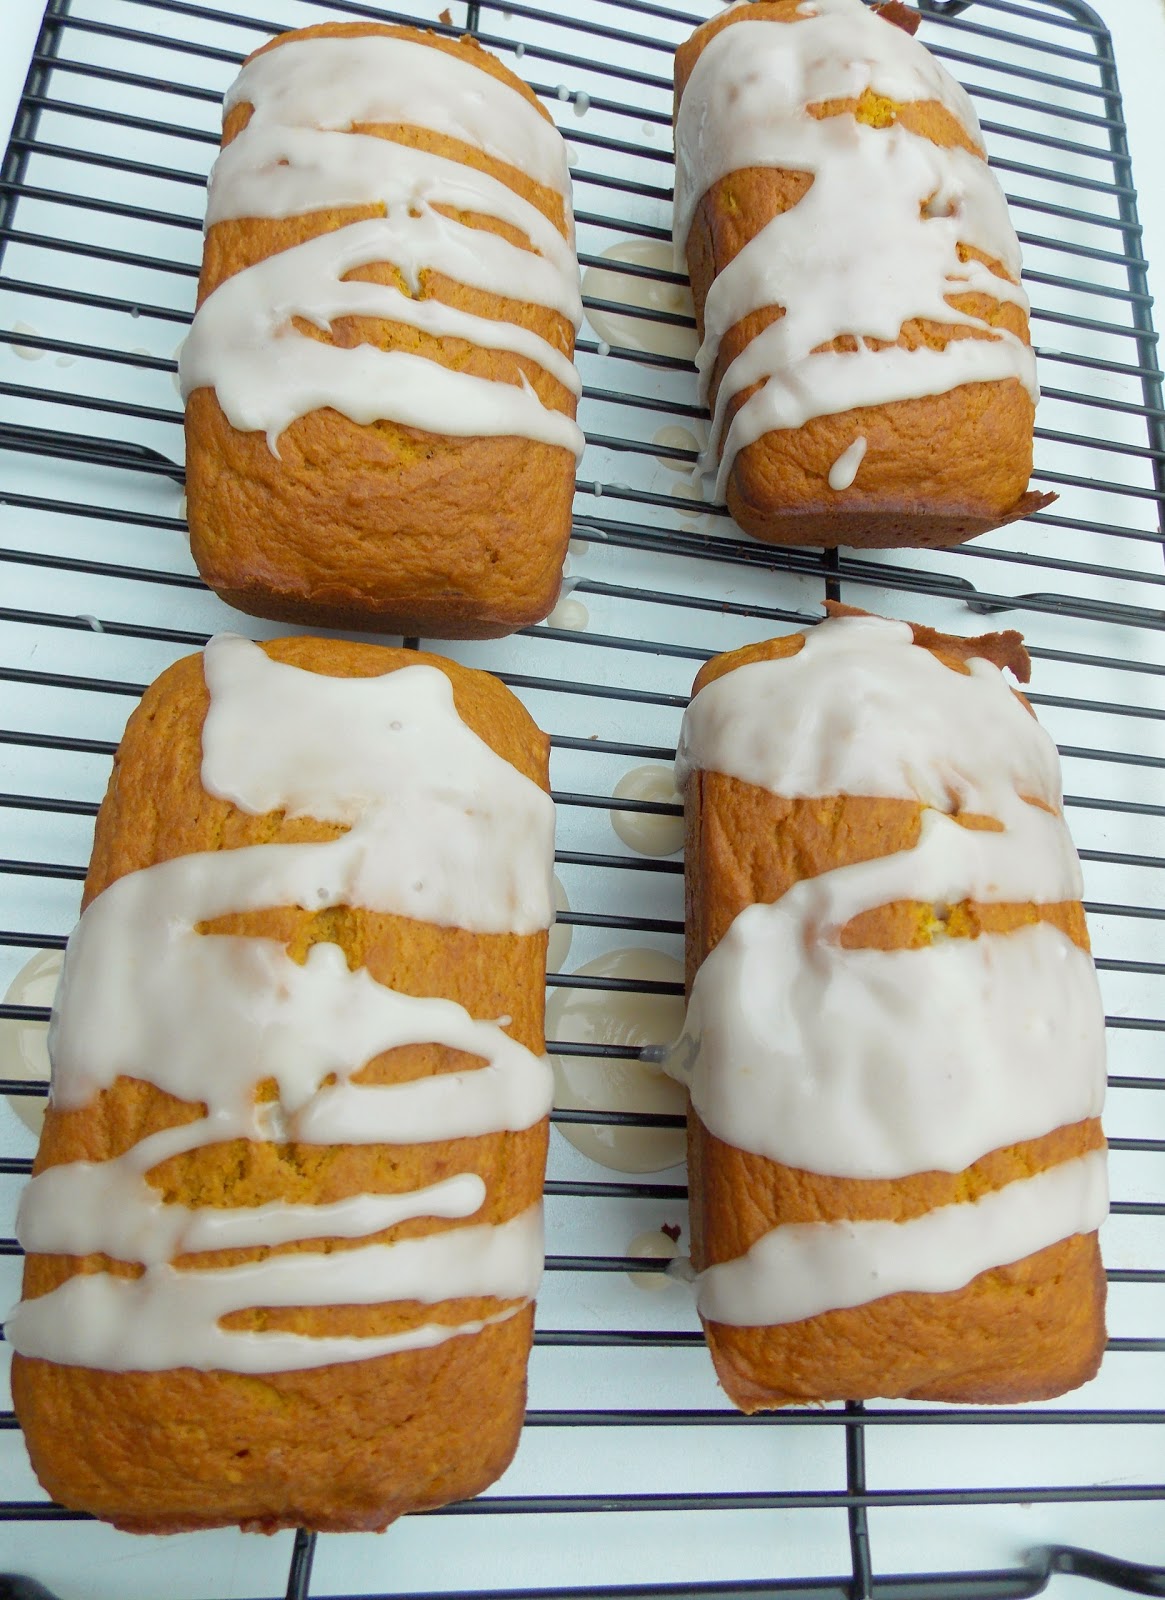
I'm so excited about my Pumpkin Bread, which I rarely make...my daughter is the Pumpkin Bread 'queen' and also makes the best Pumpkin Pie for Thanksgiving, with her amazing homemade crust.
When I was a 'kid' I hated pumpkins, and squash...how absurd was that! Even now, it's still not my favorites; but I've learned to adapt a liking to all of these wonderful fall treasures!
I normally would not have even made it, but my daughter and family were away for a long weekend last week, kids were out of school the following Monday. I was happy to 'dog sit' for my favorite little guys that I have spoiled since the last few years and they were so excited to have me around to give them treats and take them for walks. In the meantime, I was treated royally by my son and family to invite me over for dinner each evening, so I didn't even have to cook, and just bring dessert which happens to be my 8yr. old granddaughter's favorite...Pumpkin Bread!...my, how times have changed...tastes have changed since I was their age. Kids are so much more adventurous with their foods and are offered a lot more healthier choices!
Instead of googling for a Pumpkin Bread recipe, I decided to look for one in Martha Stewart's cookbook, which was of course a 'thrift find'...a 1995 edition that has so many great recipes...even if the book does not have any photos...you gotta love anything from Martha Stewart! Instead of making one loaf of bread spending precious time to make it, why not make 2 or 3 loaves? I can't even find this recipe online so I will have to type it out, and the modifications I had to make, that even gave it a nicer and much more flavorful, moist bread!
I was totally looking forward to making the Pumpkin Bread, and have an extra loaf to keep. I love these cute little loaf pans, and they're so perfect and handy being attached instead of separated.
Pumpkin Bread
source; Martha Stewart, from the Martha Stewart
cookbook...1995 edition
my modifications in blue
12 Tbsp. (1 1/2 sticks) unsalted butter, at room temperature
I used 1 stick of butter
3 Tbsp. molasses
I omitted the molasses
2 cups sugar
I used 1 1/2 cups sugar
2/3 cup orange juice or water
I used 1 cup fresh orange juice from 2 oranges
also grated the zest from one of the oranges
2 cups pumpkin or squash puree
I used 1 can (15 oz. 425g.) Libby's pumpkin puree
3 1/3 cups flour
I use 3 cups unbleached all-purpose flour
1/2 teaspoon baking powder
I used 1 teaspoon baking powder
2 teaspoons baking soda
1 teaspoon salt
I used 1/2 teaspoon salt
1 teaspoon ground cinnamon
1 teaspoon ground cloves
I used 1 teaspoon pumpkin spice
1 teaspoon vanilla extract
1 cup raisins or currants
I omitted raisins and currants
Preheat the oven to 350 degrees F. Butter 3- 9x5x3-inch loaf pans.
I sprayed cooking spray (for baking that has flour mixed in) Used 1 used 4 attached mini loaf pans, and 1- 9x5x3 loaf pan.
With an electric mixer, cream the butter, molasses,and sugar until light and fluffy.
I used a metal whisk to cream the butter,eggs and sugar until light and fluffy
Beat in the eggs one at a time.
I added the 4 eggs to the butter, and sugar, the vanilla extract, and whisked it until a light lemony color.
Add orange juice and pumpkin puree and mix well.
Sift the dry ingredients together into a large bowl.
No need to sift...just mix them all together without sifting.
Add the pumpkin mixture to the dry ingredients with a wooden spoon, stirring well incorporated.
Add the raisins at this time. I omitted the raisins.
Spoon into prepared pans. Bake for 1 hr. or until toothpick inserted comes out clean. Cool in pans for 10 minutes, then turn out unto racks to cool.
I baked the mini pans for 35 minutes at 350 degrees F. along with the larger loaf pans...took the mini pans out of the oven, leaving the 9x5 loaf pan in the oven...lowered temperature to 325 degrees F. and bake for an additional 20 minutes...tested with toothpick and it was done in 55 minutes.
For Orange Glaze; 2 cups of powdered (icing) sugar, and 1 Tbsp. orange juice...mix it well together, until smooth (you should have a thick paste) ...drizzle on the bread with a soup spoon, or omit the drizzle.
Note: This was the best Pumpkin Bread that turned out so moist, the orange zest and the extra orange juice gave it such a pretty color, and flavor with the vanilla extract addition. The glaze is optional, but you don't have to use it on all the Pumpkin Breads...leave some without it if you prefer!
When I was a 'kid' I hated pumpkins, and squash...how absurd was that! Even now, it's still not my favorites; but I've learned to adapt a liking to all of these wonderful fall treasures!
I normally would not have even made it, but my daughter and family were away for a long weekend last week, kids were out of school the following Monday. I was happy to 'dog sit' for my favorite little guys that I have spoiled since the last few years and they were so excited to have me around to give them treats and take them for walks. In the meantime, I was treated royally by my son and family to invite me over for dinner each evening, so I didn't even have to cook, and just bring dessert which happens to be my 8yr. old granddaughter's favorite...Pumpkin Bread!...my, how times have changed...tastes have changed since I was their age. Kids are so much more adventurous with their foods and are offered a lot more healthier choices!
Instead of googling for a Pumpkin Bread recipe, I decided to look for one in Martha Stewart's cookbook, which was of course a 'thrift find'...a 1995 edition that has so many great recipes...even if the book does not have any photos...you gotta love anything from Martha Stewart! Instead of making one loaf of bread spending precious time to make it, why not make 2 or 3 loaves? I can't even find this recipe online so I will have to type it out, and the modifications I had to make, that even gave it a nicer and much more flavorful, moist bread!
Pumpkin Bread
source; Martha Stewart, from the Martha Stewart
cookbook...1995 edition
my modifications in blue
12 Tbsp. (1 1/2 sticks) unsalted butter, at room temperature
I used 1 stick of butter
3 Tbsp. molasses
I omitted the molasses
2 cups sugar
I used 1 1/2 cups sugar
2/3 cup orange juice or water
I used 1 cup fresh orange juice from 2 oranges
also grated the zest from one of the oranges
2 cups pumpkin or squash puree
I used 1 can (15 oz. 425g.) Libby's pumpkin puree
3 1/3 cups flour
I use 3 cups unbleached all-purpose flour
1/2 teaspoon baking powder
I used 1 teaspoon baking powder
2 teaspoons baking soda
1 teaspoon salt
I used 1/2 teaspoon salt
1 teaspoon ground cinnamon
1 teaspoon ground cloves
I used 1 teaspoon pumpkin spice
1 teaspoon vanilla extract
1 cup raisins or currants
I omitted raisins and currants
Preheat the oven to 350 degrees F. Butter 3- 9x5x3-inch loaf pans.
I sprayed cooking spray (for baking that has flour mixed in) Used 1 used 4 attached mini loaf pans, and 1- 9x5x3 loaf pan.
With an electric mixer, cream the butter, molasses,and sugar until light and fluffy.
I used a metal whisk to cream the butter,eggs and sugar until light and fluffy
Beat in the eggs one at a time.
I added the 4 eggs to the butter, and sugar, the vanilla extract, and whisked it until a light lemony color.
Add orange juice and pumpkin puree and mix well.
Sift the dry ingredients together into a large bowl.
No need to sift...just mix them all together without sifting.
Add the pumpkin mixture to the dry ingredients with a wooden spoon, stirring well incorporated.
Add the raisins at this time. I omitted the raisins.
Spoon into prepared pans. Bake for 1 hr. or until toothpick inserted comes out clean. Cool in pans for 10 minutes, then turn out unto racks to cool.
I baked the mini pans for 35 minutes at 350 degrees F. along with the larger loaf pans...took the mini pans out of the oven, leaving the 9x5 loaf pan in the oven...lowered temperature to 325 degrees F. and bake for an additional 20 minutes...tested with toothpick and it was done in 55 minutes.
For Orange Glaze; 2 cups of powdered (icing) sugar, and 1 Tbsp. orange juice...mix it well together, until smooth (you should have a thick paste) ...drizzle on the bread with a soup spoon, or omit the drizzle.
Note: This was the best Pumpkin Bread that turned out so moist, the orange zest and the extra orange juice gave it such a pretty color, and flavor with the vanilla extract addition. The glaze is optional, but you don't have to use it on all the Pumpkin Breads...leave some without it if you prefer!


