Showing posts with label Dough. Show all posts

Peach Galette

When you attempt to make a 'free form' galette, it is so much easier to make a galette, and tastier than the store bought frozen pie crust...I really, highly recommend home made. Just follow the recipe for a double crust pie crust for your galette...here, @ The Clever Carrot...such an adorable name for a food blog; but I will not be commenting  (learned my lesson from previous times, when I promoted a blog)
NO response back!

As for the filling, I got the inspiration from here...@ Kitchen Sisters; but do not follow the instructions for 8 individual galettes, although the dough recipe is beautiful, and correct, but there is no way possible to make more than two galettes (they possibly meant 8 servings) The double crust recipe yields 1 large galette, or two smaller ones.

A perfect summer dessert recipe, and for the fall season as well, as long as you can get fresh peaches. We have an abundance of beautiful peaches, right from Georgia; the state that is famous for the best...ever peaches, just like our Florida is famous for the best...ever, oranges.

As you can see, when I make some kind of dessert, it doesn't last long in my little beach apartment, and so far this week, my children, and grandchildren have been here almost every day enjoying the beach. School is starting soon, and they got the best week to enjoy the last week of sunshine, which we didn't have a lot of in the last month! As soon as the galette got cool enough to cut slices, Gabby just grabbed a fork and ate half of the yummy galette, all by herself. It was just too 'awesome' to let this moment pass, so I grabbed my camera...she just cautioned me not to take a picture of her eating, right there, while it was still on top of the stove cooling!


I used 2 ripe, but firm peaches to fill my galettes and let me tell you...the crust was so full, I barely was able to fold the dough over...but the dough is so perfect each and every time, and I mix it in my large food processor, just using 'pulse' and not mixing rapidly. The dough will actually form into a ball, and then you're ready to wrap it in plastic and press down to shape it into a disk...don't forget to refrigerate for at least one hour.


This is what a chilled disk of dough looks like, all nicely wrapped in plastic wrap, and ready to roll out.


Just lift the plastic wrap off and place it over the top of the dough to roll out, right on the parchment lined baking pan. (make sure the dough is still cold, right after you took it out of the fridge)...this will ensure that you will get a great flaky crust.


A beautiful couple hours at our private beach!
Lora, checking her I-Phone...Luca collecting 'live' fishies and baby crabs and placing them in the bucket!


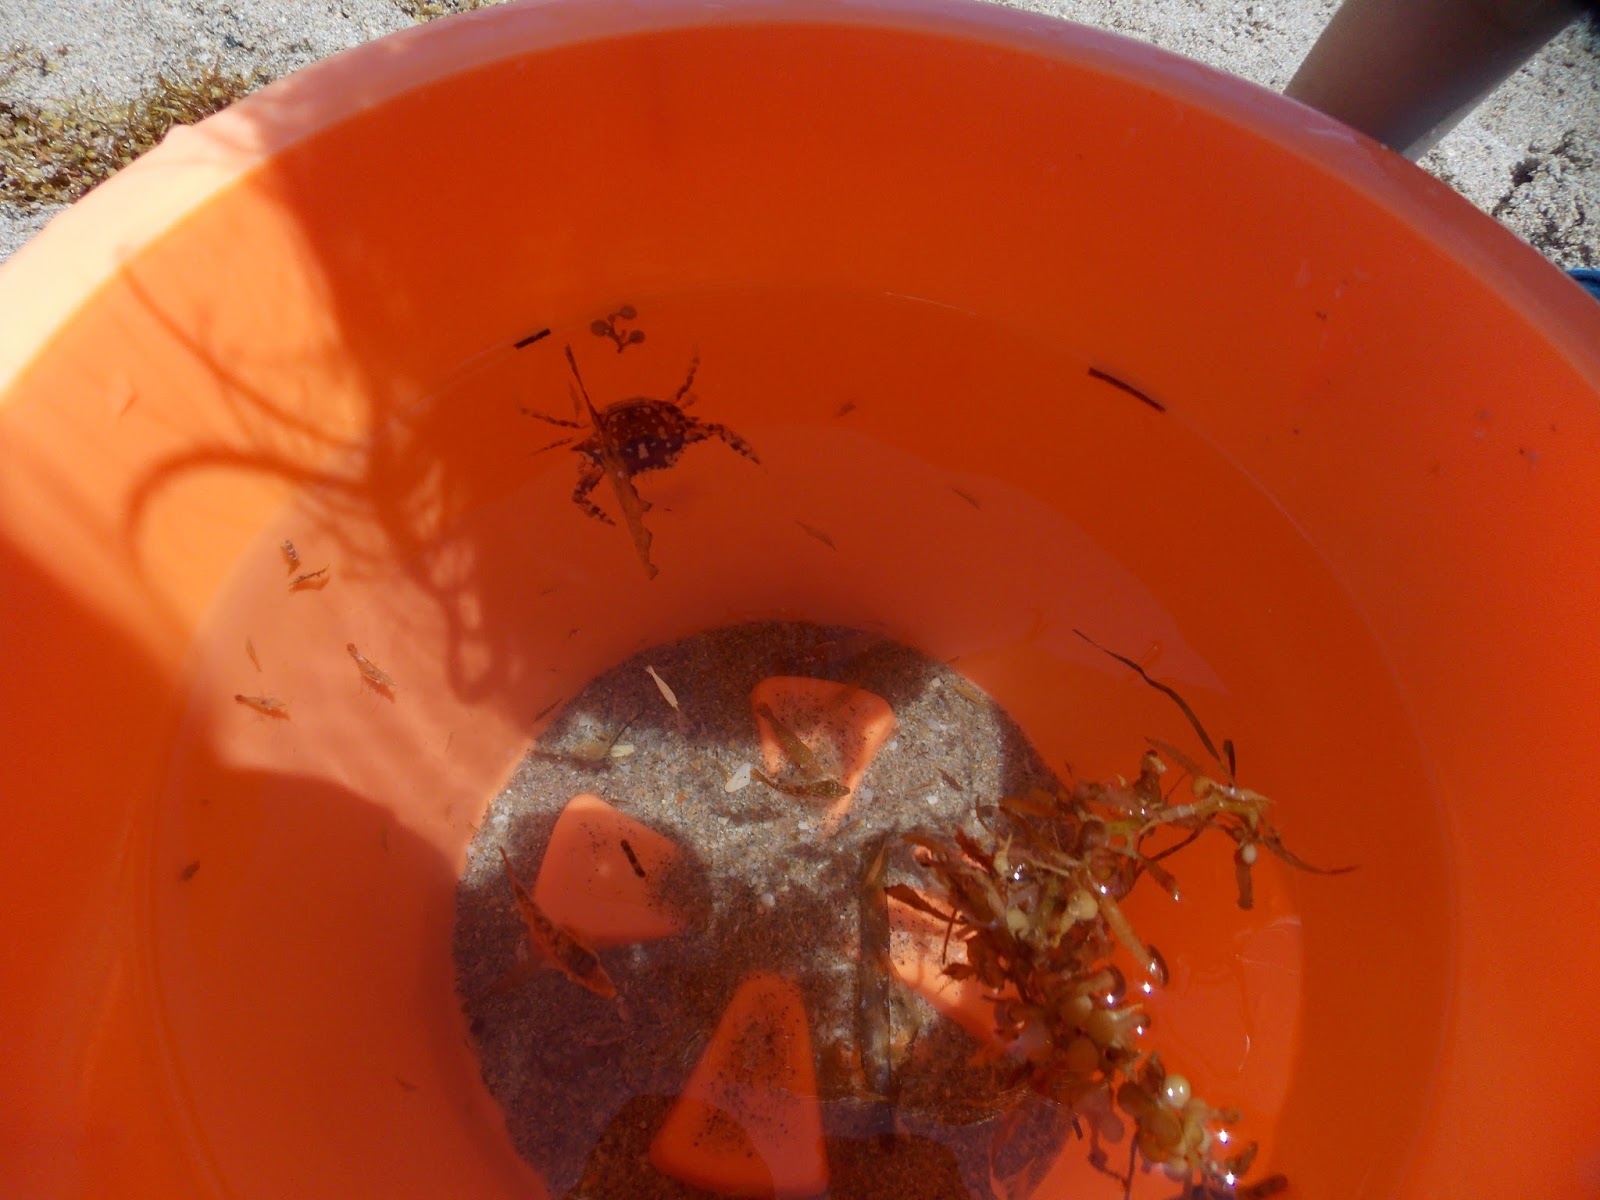
Can you spot the tiny baby crab in the middle?


A gorgeous Sunday on the beach...school will be starting, and I'm sure all kids got to take advantage of the last, or almost last Sunday, before school, doing some fun stuff!


Take care, and have a wonderful week ahead! Hugs, to all


Linking to: Full Plate Thursday @ Miz Helen's Country Cottage
                   Thursday Favorite Things @Katherines Corner


Mango-Strawberry Cobbler

Some cobbler have toppings that are actually as thick as biscuits, but to me it's patches of a crusty dough that has a cake-like flavor on the inside. I've been making all kinds of cobblers that is so easy, and so nice with fresh fruit that you want to use up.
Although, I did just state in my previous recent post that mango season is over in S. Florida...it really is over! This was the best mango season for us in years, and we were so blessed with all the abundance of these lovely tropical fruit, that we just had to use it in so many ways.

Last week, the final 4 mangoes fell down from the top of the tree and they were almost too ripe. Didn't want to use them for smoothies...it would be so selfish when we had smoothies just about every day for one month. I have not made a cobbler, since about one year ago, and it's time that I make one.

I made the cobbler this afternoon, and I was so very happy that we had beautiful sunshine today, but very, very, hot. Today was the first day of school for most of the kids in our area, and both my grandchildren started back! The weekend also went so nice with perfect Florida weather...rain again, in the late afternoon, but during the day was gorgeous and sunny!

Cobbler has got to be the easiest and fastest dessert to make...you just have to remember, that it starts out with 1 cup of flour, a little sugar, dash of salt, and don't forget the baking powder, and of course, a little butter, moisten it with either a little bit of milk to form a dough, or a little over 1 cup to be able to drop the dough on the fruit, and bake for 35 minutes...Let me tell you, the best way to eat this amazing cobbler; while it's still warm. This was gone so fast that I must say I will be making it more often now, with different fruits!
 I wanted to show you close up how juicy the fruits are (I have a little secret for that)...and for the cobbler, you can see the thickness, which is just right, and see how moist it is, yet has a crusty top!
This is my favorite photo...Gabby enjoying her cobbler, for an afternoon snack. She had her first day of school, 6th grade, and she came home so happy...all smiles, and such positive energy and lots of stories.If you want to make your family happy, with the most perfect, easy, afternoon snack...make them a fresh fruit cobbler...they will love it, and 'thank you' for it!  Now, on to the recipe...click on read more...(as if you didn't know it!?)

linking to: Hearth and Soul @ Zesty South Indian Kitchen

Pizza Margherita...{semi- homemade}

No matter what I try to do to this photo, to make it look better, its just not working! Its one of those photos that you have no choice at night, under a light that is just not gonna do justice to the photo. I made this semi-homemade pizza for myself, just the day before my family arrived back from their vacation, in Italy.

It was the easiest pizza...ever, and I must admit; the TASTIEST!...you know why?...because all you have to do is buy a fresh pizza dough from your local favorite supermarket, that's already in a plastic bag, and it weight 1 lb. and the dough is already risen. Costs about $2.50...and you don't have to do anything else, just spread the dough out on a pizza pan, and I will show you how I made it...and devoured almost the entire pizza by myself.

For the last time...alone in my daughter's house, I decided to go out on the patio with my glass, or two of my favorite Chardonnay wine, and just enjoyed the beautiful night...not exactly standing in this spot...where I took the photo of my son-in-law's creative 'trellis' design, where the beautiful bougainvilleas grow, but no flower at this time!

I am not having much luck with my computer today...or is it with Blogger? Thanks to my dear friend Angie...she wrote me an e-mail, just about an hour ago, which showed that she could not open my blog..."by invitation only"...what's up with that? I corrected it right away...so now its working, again.

Also, I cannot open my new photos that I intended to post for today's post. Lora took the photos at her house yesterday; of the Zucchini Quiche that I made, since I didn't have my camera with me, and I cannot upload it!
Will post it next week! ...so here's my super easy pizza with the 'ready dough'...BTW, I learned this method of actually getting a 'hands on' tutoring from a friend from Naples who was an expert 'pizza guy'...at my workplace at the famous caffe Luna Rosa, on the beach in Delray Beach, Florida. Now, its a chic and trendy caffe, but back in the late mid to late nineties, it was more of a small pizza, and panini place!

Pizza Margherita  
 recipe by; Elisabeth

1 lb.fresh, (not frozen) bread/pizza dough
or your favorite homemade dough
3 or 4 ripe plum (Roma) tomatoes sliced fairly thin
Kosher, or sea salt, freshly ground pepper,
1/4 cup extra virgin olive oil
3 cloves of fresh garlic, chopped
crushed red pepper flakes
dried oregano, dried basil
fresh basil leaves for garnish

1/2 to 1 cup shredded mozzarella cheese

First step: get your pizza pan ready, spray with cooking spray, take dough out of the plastic bag, and place it on the pizza pan...punch the dough down, and spread as much as it allows, leaving a border at the edge of the dough. In a small bowl, add the oil, garlic, the salt, pepper, the dry spices, and brush the dough lightly, with a pastry brush! Let the dough rest for about 30 minutes, and stretch again, leaving a border.

Preheat the oven to 525 degrees F. Also, brush the top of the tomato slices with additional oil, mixed with herbs, or if you prefer, just drizzle plain extra virgin olive oil on top. Place the pizza with the baking rim on a 'pizza stone'...if you have it, if not; it will still work fine. Bake for about 5 minutes...just to get the rawness out of the dough. Take the pizza out carefully; just don't burn your hands. Sprinkle the cheese on top of the dough, carefully put the fresh tomatoes on top of the cheese topped pizza, put back in the oven...lower the temp. to 450 degrees F. and bake for an additional 15 minutes longer, until the tomato gets slightly wilted, and cheese bubbles. The rim will get nicely golden brown, and crunchy!
Slice with a pizza cutter, and enjoy!...perfect pizza...and it really is homemade, because you made the entire pizza by yourself, and just used a 'little shortcut' dough, which saves you time, and waiting for the dough to rise!

You can top your pizza with whatever you have on hand, just a suggestion: which will help you each and every time. Brush your dough with the herb-based olive oil, and pre-bake for about 5 to even 10 minutes, depending on the topping you will use. You will never get a slimey, soggy top, underneath the topping, and will be sure to get a nice crunchy bottom, as well!
Mangia, mangia...Buon Appetito! xo


Enhanced by Zemanta

Whole Wheat Focaccia...for #Breaking Bread

I love to bake a nice focaccia every now-and-then; but this time I was eager to bake an entirely different one than my usual simple rosemary focaccia. Just did not have my own recipe for a different focaccia, and I'm sure you are the same way as I am, that at that very moment, you are not going to go through all your cookbooks to look for a certain recipe...so in my case...just go to the "heart of the matter" which is get a trusty library book on the certain item you want to make. Internet is always helpful, but borrowing a beautiful book with pictures and plenty of recipes is much more helpful!
Linking to: Full Plate Thursday @ Miz Helen's Country Cottage 

Now that I finally baked this delicious and healthy whole wheat focaccia, Lora formed the group Breaking Bread Society with her friends Shulie, from Food Wanderings and Marnely from Cooking with Books. What a fun baking with yeast ventures! I'm proud and happy to link it to the
#Breaking Bread to Lora (daughter) @Cake Duchess who is this month's hostess.
Just look at this lovely coarsely chopped walnut, and caramelized onion infusion with fresh rosemary nestled in the little pockets along with the extra virgin olive oil, bake to a crispy-crunchy top, and a soft delicious texture on the inside!
As you know, focaccia is associate with Liguria, Italy and its capital city of Genoa. There are many ways to top focaccia, as there are to top pizza...but because focaccia takes (to bake than pizza, it is important to follow the topping guidelines to protect against burning.

Whole Wheat Focaccia
adapted from;Whole Grain Breads by: Peter Reinhart

4 cups (510g.) whole wheat flour (I used King Arthur)
1 1/4 teaspoons salt (I used 1 1/2)
1 1/4 teaspoons (4 g.) instant yeast (I used 1 envelope)
2 cups +2 Tbsp. (482 g) water. at room temperature
1 1/1 teaspoons honey, or agave nectar or brown sugar
(I used 2 teaspoons dark brown sugar)
1 1/2 Tbsp. olive oil  (I used 2 teaspoons)
extra whole wheat flour for adjustments


If using the stand mixer, use the paddle attachment.
Place all of the ingredients except the extra flour and the olive oil in the mixing bowl of your mixer, on low speed for 2 minutes. With the machine off, drizzle the olive oil over the dough for another 30 seconds.

Turn of mixer and let the dough rest for 5 minutes. Mix again, on medium speed for another 30 seconds. The dough will be smoother and stronger, but it will be sticky. If it is too wet and not enough structure, add a little flour.


This method is the standard method I used, rather than the overnight method that the book recommends.

In an oil lined glass bowl place the dough ball, turn over to get it oiled on the opposite side, cover with plastic wrap and a clean dish towel, and let it rise double for about 1 hr.- 1 1/2 hrs.


On a parchment lined baking sheet, carefully shape the dough to a rectangle. Cover loosely with a clean dishtowel, and let it rest for another 30-35 minutes.


In a large skillet, with 2 Tbsp olive oil, start sauteing one sweet onion, sliced. About halfway through, add 2 teaspoons light, or dark brown sugar, and keep sauteing until it gets nicely caramelized. Add about 1 cup of coarsely chopped walnuts and fold it in.


After about 45 minutes, you can start poking the dimples in the dough with your thumb. It's ready to top when you see the indentations stay down.


In a small bowl, pour about 1/2 of olive oil, and brush lightly with a pastry brush, making sure you fill the indentation, and you can add some fresh rosemary right into the holes. You can sprinkle coarse salt over the top, and also add the walnut-onion mixture into the indentations.


Bake in a preheated 450 degree F. (232 C.) oven bake for about 10 minutes, and lower the temperature to 425 degrees F. (200 C.) for another 20 minutes; being careful
not to burn the topping. (If any burns a little bit, you can just scrape the charred layers off. I added too much topping, but you don't have to!)


The result...a perfect crunchy, and golden brown top, ready to transfer to a cutting board, after cooling on a metal rack.


Now, you see what I mean? Look at the little pockets of the filled walnut-caramelized onion, the fresh rosemary, and the light sprinkling of the coarse sea salt I used!
Superb! Whole Wheat Focaccia that is amazingly healthy, and delicious. Using my method, I promise you will not go wrong!

Buon Appetito!


Last year's mangoes...star fruit is also home grown, as well!

Aren't these mangoes gorgeous?...from my daughter's mango tree! They will be fully ripe in another month for sure!
Hugs,
Enhanced by Zemanta

Hungarian Nut Roll...and Counting Our Blessings

The holidays are almost over, and the new year will begin, in less than one week. We have so much to be thankful for...but mostly for our life, our freedom, to enjoy our choice of practicing our religion, our ethnic tradition, and respect one-another. This is the time of year when families get together and celebrate the "gift of giving!" It's not about how expensive, or how bright the gift should be...it's about the true meaning of our giving from the heart, and not putting a price on it!

My daughter Lora specifically asked me to make her Kalács (Hungarian Nut Roll) and I just put it off not realizing that it's the traditional value of the holiday season that she still remembers from the time she was little and my aunt making all the wonderful bake goods every Christmas! So, on Christmas Eve...just a few hours before we went to our dear friends for their Southern American/Italian dinner, I, at the last minute literally threw this wonderful quick nut roll together to have it for Christmas day! I rarely make yeast dough, but I made this with the full recipe, and freezing half of the dough! The filling is the same filling, that I used for my Kifli, in my previous post. I just did not have the time to make it the traditional way.

Googled the recipe, for the dough...just did not have the time to figure out the metric system to our American system. Turned out real moist, and everyone loved it. I got the nicest compliment from Lora, telling me that this was the best Christmas gift...better than any other present!

Hungarian Nut Roll
Adapted from Taste of Home

2 packages (1/4 ounce each active dry yeast
1/2 cup warm 2% milk
1/4 cup plus 2 Tablespoon sugar
3/4 teaspoon salt
1 cup butter softened
1 cup (8 ounces) sour cream
3 eggs, lightly beaten
6 to 6-1/2 cups all-purpose flour


Filling:
my own recipe

1/2  lb. walnuts
1 cup apricot preserves
1/4 cup sugar
Grated zest of 1 lemon
1/2 cup light raisins (optional)

In a large bowl, dissolve yeast in warm milk. Add the sugar, salt, butter, sour cream, eggs, and 3 cups flour. Beat on medium speed for 3 minutes. Beat until smooth. Stir in enough remaining flour to form a soft dough.( Dough will be sticky.)
Turn onto a floured surface; knead until smooth and elastic, about 6-9 minutes. Place in a greased bowl, turning once to grease top. Cover and let rise in a warm place until doubled, about 1 hour.


This is how the dough will look, doubled in size, nice and puffy!


Recipe calls for dividing dough into 4 portions, I divided mine into three. Roll out dough on a floured surface. Roll each into a 12x10 inch rectangle. Spread filling within 1/2 inch of edges. Roll up jelly roll style, starting with the long side; pinch seam to seal. Place seam side down on parchment paper lined baking sheet.


Cover and let rise until doubled, about 30 minutes. This is how it looks after 30 minutes...doubled in size. You can use egg wash with 2 eggs beaten with about 1 Tbsp. water, and with a pastry brush, just paint the tops and sides. Bake at 350 degrees F. for 30-40 minutes or until lightly browned. Remove from pan to wire rack, and cool.


For traditional walnut filling:

4 cups walnuts
1/2 cups sugar
1 teaspoon ground cinnamon
2 Tbsp. brandy
1/3 cup hot milk

Mix all the ingredients in a food processor, ending with the brandy, and hot milk. Spread on the rectangles, and roll up jelly roll fashion, and proceed with the instructions!


Linzer Cookies...and White Christmas Recipe Challenge


I am such a procrastinator...always the last one to join an event, unless someone is pushing me to do so! I did join the Very Good Recipes, as you can see the badge on my sidebar, and I do love this group, and to think that I didn't have to do a thing, just to sign up and they do all the work for you, to feature your blog with your latest posts automatically linked into your own page...now how hard awesome is that!? I'm also entering in this fun event with the Very Good Recipes White Christmas Challenge

Just click on, to see what the challenge is about, and check out the fabulous judges, including my dear friend Veronica, from Quay Po Cooks!

 linking to: Full Plate Thursday, 12-22-2011 @ Miz Helen's Country Cottage
                  Thursday Favorite Things Blog Hop 15 @ Katherines Corner

There's so many different versions of these lovely Viennese cookies that each country calls it their own, but it was actually originated during the 19th century
what was then, the famous well know Austria-Hungary empire! So, there you have the short history on these delicate buttery sandwich cookies...filled with apricot and various other fruit jams.
As a child, I have fond memories of these Linzer cookies, and I don't have my mom's or my aunt's recipes...only just remembering how it was made, so I adapted my version, from a trusted source!


Linzer Cookies

adapted from, Joy of Baking

1 cup (110 grams) blanched sliced almonds
1/4 cup (50 grams)

1 cup (227 grams)  (2 sticks) unsalted butter, room temp.
2/3 cup (135 grams) granulated white sugar, divided
2 large egg yolks
2 cups (220grams) all purpose flour
14 teaspoon salt
1/2 teaspoon cinnamon (optional)
1 teaspoon pure vanilla extract
1/2 teaspoon baking powder
Zest of 1 lemon

Confectioners' icing sugar, for dusting
choice of jams; raspberry (seedless preferred) blackberry
I used organic apricot, and organic blueberry, but you can use
choice of your own, even Nutella, which is great for chocolate lovers,
recipe, continued...

Rosemary, and Olive Knots...and Photo Props


Question! How important is "prop setting" for your food photo?...is it the prop behind the food? ...or is it the importance of the photo of the food! Plating the food is to me, and the presentation of it....is  the most important thing! First of all, the props, the plating, the lights...natural is the best lighting, by the way!
So, really, which angle works best?...and what do you really focus on?...my most amazing knot shaped rolls, filled with sliced Kalamata olives, and chopped fresh rosemary?...or the fresh bunch of rosemary?...what about the beautiful Batik Cloth?...well, that should be and "eyeful,"...so bright, and pretty, the floral designs are absolutely gorgeous, on the background of a soft blue-green color! This was a gift given to me by my dear food blog friend for over one year now, Joanna (Jo)...from ChicGorgeous , whom I finally met in person, at the 3rd Annual Foodbuzz Blogger Festival, and we share nearly one week of fun, and adventure, in San Francisco! She gave me this beautiful cloth, and what did I give her?...what do most American wear the most...all genders...a Baseball Cap!
Yes, an all American Baseball Cap, with of course, Palm Beach, Florida written on it, from yet, another famous 5 star hotel, The Breakers Hotel! (let's just hope Jo will pose with the cap, and takes photo with it to post on her blog)
Rosemary and Olive Knots...warmed up, on the second day; tasted even better!

Before I get to post the actual step-by-step direction, recipe...since now, I forgot the exact recipe from the book, which I didn't even really follow...just needed the idea. By now, I know the basic dough making for the yeast rolls, and I have become more "hands on" with the using of the dry yeast powder. Don't be afraid to use it, just make sure that the date isn't expired, and make sure that you start out with warm water to get the yeast started with.

I, for one, will tell you the source my recipes come from, or at least an idea how it came about, most of the times, unless it's a "hand me down" verbal recipe that I remember from making it over, and over again. It's just a matter of experimenting with various herbs, spices, and different ways of creating, and re-creating a recipe! I got this book called "The Modern Baker" by Nick Malgieri, from my local public library, and I fell in love with the book and all the amazing recipes, for cakes, rolls, and breads. I simply clicked on to my Amazon account, and ordered it online, for an unbeatable cheap price...and NEW! I took the book back to the library, just after I made these rolls, and forgot to copy the recipe, but my book will be arriving in a few days, or so! I just had so much fun with this dough, along with my little grandson, again. (I think he will follow his daddy's and my footsteps)...and he will become a chef, or a baker!

Hungarian Kifli and a Quiet Weekend

While other people were piling up outside, after Thanksgiving dinner at various locations for the famous Black Friday shopping, 24 hours before, I was glad to get home and just chill out after a huge Thanksgiving feast with friends and family. Whatever happened to just the plain old "day after Thanksgiving Sale?"...now it's BLACK FRIDAY!...pretty scary, especially when you have to camp out the day before...luckily, this year they opened the doors at some stores, as early, as 9:00pm on Thursday, and midnight, instead of 4:00am on Friday! Granted, the sales are incredible, 40 to 60% savings, is for sure a bargain. I saw a few incidence on the news last night about an irate customer that was going around with pepper spray...spraying his/ her opponents so they can't get the bargains that she was aiming for: she did get arrested, but that is "bizarre" ...think I'm just going to take advantage on the online shopping, and leave the stress behind!
The reason this is called Hungarian Kifli, which means "crescent"  in English, or "kipfel" in German The dough is either a yeast based type of dough or in this case, is dough that is combined with equal amount of butter, and cream cheese, combined with flour. No eggs used in this recipe. This is the basic dough for the famous Rugelach, as well! On the front row, they are filled with ground walnuts, raisins and apricot jam, and in the back row, shaped like the Rugelach, but slightly bigger, filled with Nutella, which was the kids' favorite!
I also made the fluffiest, and most amazing Sweet Potato Pie, at the same time, with homemade pie crust. Lora and I were able to work alongside at the same time...making pies, and other pastries. As you can see, I got the favorite butcher block table, and she had the entire granite top counter, which she likes to use.
 I did not get a chance to take hardly any photos at the dinner party, but did not want to miss the chance of my son-in-law's Chef Fabrizio's Vegetable Lasagna, that was a huge hit!

 Lora's Cranberry cake...light, and moist, not too sweet, absolutely delicious!

Cleveland Winter 2017

Hello my friends, I hope you all had a great holiday. I just got back from Ohio and I thought it would be nice to put together a post to s...