Showing posts with label Sugar. Show all posts

Pumpkin Bread

I'm so excited about my Pumpkin Bread, which I rarely make...my daughter is the Pumpkin Bread 'queen' and also makes the best Pumpkin Pie for Thanksgiving, with her amazing homemade crust.
When I was  a 'kid' I hated pumpkins, and squash...how absurd was that! Even now, it's still not my favorites; but I've learned to adapt a liking to all of these wonderful fall treasures!
I normally would not have even made it, but my daughter and family were away for a long weekend last week, kids were out of school the following Monday. I was happy to  'dog sit' for my favorite little guys that I have spoiled since the last few years and they were so excited to have me around to give them treats and take them for walks. In the meantime, I was treated royally by my son and family to invite me over for dinner each evening, so I didn't even have to cook, and just bring dessert which happens to be my 8yr. old granddaughter's favorite...Pumpkin Bread!...my, how times have changed...tastes have changed since I was their age. Kids are so much more adventurous with their foods and are offered a lot more healthier choices!
Instead of googling for a Pumpkin Bread recipe, I decided to look for one in Martha Stewart's cookbook, which was of course a 'thrift find'...a 1995 edition that has so many great recipes...even if the book does not have any photos...you gotta love anything from Martha Stewart! Instead of making one loaf of bread spending precious time to make it, why not make 2 or 3 loaves? I can't even find this recipe online so I will have to type it out, and the modifications I had to make, that even gave it a nicer and much more flavorful, moist bread!
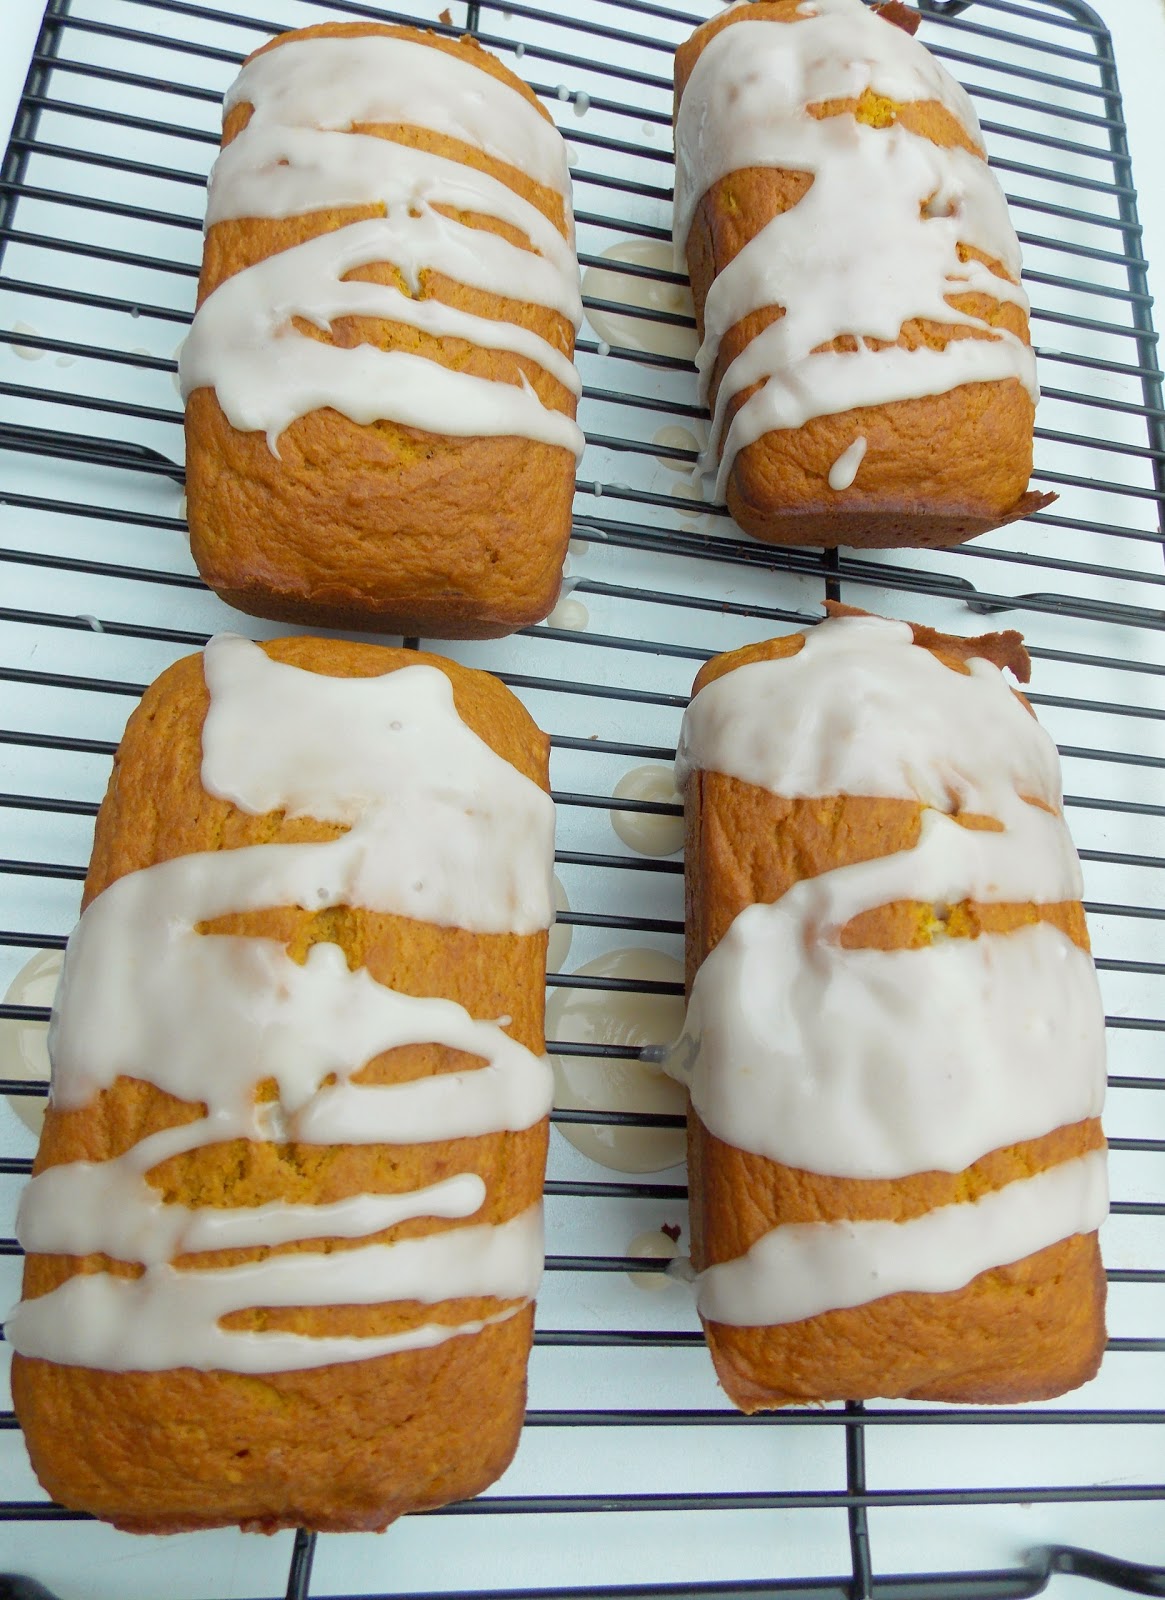
I was totally looking forward to making the Pumpkin Bread, and have an extra loaf to keep. I love these cute little loaf pans, and they're so perfect and handy being attached instead of separated.

Pumpkin Bread
source; Martha Stewart, from the Martha Stewart
cookbook...1995 edition

my modifications in blue

12 Tbsp. (1 1/2 sticks) unsalted butter, at room temperature
I used 1 stick of butter
3 Tbsp. molasses
I omitted the molasses
2 cups sugar
I used 1 1/2 cups sugar
2/3 cup orange juice or water
I used 1 cup fresh orange juice from 2 oranges
also grated the zest from one of the oranges
2 cups pumpkin or squash puree
I used 1 can (15 oz. 425g.) Libby's pumpkin puree
3 1/3 cups flour
I use 3 cups unbleached all-purpose flour
1/2 teaspoon baking powder
I used 1 teaspoon baking powder
2 teaspoons baking soda
1 teaspoon salt
I used 1/2 teaspoon salt
1 teaspoon ground cinnamon
1 teaspoon ground cloves
I used 1 teaspoon pumpkin spice
1 teaspoon vanilla extract
1 cup raisins or currants
I omitted raisins and currants

Preheat the oven to 350 degrees F. Butter 3- 9x5x3-inch loaf pans.
I sprayed cooking spray (for baking that has flour mixed in) Used 1 used 4 attached mini loaf pans, and 1- 9x5x3 loaf pan.
With an electric mixer, cream the butter, molasses,and sugar until light and fluffy.
I used a metal whisk to cream the butter,eggs and sugar until light and fluffy
Beat in the eggs one at a time.
I added the 4 eggs to the butter, and sugar, the vanilla extract, and whisked it until a light lemony color.
Add orange juice and pumpkin puree and mix well.
Sift the dry ingredients together into a large bowl.
No need to sift...just mix them all together without sifting. 
Add the pumpkin mixture to the dry ingredients with a wooden spoon, stirring well incorporated.
Add the raisins at this time. I omitted the raisins.
Spoon into prepared pans. Bake for 1 hr. or until toothpick inserted comes  out clean. Cool in pans for 10 minutes, then turn out unto racks to cool.
I baked the mini pans for 35 minutes at 350 degrees F. along with the larger loaf pans...took the mini pans out of the oven, leaving the 9x5 loaf pan in the oven...lowered temperature to 325 degrees F. and bake for an additional 20 minutes...tested with toothpick and it was done in 55 minutes.

For Orange Glaze; 2 cups of powdered (icing) sugar, and 1 Tbsp. orange juice...mix it well together, until smooth (you should have a thick paste) ...drizzle on the bread with a soup spoon, or omit the drizzle.

Note: This was the best Pumpkin Bread that turned out so moist, the orange zest and the extra orange juice gave it such a pretty color, and flavor with the vanilla extract addition. The glaze is optional, but you don't have to use it on all the Pumpkin Breads...leave some without it if you prefer!

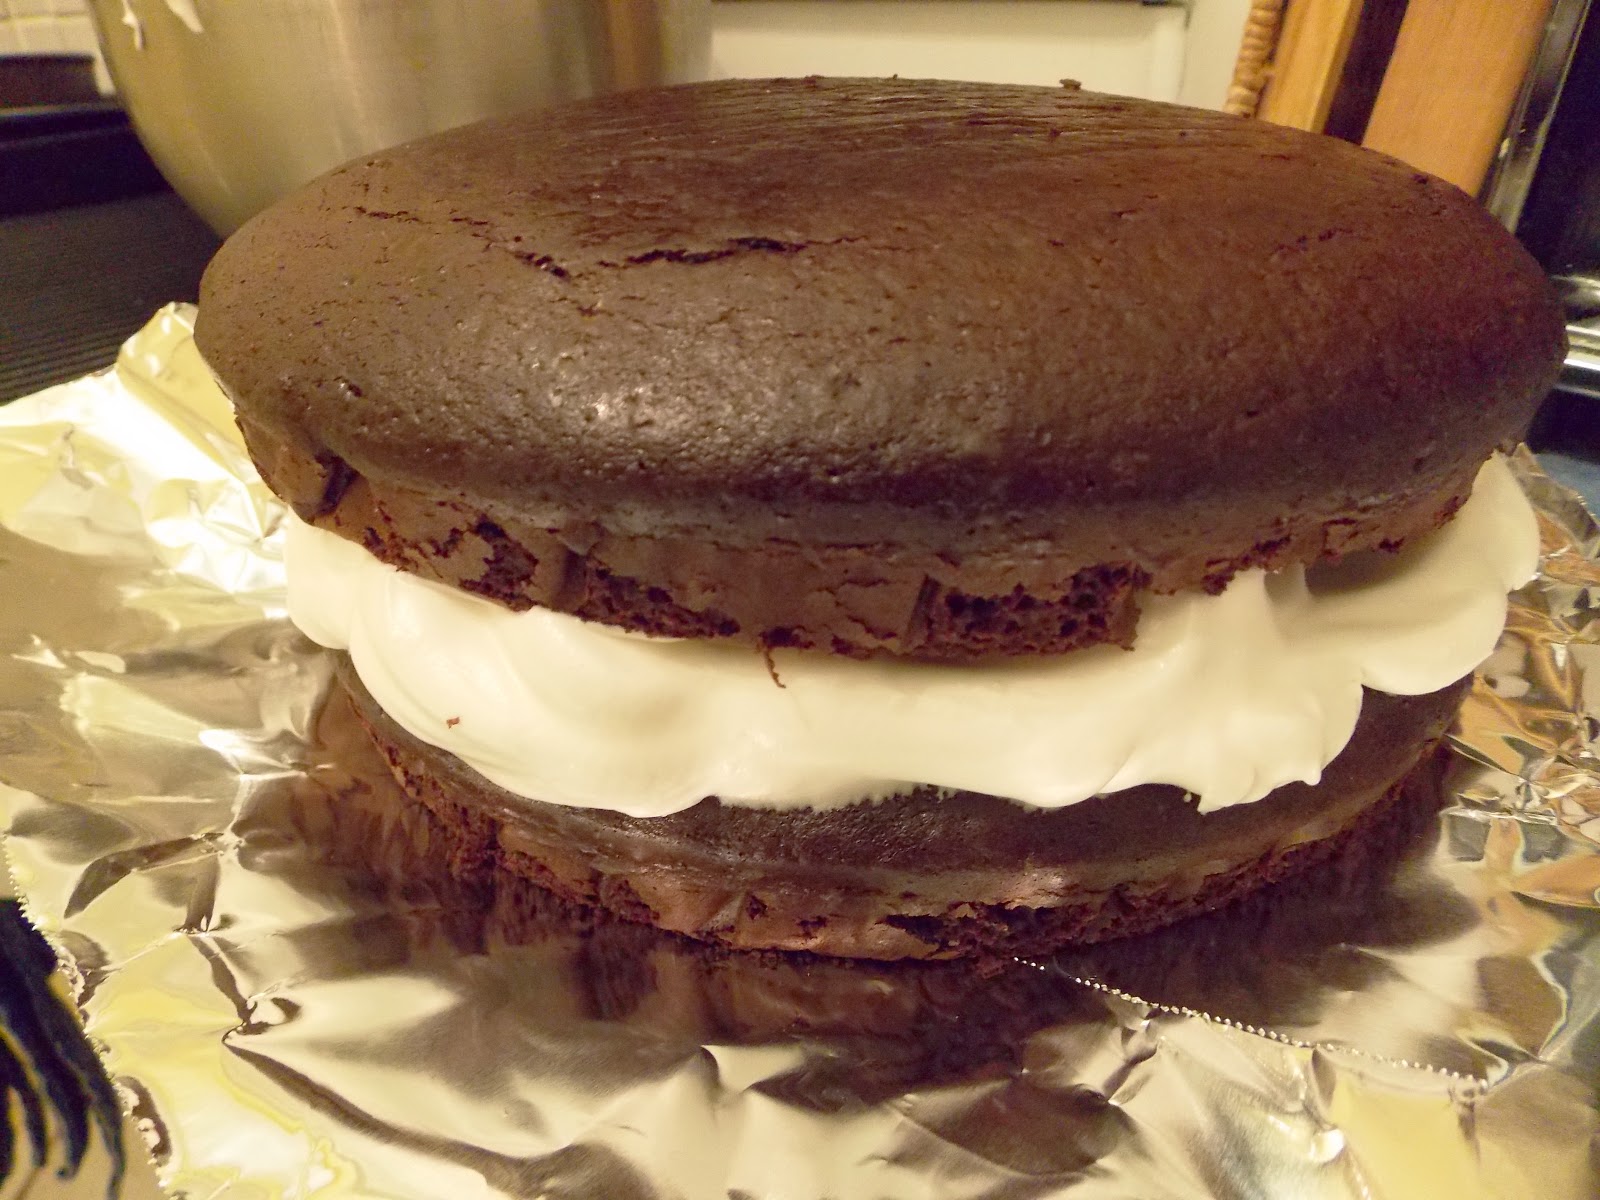
Hershey's "Perfectly Chocolate"...Chocolate Cake...

Just to prove my point...cloudy, dreary, and rain, rain, rain, every single day, here in South Florida until Oct. 17, the official date for the end of our rainy season. Don't get me wrong that we don't get any sunshine...yes we do, even with all the rain. Clouds form on one side of the sky and it's clear and blue on the other side. The weirdest part is; when it rains on one side....for instance; down the road it is sunny...less than one mile away! I was so determined to take my photo of this classic Hershey's Chocolate Cake...by the time I finished, the clouds were rolling in...so there you have it...my worst best shot!
One hour later...delivered the cake to its destination...(did not realize the small smear taking it out of the carton)...doing yet, another 'photo prop' outside my daughter's back yard patio....little better natural lighting, then, a few minutes later...had to literally run inside with the cake because it started to rain. So there you have it; 'the rain saga'...once more!

While I was visiting and commenting on blogs, I stumbled on this wonderful 'classic' Hershey's "Perfectly Chocolate" Chocolate Cake from a dear new blogger friend, Dottie, @Family Plus Food Equals Love...what a sweet name for a food blog. She is so gracious, and talented; you can also find the Hershey's Milk Chocolate Chip recipe there, as well!

I haven't made this classic cake in a while, and I must say I had to adapt a few things, first...by adjusting the sugar amount and adding a small amount of 'real' butter to the batter, as well.

My modifications are in red

Hershey's "Perfectly Chocolate" Chocolate Cake

Ingredients
  • 2 cups sugar 1 cup of sugar
  • 1-3/4 cups all-purpose flour 2 cups flour
  • 3/4 cup HERSHEY'S Cocoa 1 cup
  • 1-1/2 teaspoons baking powder 2 teaspoons
  • 1-1/2 teaspoons baking soda 1 teaspoon
  • 1 teaspoon salt 1/2 teaspoon salt
  • 2 eggs 3 eggs
  • 1 cup milk 1/2 cup milk boiled
  • 1/2 cup Hershey's semisweet chocolate chips
  • 1/2 cup vegetable oil 1/4 cup veg. oil + 1/4 cup (1/2 stick) unsalted butter softened
  • 2 teaspoons vanilla extract
  • 1 cup boiling water
                                                                                         
    1. Heat oven to 350°F. Grease and flour two 9-inch round baking pans.
    2. Stir together sugar, flour, cocoa, baking powder, baking soda and salt in large bowl. Add eggs, milk, softened butter, oil and vanilla; beat on medium speed of mixer 2 minutes. Stir in boiling water, boiled milk, with chocolate chips added in the milk to melt (batter will be thin). Pour batter into prepared pans.
    3. Bake 30 to 35 minutes or until wooden pick inserted in center comes out clean. Cool 10 minutes; remove from pans to wire racks. Cool completely. Frost with "PERFECTLY CHOCOLATE" CHOCOLATE FROSTING. Makes 12 servings.

    Frost with FLUFFY WHITE (7-MINUTE) frosting

    VARIATIONS:
    ONE-PAN CAKE: Grease and flour 13x9x2-inch baking pan. Heat oven to 350° F. Pour batter into prepared pan. Bake 35 to 40 minutes. Cool completely. Frost.
    THREE LAYER CAKE: Grease and flour three 8-inch round baking pans. Heat oven to 350°F. Pour batter into prepared pans. Bake 30 to 35 minutes. Cool 10 minutes; remove from pans to wire racks. Cool completely. Frost.
    Fluffy White Frosting, or 7- Minute Frosting...or Marshmallow Frosting is a true American 'classic' that has been around for decades...my very first time I tried it, was a Better Homes and Gardens cookbook that was given to me as a gift, in 1974, when it was called...FLUFFY WHITE FROSTING!
    Every recipe I googled called for the addition of light corn syrup added...which I sparingly use...or don't use at all! I have been using McCormick Cream of Tartar instead...for years; which is a powdery substance, a very small amount added to make the frosting fluffy, and add body which the corn syrup adds...which happens to be a stabilizer. A tiny amount of the Cream of Tartar does it all!
    Fluffy White Frosting      

    1 cup white sugar


    1/3 cup water


    1/4 teaspoon cream of tartar


    2 egg whites 
    I used 4 egg whites                                                   


    1 teaspoon vanilla extract


    This method is so much easier than the double boiler method, just make sure that you let the mixture get very bubbly, for a few minutes...it will get thicker, and almost a pale yellow color (after that it will turn amber) and you will have to make caramel sauce with it, adding cream to the amber sugar.
    The choice is yours; just carefully watch over the boiling sugar content!


    1. In a saucepan, stir together the sugar, water and cream of tartar. Cook over medium-high heat until the sugar is dissolved and the mixture is bubbly.
    2. In a medium mixing bowl, whip the egg whites and vanilla to soft peaks. Gradually add the sugar mixture while whipping constantly until stiff peaks form, about 7 to 10 minutes. Frost the cake of your choice. 
    3. I have been making this frosting for my grown children when they were little...and now my 4 grandchildren are enjoying it, and it has become their very favorite. With 4 egg whites you can achieve the same quality...making sure you do the 'finger test'...seriously!

    Lemon Curd

    Nothing like homemade Lemon Curd that you so lovingly make...being careful not to let it burn or curdle because after all, you'll be wasting half a dozen egg yolks (save the whites for another use) some precious fresh butter, three lemons, a cup of sugar and all that time you've spent carefully whisking it to yummy perfection.
    Don't boy store bought lemon curd because they never can compare to the luscious one you make at home. I love this even more than custard, which actually is, combined with fresh squeezed lemons and grated lemon zest.
    Notice the cute wrought iron trivet...shaped like a teapot? A 'thrift find for $1.99; it even has a little hook so you can hang it...gave it to my daughter last year and it is so well made, sturdy, and beautifully glazed. I set the still hot lemon curd after I filled the mason jar that has been sanitized.

    Now that its sealed with the lid I'm going to refrigerate it and fill a tart crust, or you can fill a pie crust, and top it with fresh raspberries...or, I could save it in the fridge to use it for another dessert, spread it on freshly baked biscuits. This would make a very special gift as well, for the holidays!


    The recipe is found in Martha Stewart Cookbook...collected recipes for every day. This is a fantastic book where you will find your basic recipes at a moment's glance...another 'thrift find' for $2.99...also gave to my daughter.

    Lemon Curd
    adapted from Martha Stewart

    6 egg yolks lightly beaten
    1 cup sugar (caster-granulated)
    Juice of 3 large lemons, about 3/4 cups
    1/4 lb. (1 stick) unsalted butter, cut into small
    pieces.
    1 Tablespoon. grated lemon zest

    In a medium stainless steel pot, combine the
    egg yolks, sugar, and lemon juice. With a wire
    whisk, stir constantly for about 12-15 minutes
    until mixture thickens, and coats the back of a spoon. Do not allow the mixture to boil. 

    Remove from heat and strain the mixture through a mesh sieve into a medium bowl, to make sure that it is completely smooth without any lumps.Stir in the butter, a few pieces at a time and fold in the lemon zest. While still warm pour the mixture into a sterilized jar, and cover tightly. Refrigerate until ready to use. 
    Yields 1 1/2 cups.


    Red Velvet {Birthday} Cake with Cream Cheese Icing

    As you may know we've had a very stormy week, starting last Wednesday, and expecting the worst by Thursday, and Friday...kids having half a day of school on Thursday, and off on Friday, due to Hurricane 'Sandy' lurking around our area in S. Florida...leaving a mess behind in Cuba, and Haiti. Now, heading up to the east coast...already causing havoc in North Carolina! Luckily, we escaped a lot of what could have been really bad damage, just heavy winds, to deal with and a lot of downpour of heavy rains.
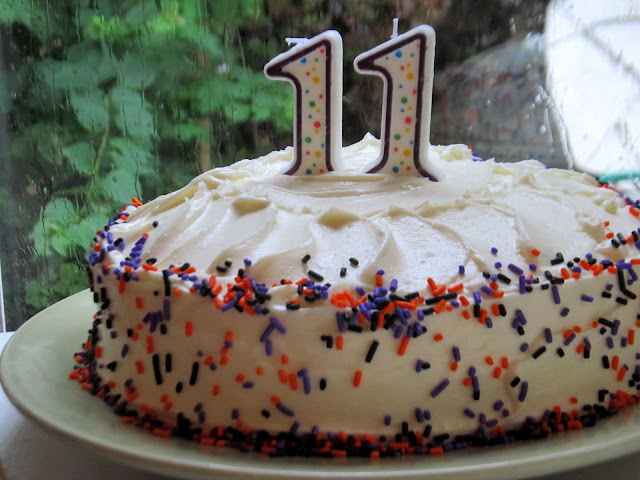
    The only time you will see a frosted cake posted on my blog, when I make one for a special occasion...and this certainly was! My granddaughter Sophia just turned 11...the second oldest of the 4 grandchildren that I have. Gabriella had her 11th birthday in August. This was a special request from Sophia, she's such a 'sweetheart' and knows exactly what she wants. Red Velvet Cake is an 'all American' Southern cake...and don't let anyone convince you...otherwise:) Some like it 'ruby red'...but since there's cocoa powder used, I like to have a dark reddish/brown
    version of this famous cake!
    Most recipes call for cake flour, but the recipe that I adapted this from called for all-purpose flour. When using cake flour, you do not add baking powder, just baking soda, but I figured baking powder addition to the all-purpose flour would lighten it up...and it did; so moist, perfect, and yummy. Also, I cut down on the sugar, as well!
    My two 'angels' Sophia on the left...and Gabby (cousins)...but more like sisters!


    I don't like my Red Velvet Cake to be a
    bright red color...so I added the special dark Hershey's cocoa, instead of the regular one. When you chill the cake, you can cut a perfect slice, just like this! I will share this 'failproof' and perfect recipe with you, step-by-step, so READ on!

    Pumpkin-Banana-Cranberry Mini Bundt Cakes #BundtaMonth

    Notice something different?...I figured out how to use 'text' in my photos! So thrilled to start out for the #BundtaMonth Challenge, and the theme for October is Pumpkin!

    Vintage 'Vera' table cloth, (brand new $1.99) ...a 'thrift find' from Goodwill
    Hi everyone! I have so much to share with you starting with this post...which is so exciting because, it is the month of October, a very favorite month of mine which spells FALL, AUTUMN...HALLOWEEN, the crisp cool fall weather...of course; I'm not talking about S. Florida, but in our northern states, and everywhere else where they celebrate the beautiful fall season. I mentioned before that this is one of my all-time favorite season with the beautiful changing of the gorgeous autumn colors of the leaves...weaving its magical bright orange, yellow, brown, burgundy colors. So mesmerizing and enchanting, that I would want to enjoy this for more than just a short time!

    I've been wanting to link up with such great 'blog hops' ...but for me, the easiest ones are the ones where I can link up whatever I have on my blog for that chosen day...but as for the #BundtaMonth link, I cannot resist it not just because my daughter Lora and Anuradha are the partners in crime of this fabulous 'bundt' challenge...and I just happen to love bundt cakes. I have been baking bundt cakes since the seventies when they were so ultra-popular.

    I still have my original dark orange color seventies bundt pan along with a couple newer ones, and an awesome mini heavy duty pan, a 'thrift find'...which I love to bake in. I didn't want to take time browsing for a recipe, so I just used my 'trusted' basic banana bread recipe that I have memorized, modified it, and added the pumpkin and the fresh/frozen cranberries from Whole Foods.

    What is #BundtaMonth all about?

    Here’s the challenge:
    Anuradha (Baker's Street) and Lora (Cake Duchess) will pick an ingredient and announce it the first week of every month. All you Bundt loving bakers need to do is use your imagination on how you’d like to incorporate it and bake a Bundt – mini Bundt or large Bundt – and link it up to our blogs throughout the month. It's that simple!

    They decided to bake with pumpkin in their October Bundts.

    If you're out of ideas and are looking for inspiration you should check out their Pinterest board that has 100+ bundt cake recipes.

    Pumpkin-Banana-Cranberry Mini Bundt Cakes
    recipe by; Elisabeth

    1 cup all-purpose flour
     (I used King Arthur unbleached all-purp)
    1 cup whole wheat flour
    1 teaspoon baking powder
    1 teaspoon baking soda
    1 can (15 oz) pumpkin (I used Libby's
    2 ripe bananas
    2 large eggs
    1/4 cup vegetable, or canola oil
    1 bag (12 oz) fresh, or frozen cranberries
    (you can use dried cranberries, in place of fresh
    or frozen...1 cup)
    1 teaspoon salt
    1/2 cup granulated sugar
    1/2 cup light brown sugar
    1 teaspoon vanilla extract
    1 teaspoon cinnamon
    1/4 teaspoon nutmeg (I used a sm. amt. of fresh grated)
    3 or 4 pieces crystallized ginger
    (you can use 1/2 teaspoon powdered ginger instead)


    Preheat oven to 375 degrees F. Get 3 bowls ready for your ingredients. (1 large, 1 medium, and 1 small)
    On the top right photo...in the large bowl,
    add the canned 15 oz. pumpkin puree, the 2 sugars,
    the cinnamon, the grated nutmeg, the 2 bananas, and mash coarsely with a potato masher.

    In a small bowl, add the 2 eggs, and 1/4 cup vegetable, or canola oil, and whisk with a fork.


    In the medium bowl, combine the flours, salt, baking powder, and baking soda. Mix together.


    Add the cranberries, and the crystallized ginger to the flours and mix gently together. The importance of this method is; so that they don't sink to the bottom of the batter when baking.


    Now, you can add half of the fruit and flour mixture to the pumpkin mixture, in the large bowl. Also the the egg mixture to that, and fold in gently.
    Now, finish adding the second half of the fruit and flour mixture, and fold that into the large bowl, again.

    Finish, by gently incorporating everything, so that you don't smash the cranberries.


    Spray a a mini bundt pan, and a 6 cup muffin pan with cooking spray, and add the batter carefully, about 3/4 full  in the bundt pan, and halfway full in the muffin pan

     Bake at 375 degrees for 20 minutes...remove the muffin pan, which will be done...Lower temperature to 350 degrees F. and finish baking the mini bundts for another 20 to 25 minutes (total 45 minutes for the bundt cake) Cool on metal rack for about 15 minutes before inverting the bundt cakes.


    As you can see, I've worked very hard on this challenge, planning, working on re-constructing the actual 'memorized' banana bread recipe from 'scratch' taking step-by-step photos...trying to capture a good natural light with a 'speck of sun'...virtually, never using 'props'...just 'thrift finds' items I have on hand.

    I almost forgot the glaze recipe!

    2 cups powdered sugar
    1 teaspoon light rum
    1 teaspoon (maybe 2, if needed)


    Mix all the ingredients with a fork, making sure there are no lumps, and to have it at a fairly thick consistency. (finger testing)...making sure it stick to your finger when you test it. Drizzle on with a teaspoon, since these are small cakes.

    Just look and see how incredibly moist is the texture. Your taste buds are in for a huge surprise when you bit into the sour taste of the cranberries, and the sweet tangy taste of the crystallized ginger.

    As for kids under 6...I recommend using dry cranberries, that have been soaked in boiling water for a few minutes before mixing it in the batter. (my little 6yr. granddaughter literally picked out each cranberries before she ate the cake, which she did like, but not approved of the sour taste, which actually mingles with the sweet cake and a surprise of the slightly spicy crystallized ginger!
    Enhanced by Zemanta

    White Chocolate Chip, Chocolate Cookies


    While I'm trailing behind everyone else, on the 'food blogger scene,' I still try to come up with decent photos and different type of recipes. I must admit that I could actually post something every-other day...even every day; let's face it, we all have to eat every day 3 meals a day... but who actually wants to take photos of everything you make?...not me; although I should have taken a picture of my awesome homemade 'nokedli=spaetzli'...or even, my northern bean-vegetable soup cooked in my slow-cooker last week, but then I would have to stop and measure everything from the start because it's from 'scratch' and memory...scratch that, and let's start with my cookies.

    Even with the cookies...when you don't have semi-sweet chocolate chips, or any other chocolate chips; just white, what do you do?...well, you make a 'White Chocolate Chip, Chocolate Cookies'...duhh...how easy is that to figure out?

    Luckily, I always save the empty bag from the Nestle Semi-Sweet morsels, the 12. oz bag, and follow the recipe on the back, but just alter it a little to make it dark chocolate, with white chocolate chips...no problem...done!


    Homemade cookies are so much more appreciated and it is much better than store-bought with all the preservatives, unless it's 'OREOS'..but that is always saved for emergencies.

    You can make any kind of 'chip' cookies with the basic Toll House cookies recipe from Nestle's, just keep that in mind. Next time it will be with peanut butter chips with dark chocolate...just switching around the white chocolate chips.

    Good thing I have another batch in my fridge...ahh thought you would be wondering why do a have a 'second batch' in my fridge?...saving it for a 'rainy day'...not such a bad idea! Today was actually a rainy day, and I had to be at my service station at 9:00AM sharp to get an oil change, and walk over to Goodwill with my umbrella, while car was being serviced. (didn't really find anything,) or at least nothing that I wanted to carry back on foot to pick up my car...so now, here's the slightly adapted recipe for a different chocolate chip cookie!

    White Chocolate Chip Chocolate Cookies
    adapted from Nestle's Toll House Cookies

    2 cups all-purpose flour
    1/4 cup Hershey's or another good brand cocoa powder
    1-1 oz block of semi-sweet baking chocolate
    1 teaspoon baking soda
    1 teaspoon salt
    1/2 cup butter (1 stick) melted with the 1 oz. of the semi-sweet chocolate, and cooled
    1/2 cup (1 stick margarine) or 1/2 cup shortening
    3/4 cup granulated sugar
    3/4 cup brown sugar
    1 teaspoon vanilla extract
    2 large eggs

    2 cups (12 oz. pkg.) white chocolate chips or dark chocolate chips

    Preheat  oven to to 375 degrees F.

    Line a baking pan with parchment paper. Combine flour, baking soda and salt in a small bowl.In a large bowl, beat cooled down melted chocolate and butter mixture, the 1/2 cup (1 stick margarine)...or the 1/2 cup shortening with the granulated sugar and brown sugar, and vanilla extract until creamy. Add eggs one at time, beating well until each addition.

    Gradually beat in flour and cocoa mixture. Stir in chocolate morsels.

    Drop by rounded teaspoon onto parchment paper lined baking sheets, keep them 2 inches apart. Bake for  9 to 11 minutes. Cool on baking sheet for 2 minutes.

    Note: on the photos above, I saved more than half the portion of the dough, patted it down, wrapped it in plastic wrap...then aluminum foil, and took out more as needed the next few days. Score them first, then cut equally, shape into a walnut size ball and press down lightly; follow baking instructions.


    Have a cookie...or two...or three:) You'll love these...yumm!
    Linking to: Hearth and Soul Blog Hop @ Zesty South Indian Kitchen
                    Thursday Favorite Things Blog Hop @ Katherines Corner
                     Full Plate Thursday @ Miz Helen's Country Cottage


    Enhanced by Zemanta

    #BundtaMonth-Banana Zucchini Bundt Cake

    banana-zucchni-bundt-cake-1
    I’ve loved baking Bundt cakes since my kids were little. Baking a Bundt is homey and comforting. There’s something about a round Bundt with the glaze drizzled down the side that is irresistible. Perfect for coffee or tea time with friends or to bring to a party.

    Cleveland Winter 2017

    Hello my friends, I hope you all had a great holiday. I just got back from Ohio and I thought it would be nice to put together a post to s...