Showing posts with label Black pepper. Show all posts

Eggplant Caviar

Continuing with my usual blogging has not been the easiest and smoothest thing on my list of things to do...just like my daily tasks these days, but I'm trying my best to catch up. I know I owe you, my dear friends comments, and replies on your blogs. It's not enough to be replying back on  my comment section, it should be done directly by visiting your blogs.

So, I will try harder...you've been all so sweet and kind with all your comments. I thank you for that!
I seldom make eggplant dishes, although I do love eggplant...as do all my family. So many ways of preparing it, for appetizers, side dishes, and main dishes. It is so versatile and can be prepared so deliciously, just like I made it for a wonderful appetizer.
 Eggplant Caviar is another favorite Sicilian dish which I have been making for a long time. It is quite similar to the famous Caponata, but with less ingredients, and is simplified, using only a few additions. Also, traditionally it is peeled and mashed up into a paste-like concoction which is not so attractive...so I prefer to leave the skins on which as you can see is soft and edible, and also leave most of it in chunks. All you need is some crusty bread, and enjoy!

Eggplant Caviar
recipe by; Elisabeth

1 large eggplant
1/4 cup plus 2 Tbsp. extra virgin olive oil
1 teaspoon red wine vinegar
2 cloves garlic minced fine
1/4 cup small capers
juice of 1 lemon
a handful of fresh chopped Italian parsley
sea salt, or Kosher salt to taste
fresh ground black pepper to taste
crushed red pepper flakes, about 1 teaspoon

Preheat oven to 400 degrees F. Line a baking sheet with dull side of the aluminum foil side up; spray with cooking spray. Cut eggplant in half, lengthwise then cut into thirds, and into segments as shown on photo. You can spray some more spray on the eggplant slices, or drizzle oil. (I sprayed mine with cooking spray)

Bake for about 20 minutes, and check to see if it needs liquid; just don't add any more oil...add about 1/4 to 1/2 cup of plain water to the pan...it will soak into the eggplant. Continue baking for another 25 minutes.(45 minutes total)

When eggplant has a brownish color and soft, carefully take the hot baking pan out and remove the eggplant pieces with a flat spatula onto a cutting board to cool for a few minutes then, cut into bite size pieces.

Have a medium size bowl ready to add the 1/2 cup oil, the chopped garlic, pepper flakes, capers, parsley, the vinegar, and the lemon juice. Add the salt and pepper. Carefully add the eggplant, you can mash some of them up. Stir carefully, and serve it on small plates for first course, or just appetizer. Drizzle extra oil on top, and garnish with extra parsley.  Serves 4
Enhanced by Zemanta

Mango Jam... Sweet Mango Chutney

With all the cloudy days we've been having, I haven't been able to take a descent outdoor/indoor 'natural light' photo in all last week. Don't you agree that this is a nice outdoor 'last minute'...photo of my amazing mango jam, and sweet mango chutney?
If I want to take descent natural light photos, I have to take them at my daughter Lora's house in her lovely kitchen with plenty of natural lights or on the patio. As for my little condo, I have only one spot for photos, but I DO have GREAT lighting in my tiny kitchen, 3 different types which are very helpful for photos!

Enough of the photos...still up to our 'eyeballs' with the mangoes, as you can see in Lora's recent post as well!

Since she came back from Italy, we've been busy making all kinds of things with mangoes...but she's the one that made the majority of the jams.

See what I mean? ...natural lighting is 'everything'...same mango chutney inside, by the glass door...can't even correct the color...and the same one, in the jar.

BTW-this pretty dish is an American antique from the 1930's 'thrift find' for $2.99 that I gave to Lora. I just love the ruffled details and the 18 carat gold...if that's not an amazing treasure, than I don't know what is!

Although Lora brought back with her Italian pectin and has used the metric system measure with her little scale to weigh the fruit, the sugar, and use the pectin accordingly, I am satisfied with our 'good old' American made by KRAFT FOODS, which I'm happy to say, I also used for the Sweet Mango Chutney, which I will give you a full recipe for the 'spicy' version, but you can eliminate the spicy peppers, onion, and garlic for the sweet version that I used, because the little ones love this even as a thick jam!
Just to let you know how much I love this product, I did buy a double VALUE PACK just the other day, to use it for a GIVEAWAY gift for any one, that would be interested of using that great pectin, made in the U.S. by KRAFT FOODS!
It is a double pack, sealed in plastic, with instructions on the box, and inside with a packing slip, as well for other suggestions of uses. It is 100% natural, and no 'animal' products added. If you are interested in receiving this amazing product, which takes the place of AGAR...that is a lot more expensive...than by all means let me know, and mention what you wold like to use it for! I will use the RANDOM.org calculation, to determine the winner, by Friday @ 11:00PM Eastern Standard time.

On another serious note:
Did you know that on Aug. 1, 2012, Foodbuzz will no longer exist?...or is it joining Daily Buzz Food? As a Foodbuzz Publisher, I don't recall getting any notice in my e-mail...but I do know that for several months now, I have not been getting paid for ads into my Pay Pal account. I have close to 3,000 friends on Foodbuzz that I have been so fortunate to befriend in the nearly last two years on Foodbuzz, among them my dear friend Lizzy, Gina, Chef Dennis, and Jo...from day #1 we've been supporting one-another all this time, and I've had the pleasure of meeting them (except Lizzy)...at last year's fantastic Foodbuzz Food Festival, in San Francisco...another question?
What is happening this year with the Food Festival? I've gotten the invite, but have not responded...and now, THIS?...I am totally perplexed!

I've submitted an application to be a content contributor for DailyBuzz Food, and given you my RSS feed. Why don't I see my content yet?


Diane
posted this on Jul 23 12:16
Our system soon will push your RSS content onto appropriate channels automatically, but for the time being we're manually processing posts. They'll show up as soon as we can mark them active. Thanks for your patience!

This was just one of the questions posted re: the new Daily Buzz Food...if anyone knows more info regarding the change on Foodbuzz, please let us hear about it...I'm in the 'dark'...and have no answers other than what you may all know!

For the Mango recipe:
Follow the instructions of the Sure-Jell, or other pectin of your choice, package instructions. You can make any kind of jam easy, as long as you have a sterilized jar, and lid...make sure you refrigerate it, otherwise you would have immerse the jars with the jams in boiling water for 10 minutes, and let it cool completely. before storing it in a cool place in your cupboard. (Personally, I prefer the fridge method)

Mango Chutney
adapted from Cooking Light

2 medium ripe mangoes
peeled and cut into chunks
1/2 sweet onion chopped
1/2 red bell pepper chopped
1 jalapeno pepper diced
1/2 cup golden raisins
3 Tbsp brown sugar
Juice of 1 lime
1 teaspoon white vinegar
1 teaspoon balsamic vinegar
1 teaspoon chopped fresh ginger
1 teaspoon of pectin
(you can use powdered instead)
dash of salt
dash of black pepper
1 garlic clove minced

Combine all ingredients in a medium saucepan Cook over medium heat for 20 to 30 minutes or until thick. Stir occasionally. Remove from heat, Cool completely. If too chunky, mash with potato masher. Spoon carefully into sterilized jars with sterilized lids, and refrigerate. It will keep fresh for up to 3 weeks (if it stays that long)

For the sweet version:
Just omit the hot peppers, including the black pepper, and also the onion and garlic...otherwise, follow as in the original method. (the original version did not use pectin; but it really does make a great difference in texture and flavor, so I added it)

note: either one is great as a condiment on burgers, fish tacos, or as a side sauce, heated up and thinned out a little, or even as a jam on toast!

Enhanced by Zemanta

Oven Roasted Tomato Crostini...and with Rigatoni

When you have a beautiful loaf of homemade bread, and red ripe tomatoes, what could be better, than a "fresh bruschetta topped" or an Oven Roasted (fresh) Tomato Crostini? ...knowing that you have the best extra virgin olive oil, and chopped garlic, and have a batch of fresh basil, you're all set! You don't even need to waste electricity to roast them in your big oven. Your handy toaster oven will do the job for you!
This past week has not been a very successful one, as far as cooking, or baking from my Weight Watchers cookbook...simply, because of last weekend which was the NFL Super Bowl weekend! Missed my WW meeting, didn't keep track of my points, only knowing by now, how much points each item has, that I eat. For instance, one crostini with the roasted tomato topping is 5 points, which is not a lot, but having 2 of these, you're up to 10 points, granted it's very, delicious, and a satisfying snack, but I literally had this for lunch, which was OK. The worst part of the weekend, was, the Super Bowl Sunday, not because I ate too much...it's what I ate. BBQ ribs, twice baked potato, pasta with clams, and for dessert, a slice of Tiramisu! That means, the next following days, I gained back 2 lbs. so now, I'm 3 lbs away from my goal of the 10 lbs loss...sad, but true! Although I hit the gym again...just have to get back to my routine, and stay with the program.
"Kill two birds with one stone" Roasted Tomato Crostini, and Roasted Tomato Rigatoni


Oven Roasted Tomato Crostini
my own recipe

4 to 6 medium ripe tomatoes, or
6 to 8 ripe Roma tomatoes
halved, and cut into quarters
salt and pepper to taste
dried herbs, such as basil, oregano, thyme
2 to 4Tbsp extra virgin olive oil
chopped garlic (optional)


(I didn't add the chopped garlic when roasting tomatoes, I added it to the crostini. You can add it when roasting tomatoes)


Line a small baking pan with aluminum foil, (dull side up)
Place your tomato pieces, and sprinkle with the salt, pepper and spices, and drizzle the extra virgin olive oil on them. Bake in a 375 F. degree oven, for about 45 minutes.

(I used a toaster oven, so simple, and less space used, easier clean-up, and saves electricity)


This is how they will look like after 45 minutes. Almost all of the oil soaked up, just the perfect texture, and incredible sweet flavor. Not using the garlic while you roast them gives them the true sweet flavor. Garlic tends to overpower them while roasting. Use garlic afterwards, if you like, according to taste!


All you do afterwards is, set the tomatoes in a dish with a rim, or in a small bowl, add a little more extra virgin olive oil, adjust seasoning. You can add fresh chopped herbs at this time, and a touch of balsamic vinegar if you like.


I also added some to cooked rigatoni pasta, with some of my leftover chickpeas, and shaved Parmigiana cheese!
It was the best topping for a simple, healthy and delicious pasta, I could think of at the moment:DDD
Points value for the pasta: 7 points


For the Crostini:

Chop  a few cloves of garlic, place them in a small ramekin, add about 1/4 cup extra virgin olive oil to it, and you have a nice garlic spread. Spread some of that lightly on a nice thin slice of crusty bread, spoon some of the roasted tomatoes on, and on a 350 F aluminum foil lined baking sheet, bake for about 10-12 minutes. Roll about 3 fresh basil leaves, and cut them into thin slices (chiffonade) ...scatter them on top, just before serving. You can also add shaved Parmigiana on the crostini, as well.
Do not add the basil when baking the crostini, or it will darken or burn!

Smoky Manhattan-Style Clam Chowder...


Still going strong with Weight Watchers and their amazing recipes from the Weight Watchers New Complete Cookbook. Also received another one from a friend, called Weight Watchers One Pot Cookbook. I can hardly wait to check out some of the delicious recipes. I actually signed up for the meetings...only, because a lot has changed in the program in the last few years, and it's a different point system now. As far as the weight loss, I'm still at 7 lbs of my weight loss, but I do splurge at least once a week, where I don't even try to count the points because it would totally fall off the points track. As you can see, that really does make a difference when you are trying to lose weight!
If you like clams, then you will most likely love Manhattan Clam Chowder. So light, rich, yet oh, so satisfying, and it's actually a Weight Watchers recipe, that I barely altered. The only difference was, that I added a dry chipotle pepper, that I soaked in boiling water, to give it the smoky taste, instead of using fire roasted diced tomatoes. Chipotle has more of a smoky flavor than fired roasted tomatoes would. I must confess, that I'm totally enjoying this new program, and are looking forward to each day with so much enthusiasm to plan a different meal every day, knowing that it's so flavorful, and healthy with lots of fresh vegetables that can be made so many ways. Just look at the robust color, texture and flavor of this gorgeous Manhattan Clam Chowder. I'm so happy to share the recipe with you.

Linking to: Cookbook Sundays @couscous-consciousness


Smoky Manhattan-Style Clam Chowder
adapted from: Weight Watchers Complete Cookbook

2 teaspoons olive oil
(I used 1 Tbsp.)
1 onion chopped
1 large garlic clove minced
1 (1/2 pound) all-purpose potato, peeled, and  cut into 1/2 inch dice (I used 2 large potatoes)
1 small zucchini diced (I omitted it)
1 carrot diced (I added 3)
1 (14 1/2 ounce) can fire-roasted diced tomatoes)
(I added 2 cans of diced regular tomatoes)
1 bay leaf
(1 chipotle pepper)
2 (8 ounce bottles)clam juice
( I used one bottle)
1/2 cup of water
(I used 2 cups of water with 1 Tbsp vegetable base, boiled in the microwave)
1/2 teaspoon dried oregano (I used 1 teaspoon)
1/8 teaspoon black pepper (I used 1/2 teaspoon)
1 (6 ounce can chopped clams (I used 2 cans of chopped clams)

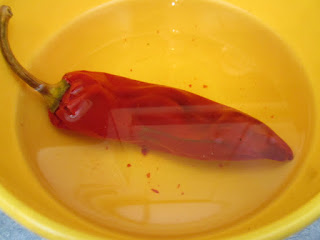
Soak the dried chipotle pepper, after you have boiled it. Let it soak until soft. Cut in half, and clean the seeds out, and cut pepper into small pieces to add to the chowder.
It's optional, you don't have to use it, if you are using fire roasted diced tomatoes.


Heat the oil in a large pot, over medium heat. Add onion and garlic; cook stirring until onion is softened, about 5 minutes. Add celery, carrots, and zucchini (if you're using it) and saute for another 5 minutes. Add the oregano, pepper, and stir through.


Add the tomatoes with their juice, the clam juice, the water, the bay leaf, the chipotle pepper, diced, and bring to a boil. Reduce heat, and simmer partially cover, for about 25 minutes.


Add the clams with their juice, and cook, just until heated through, about 2 minutes. Do not boil, or the clams will toughen.
8 servings
PointsPlus value:4


Enhanced by Zemanta

Black Beans and Rice...and Cuban Picadillo

Being on WeightWatchers is so much fun, and versatile with all the interesting and delicious foods you can prepare, right out of the cookbook, or get recipes online. Not only that, but you can create your own menus, as long as they are not too fatty, or too much carbs. I love beans, any kind...especially black beans. Here is South Florida we have a huge population of Cuban/Americans that have brought their culture, and cuisine with them to carry on and you can find a Cuban restaurant, or market all around town, here in West Palm Beach, but mostly in Miami!
It's so easy to make Black Beans and Rice, very satisfying with the addition of the Picadillo, which is stirred into the ready made Black Beans and Rice, and if you want to keep it vegetarian...just omit the Picadillo. I will include the basic ingredients for the Picadillo, which is a Cuban hearty ground beef dish, that can be also served with rice, just by itself...combining it with the black beans is really, so hearty and delicious with a simple salad on the side!

Black Beans and Rice
by; Weight Watchers New Complete Cookbook

4 teaspoons olive oil
1 green bell pepper seeded and chopped
1 onion, finely chopped
5-6 garlic, minced
1 (16-ounce) can black beans, rinsed
and drained
1 (14 1/2-ounce) can diced tomatoes
1 cup vegetable stock, or broth
4 teaspoons dry sherry
1 teaspoon finely chopped fresh thyme
or 1/2 teaspoon dried
1 bay leaf
1/4 teaspoon dried oregano
1/4 teaspoon hot red pepper sauce
1/2 cup water
1 teaspoon finely chopped fresh cilantro
Salt and ground black pepper to taste
4 cups cooked white rice

In a medium saucepan, heat the oil. Saute the bell pepper, onion, and garlic, until very soft, about 15 minutes. Stir in the beans, tomatoes, stock, sherry, thyme, bay leaf, oregano, pepper sauce, and water; bring to a boil. Reduce the heat and simmer, stirring occasionally, until the sauce thickens and vegetables are tender, about 45 minutes. If the mixture becomes too thick, add hot water to thin to desired consistency. Stir in the cilantro, and season with the salt and pepper; discard the bay leaf. Serve over the rice. Makes 4 servings.
Points Value: 9

Note: with the addition of the picadillo, another 3, or 4 points are added. What I did, was have my usual coffee at breakfast, and ate an entire grapefruit (0 points)...NO OATMEAL...I saved my 4 points to have the Picadillo

For the Picadillo:
Saute 1 medium onion, 4 cloves chopped garlic, in small amt. of olive oil. Add 3/4 cup tomato sauce, 3/4 cup beef broth, 1 teaspoon oregano, 1 teaspoon cumin, few dashes of red hot sauce, and simmer for about 30 minutes. Stir in 8 to 10 pimento stuffed green olive (you can cut them in half) and chopped cilantro. Simmer for an additional 15 minutes. You can serve them over rice, or add, and stir in with the Black Beans and Rice.

Linking to: Cookbook Sundays @ Couscous & Consciousness

Lemon and Cinnamon Scented Flan...and Citrus Love Month

Since I'm into my second week of the WeightWatchers diet program, you would think that I gave up after this super delicious flan...but I did not give up, I am continuing with more enthusiasm, as ever! I lost an additional pound...4 lbs, loss, as of this morning. Yesterday, I went to the gym to work out for 50 minutes, and I mean...really work out, cardio, 30 minutes, and weights, another 20 minutes. I wanted to join in on the Citrus Love Month with something used with citrus. I can't be spending too much time with desserts, knowing that I can only have one bite, or maybe 1 cookie for a treat, so I'm sharing my flan to link up! Also, I will show off my very well planned out dinner...but only, when I have dinner at my daughter Lora's is when I get enthusiastic about it...otherwise, it's dinner for one, and it better be from the WeightWatchers, or similar type of dish!

Lemon and Cinnamon Scented Flan
inspired by Food & Wine

2 1/2 cups whole milk
Peel of half lemon
1 medium cinnamon stick, broken
1 cup sugar
1/4 cup water
5 large eggs


  1. Preheat the oven to 300°. Set six 5- to 6-ounce ramekins or custard cups in a medium baking pan.
  2. In a medium saucepan, combine the milk, lemon peel and cinnamon stick and bring to a boil. Remove from the heat and let stand for 15 minutes; discard the lemon peel and cinnamon stick pieces.
  3. Meanwhile, in a small saucepan, cook 1/2 cup of the sugar with the water over moderately high heat, stirring just until the sugar dissolves. Lower the heat to moderate and let the sugar syrup simmer, without stirring, until a deep amber caramel forms, about 15 minutes. Immediately pour the caramel into the ramekins, tilting them as necessary to evenly coat the bottoms.
  4. In a large bowl, whisk the eggs with the remaining 1/2 cup of sugar. Slowly whisk in the warm milk, then strain through a fine sieve into a large measuring cup or a bowl. Pour the custard into the ramekins. Pour enough hot water into the baking pan to reach halfway up the sides of the ramekins. Bake for about 40 minutes, until a knife inserted into a flan comes out clean. Transfer the ramekins to a rack and let the flans cool to room temperature. Refrigerate the flans for at least 4 hours or overnight.
  5. To serve, run a thin knife around each flan. Top each flan with an inverted dessert plate and unmold, letting the caramel run over the flans. Serve at once.
Make Ahead: The flans can be refrigerated for up to 2 days in the ramekins.

Linking to: Citruslove @ Mis Pensamientos
                   Thursday Favorite Things @ Katherines Corner

A New Year...a New You!

Yes, this is a New Year...and a New You...if you let it happen! I've been putting it off for the last 7 years and now, I've made the crucial decision! I want to be at my best, and I want to look amazing! ...that means, I have to lose 35 lbs...actually, 45 lbs! According to my daughter Lora, "how about 50 lbs?"...well, that means if I do lose 50lbs it would be my weight since high school! How many of you can really say you are at the same weight since high school?...I bet, not too many! As the years pass, the weight keeps creeping up...sad, but true!

We toasted to the New Year with a glass of nice pink Prosseco...


Had my bowl of  Hungarian/Italian style lentils made in the slow cooker...also, Lora's fabulous lasagne with the pumpkin, and the bechamel sauce...


Tonight...a large glass of Chardonnay (6 ozs.=2points) in the Weight Watchers system, and now...the Diet begins!


I purchased this amazing Weight Watchers New Complete Cookbook...a 2006 edition, with fabulous recipes that are totally appealing, and delicious, and are perfect for today's lifestyle, if you are contiguously, thinking of healthier eating and making healthier choices...this is the best way to go about it! I actually bought this book at a favorite thrift store of ours, for $1.99 knowing that it retails for at least $32.00. Beautiful hard covered notebook, with the best, of the best light and easy recipes.

I joined Weight Watchers online, just since yesterday, and will probably have to sign up for their weekly meetings locally, in order to monitor, and maintain my weight loss! I already know my point system, and know how to figure out the points in order to lose weight, and I will be posting recipes from this book, for the next 90 days, and keep you posted of my weight loss results!
I made my own recipe, from 2 pieces of boneless chicken thighs, that I had in the freezer, to accompany with a nice dish of salad. The actual dish was 6 points, and I allowed myself 22 WW points in order to lose 35 lbs within the next 90 days!
Here's the recipe, I adapted my recipe from!


Southern Oven "Fried" Chicken

1/4 cup fat free buttermilk
1/4 cup cornflakes crushed
3 Tbsp all-purp flour
1/4 teaspoon salt
1/4 teaspoon freshly ground pepper
2 lbs. chicken parts, skinned
4 teaspoons canola oil

Preheat oven to 400 degrees F. Spray a large baking sheet with nonstick cooking spray.
Pour the buttermilk into a large shallow bowl. On a sheet of wax paper, combine the cornflake crumbs, flour, salt, and pepper. Dip the chicken in buttermilk, then dredge in the cornflake mixture, coating completely. Place the chicken on the baking sheet; drizzle with the oil. Bake 30 minutes, then turn the chicken over. Bake until cooked through, 16-20 minutes longer.
Points value: 5


My version of my Boneless Baked Chicken Thighs...based on the WW recipe, using 2 boneless skinless chicken thighs, rubbed with Cajun Blackened spice, and 1 teaspoon each of extra virgin olive oil for the chicken thighs drizzled on, and dredge in 1/4 cup of Matzo Meal, also adding a dash of salt, and pepper. Bake in a 350 degree F. oven till crispy, and light brown for about 25-30 min. turning once. Serve it over a garden salad, topped with 1 teaspoon extra virgin olive oil, and white wine vinegar. Slicing the chicken, and serving it on top of the salad. Total points- 6


For my first day, I consumed 24 of my 22 allowed points, from breakfast to lunch, and dinner...not too bad for the first day! For breakfast, I had home made oatmeal with raisins, sweetened with Blue Agave organic nectar- 4 points. For lunch I had lentil soup from my huge pot of lentils, added more vegetable broth to make a nice soup- 4 points. For snack crackers, and peanut butter-3 points. Also, cashew peanuts for more snacks, another 2 points. I think I actually stayed within my point system, just have to keep a closer eye on it, and start to exercise, as well! Will keep you more informed of my progress!


Enhanced by Zemanta

It's The Season...for Dill Pickles?

It's The Season To Be Jolly...for Dill Pickles?...yes, and what a great gift for someone special who loves dill pickles, and better yet, homemade! You really can make your own fresh dill pickles, you don't need a whole case of canning jars, just two large 32 ounces (guess you would have to buy the whole case)...just need two large jars, 3 days to let it marinade in the homemade brine, and you can open it, and enjoy a crispy dill pickle with your favorite sandwich or burgers...yumm!
I must confess, I love pickles...any kind, dill, sweet, hot, half sour, but dill pickles, are my all-time favorite. I could munch on it, just by itself. Why would you want to pay $2.00 for a large dill pickle from the deli, or buy a jar of the refrigerated Kosher Dill's for up to $5.00 for a large jar, or even more! Those pickles are very good, and crispy crunchy, but sometimes they are too sour, too garlicky, or not sour enough. When you make your own brine for your pickles, you know that they are pure...no preservatives, no funny "off" taste, just pure fresh, crunchy dill pickles.

I checked so many different recipes, googled quite a few, but nothing seemed to be what I really wanted. The most important thing is the BRINE, and to make sure the pickles are the freshest, Kirby pickles you can find. The have to be really a nice healthy green color, no blemishes, and be sure they are firm! We find these at this time of the year in South Florida, the best to find is at a local produce market, or of course Whole Foods store.

Fresh Dill Pickles Home Made
my own recipe

2 cups white distilled vinegar
6 cups water
2 Tbsp. Kosher salt
4 cloves peeled fresh garlic
1 Tbsp. whole black pepper corns

2 small bunches of fresh dill (cut off bottoms)


6 to 8 Kirby pickles


In a large stainless steel pot, add the vinegar, the water,
salt, pepper corns, and bay leaves. Do not add the garlic or dill at this time, or the dill will get too wilted, and the garlic will get blue spots from the brine. Bring water to a boil, and boil on med. low for about 15 minutes. Shut the heat off, and let it steep for another 15 minutes OFF  the heat. Wash pickles real well in the sink, or in a bowl, and take off the end stem, if any. Make sure your jars and lids are sterilized already. You can just run it through the rinse sickle of your dishwasher, or boil them in a large pot of water for about 10 minutes, and let it cool down.

Cut the pickles in half, or in spears, and carefully pack  them in the jar, with the clean dill sprigs, and place the 2 garlic clove each, for the two jars, on the bottom. You can now pour the pickling brine almost to the top, making sure you spoon out the pepper corns, and the bay leaves to divide among the two jars. Close the lid tightly, and when it gets cool enough, place them in your refrigerator, for at least 2 days...3 or more days, is even better, up to 1 week to marinade. (I only kept it for 3 days before I opened the jars)

Make sure you check the jars at least twice a day to turn it upside-down, to let the marinade flow through all over!
Keeps up to 4 weeks in the fridge...if it should lasts that long! Very, very good, not too sour, not to garlicky, just right, crispy, crunchy and totally the best pickles, if you love Dill pickles!


Since I'm a "thrifter" I used last year's Christmas wrap to cut about two 4x6 inches of wrapping paper, overlapped the two, placed it on the jar top, placed a rubber band around it, and with plain scissors, cut around it in a zig-zag design. I also purchased a roll of gorgeous bow from Michael's, which is such an amazing store for crafts, and things, for $2.99 on sale, at a 50% discount. Tied a nice bow around it, and my special gift is ready for a special pickle lover recipient! The other jar, I already opened, to keep for myself, and to share with family! (also for my photo shots)

You can use smaller jars, for the pickles, (probably about 4) Recalling one recipe, on the Internet, I really cringed at the thought of up to 10 lbs of Kirby cucumbers, putting them in the bathtub...yuk! Doesn't matter how clean is your bath tub, to me, just is not something I would do. In a clean kitchen sink, with less...let's say about half the amount, maybe up to 5lbs, is more like it! ...but then, you need a lot of empty sterilized jars, and a "cold basement"...which we do not have here, in South Florida, so small amount is the best, and to refrigerate it!

So that's it for now...just a little suggestion for 1 of many, many homemade gifts you can give with "love" and from the "heart"
Thank you for all you kind and loving comments, I appreciate all of you, and just don't go overboard trying to please someone with "unrealistic" spending. You can make a person so happy, just by making something by hand, like crafting, baking a special treat, give a nice picture frame with a favorite photo of yourself or them; any of these gifts cost so little, yet means so much to the recipient you are giving it to!
Hugs, to all!
Enhanced by Zemanta

Israeli Couscous Salad

Even though you are not a vegetarian, and for sure not a vegan, have you wondered lately that what you are consciously cooking might be...could be vegetarian, or vegan?...well it happens to me a lot, without even thinking or planning it, do to the fact that I always have fresh veggies on hand and like to use them up with whatever I happen to think of making. Same goes for the dry beans, and for the canned beans, rice, lentils, and couscous that I like to prepare to have around as a snack, or a side dish!

Israeli couscous is made of small, round pearls of pasta. Similar to regular couscous, it resembles a grain but is made of wheat flour. Because of its large surface area, it holds sauce well and is very versatile; Israeli Couscous can go in soup, be baked, served as a pie, or made into a risotto. It is widely used in the Middle East, and in Portugal, Spain, and Italy. So delicious with cooked vegetables or used as a side dish with stews. It has a nutty flavor, and it does not get a sticky texture when it is cooked properly. I love to eat this as a cold salad, but you can eat it warm as well!

Roasted Peppers, the Easy Way!

If I show you step-by-step how easy is to make the best roasted peppers in your own oven, I guarantee that you won't buy the jarred kind, which does not come remotely close to the homemade kind. I'm not going to convince you that it's cheap to buy red, yellow, or orange bell peppers, but if you can find a local produce market, chances are they always have bulk buys of whatever kind of vegetables that they have an abundance of, or they are getting a little too ripe, so they will put it on sale. Our local Cuban produce market has the freshest and such a variety of every kind of produce you can find.

I'm linking this to Full Plate 5-26-11 @ Miz Helen's Country Cottage

 also...HURRY,
You don't want to miss out on this giveaway on Lora's blog @ Cake Duchess Honey Girl Organic Skincare products, from Hawaii. Be sure to check it out!

You can visit their website to learn more about their amazing products! There is even a video here on this page that shows how they get the honey from their own bees in Hawaii.

honey%20girl%20organics_2007_ed


I was so thrilled when my daughter gave me 2 large bags of peppers, and zucchini, that she bought for $1.00 each bag from the produce market. That's what I call a real thrift buy and I am truly grateful for it.
If you love peppers as much as I do, follow me through all the steps and I will show you how easy it is to make roasted peppers.

Spicy Sautéed Vegetables...and an Amazing Weekend!

It all started Saturday, when my daughter gave me a huge bag of mixed vegetables from our favorite produce market...one of those fabulous deals that her m-in-law discovered, while she was here from Italy. $1.00 for a hug bag of vegetables, all mixed...zucchini, peppers, onions, some iceberg lettuce...a huge bag, no joking. There was absolutely nothing wrong with the veggies, except, they had a few bruises here, and there, and maybe starting to get a bit over ripe on some of the peppers that made the long green peppers turn orange. So, what to do with them?...what is not to do with them, but cook them up, and the best way, is to saute them with the onion, garlic, in some nice fruity extra virgin olive oil, and some great spices...don't forget the red pepper flakes, and freshly ground black pepper, and some nice sea salt, and you got yourself, a FEAST!...well, I prepped up all these great veggies, and took them over to a friends house with all the yummy things that I brought from Lora's to share with her, and her brother who is visiting their mom, from out of state.

I'm linking this to Tuesday Night Supper Club # 40... Christy @Fudge Ripple
Also made some pork ribs, marinated in Worcestershire sauce, paprika, cumin, black pepper, and garlic powder, and baked to perfection, in a 375 degree F. oven for about 1 1/2 hrs. till tender. (These were also the ribs my daughter gave me that were in her freezer from my son, who is the on-again, off-again vegetarian.) Lora did not want to deal with these because she said it's been in the freezer too long. Yea, right!!! ...since December?...so that makes it 5 months?...still like fresh, no freezer burns, so why not cook them up. They were so tender, fall off the bone, delicious!...So that's what you do for your friends...you share!...and you cook for them.
These sweet potatoes are my friend Dianne's creation. She cuts them in half, drizzles a little olive oil on them and sprinkles them with cinnamon, and adds bits of garlic...encloses the potatoes in aluminum foil and bakes it in the toaster oven on 350 degrees, F. till tender, which is at least 1 hr. or longer.
Saffron Risotto with Shrimp, Zucchini, and Peas....recipe, on this page

This is Lora's creation, and she makes this just about once a week. She does not post it on her blog because her blog is mostly about cakes, and desserts. She does not like leftovers, as a rule, unless it's spaghetti, and meatballs, lasagne, or pizza leftovers and I get her leftovers to share with friends...and truly this is gourmet, and yummy, even reheated. Just add a few drops of water, and heat on top of the stove. Now, on to the next fabulous things!

Cleveland Winter 2017

Hello my friends, I hope you all had a great holiday. I just got back from Ohio and I thought it would be nice to put together a post to s...