Showing posts with label Butter. Show all posts

Lottie Greer's Country Biscuits


Have you ever came across a recipe to learn that you don't really agree with the ingredients are off, and you either fix it, or just ignore it and move on to something else. Homemade Southern buttermilk biscuits are always so comforting to have served with chicken, breakfast, or just have it for a snack with fresh sweet butter slathered on it...yumm!

I have so many great cookbooks, but I always end up googleing for recipes on the Internet to get quick results. I purchased this lovely cookbook called Jan Karon's Mitford Cookbook and Kitchen Reader at World Thrift store for a mere $2.95...2004 edition, which is still popular and has the author's Southern family recipes which were no doubt 'hand-me-downs'...probably verbal and not all of them tried and tested before being published!

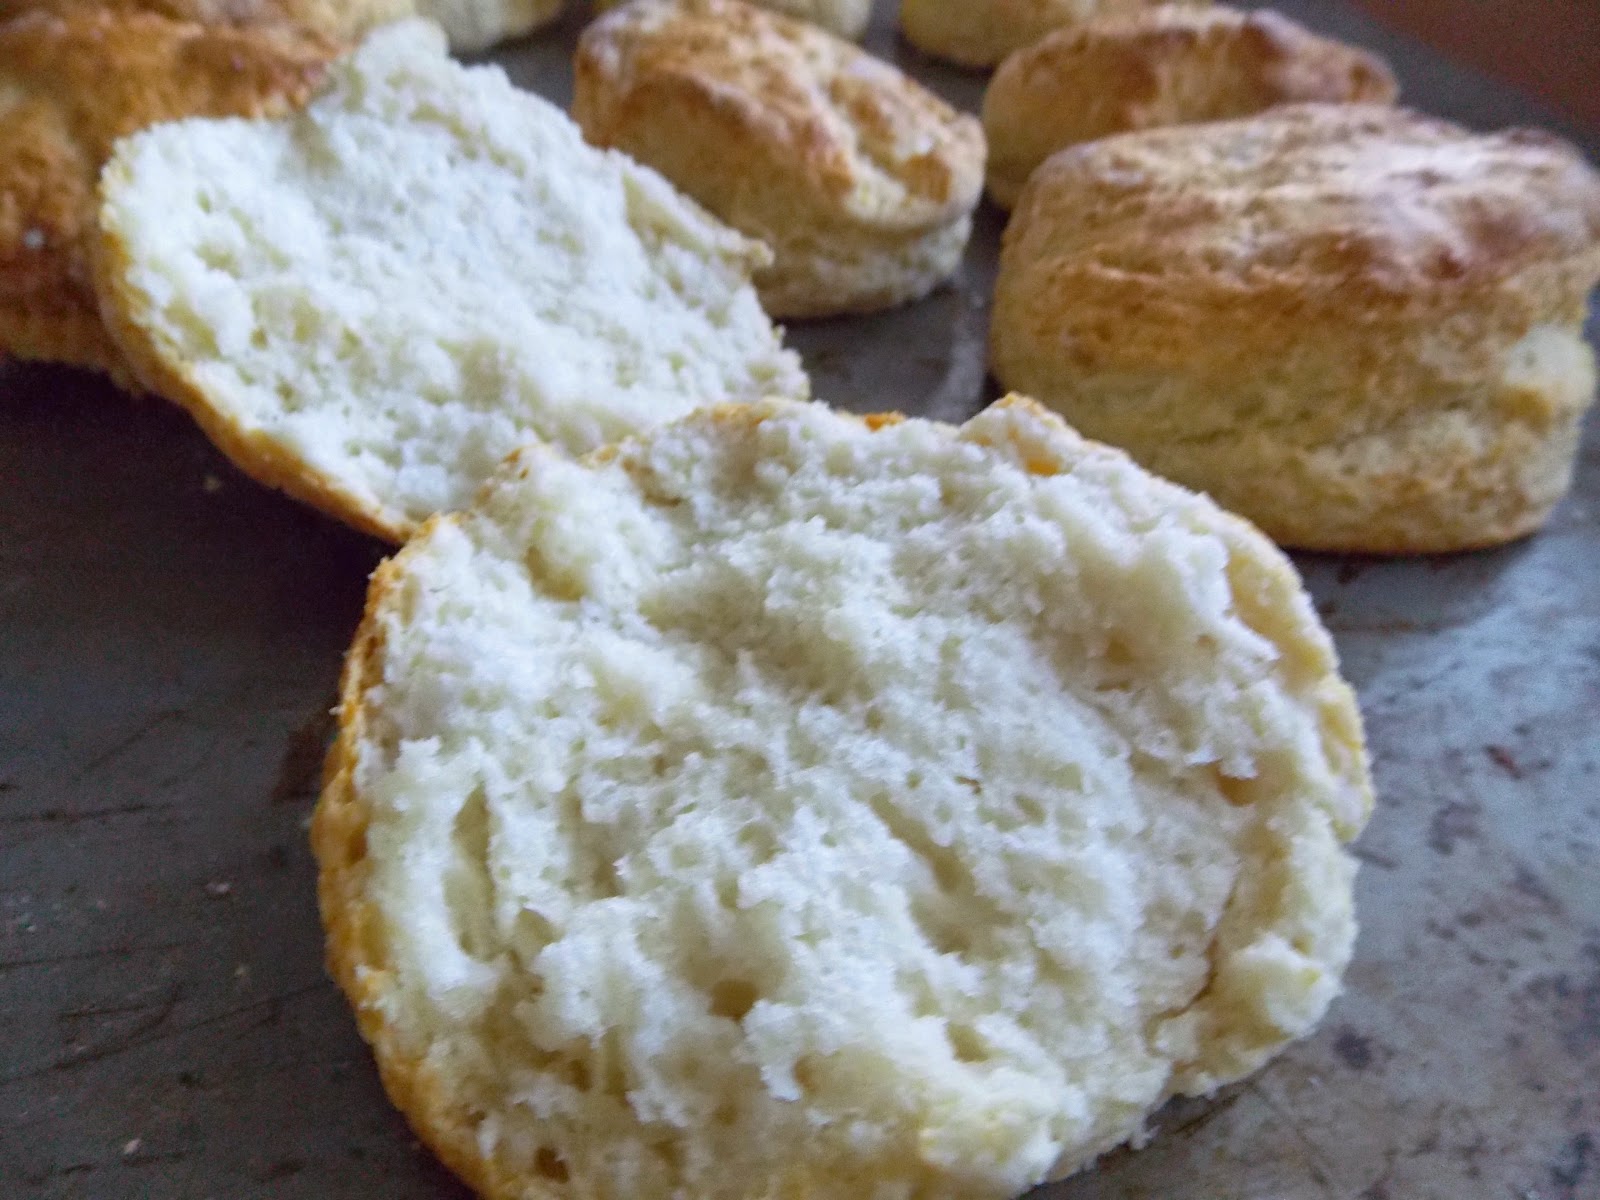
I was so thrilled that the biscuits turned out so nice, crunchy and perfectly baked out the outside, and super flaky, and delicious on the inside. Also, I want to share a little tip with you regarding the buttermilk and the self-rising flour. I must be the only one that does not particularly favor self-rising flour...only because, it tends to be too salty, and has a distinctive flavor on its own. (just my opinion)
Buttermilk is being wasted if only used in just a certain recipe; so, it's wise to use an easy substitute!
These awesome biscuits freeze well, just pop them into a plastic baggie, and when ready to use one or all, they heat up in the oven so nice, just as fresh as you made them.

You can actually see the flakiness of the biscuit, as I split it in half. Seriously, I will continue to make my own buttermilk, and save money, but not spare the flavor. As for self-rising flour, (maybe the American brand)...just not a fan of it and will stick with the all-purpose flour!
You can purchase Jan Karon's Mitford Cookbook and Kitchen Reader on Amazon


Lottie Greer's Country Biscuits

Chef.Foodie's picture


Ingredients
Shortening8 Tablespoon, chilled (More For Greasing The Baking Sheets)
I used 4 Tbsp. shortening and 4 Tbsp. unsalted butter...also use parchment paper to cover baking sheet (no greasing baking sheet; removed parchment paper when done, for photo shots)
Self rising flour3 1⁄4 Cup (52 tbs) (White Lily, More For Rolling Out The Dough)
made my own 'self-rising' flour from all-purpose flour, using the 'alternating method'
1 cup all-purpose flour
1 1/2 teaspoon baking powder
1/4 teaspoon salt
For 1 cup of all-purpose flour=1 cup of self rising flour
Salt1⁄2 Teaspoon...no additional salt needed
Granulated sugar2 Tablespoon...way too much sugar...I did use 2 teaspoons organic sugar
Baking soda1⁄2 Teaspoon...1 teaspoon
Buttermilk2 Cup (32 tbs), chilled...I used the 'alternating method' ...ONLY 1 CUP OF BUTTERMILK IS NEEDED1
For 1 cup milk...whole milk, 2 % or heavy cream
1 scant cup of milk
1 Tbsp. white vinegar
Combine milk w/ vinegar, let stand 10 min. it will slightly thicken and bubble; use in place of buttermilk
Directions
Preheat the oven to 475°F...450 degrees F. is needed
Grease a couple of baking sheets and set aside....no greasing needed when parchment paper is used.
Combine the flour, salt, sugar, and baking soda in a large bowl.
Cut in the shortening with a pastry blender until the shortening is the size of small peas.
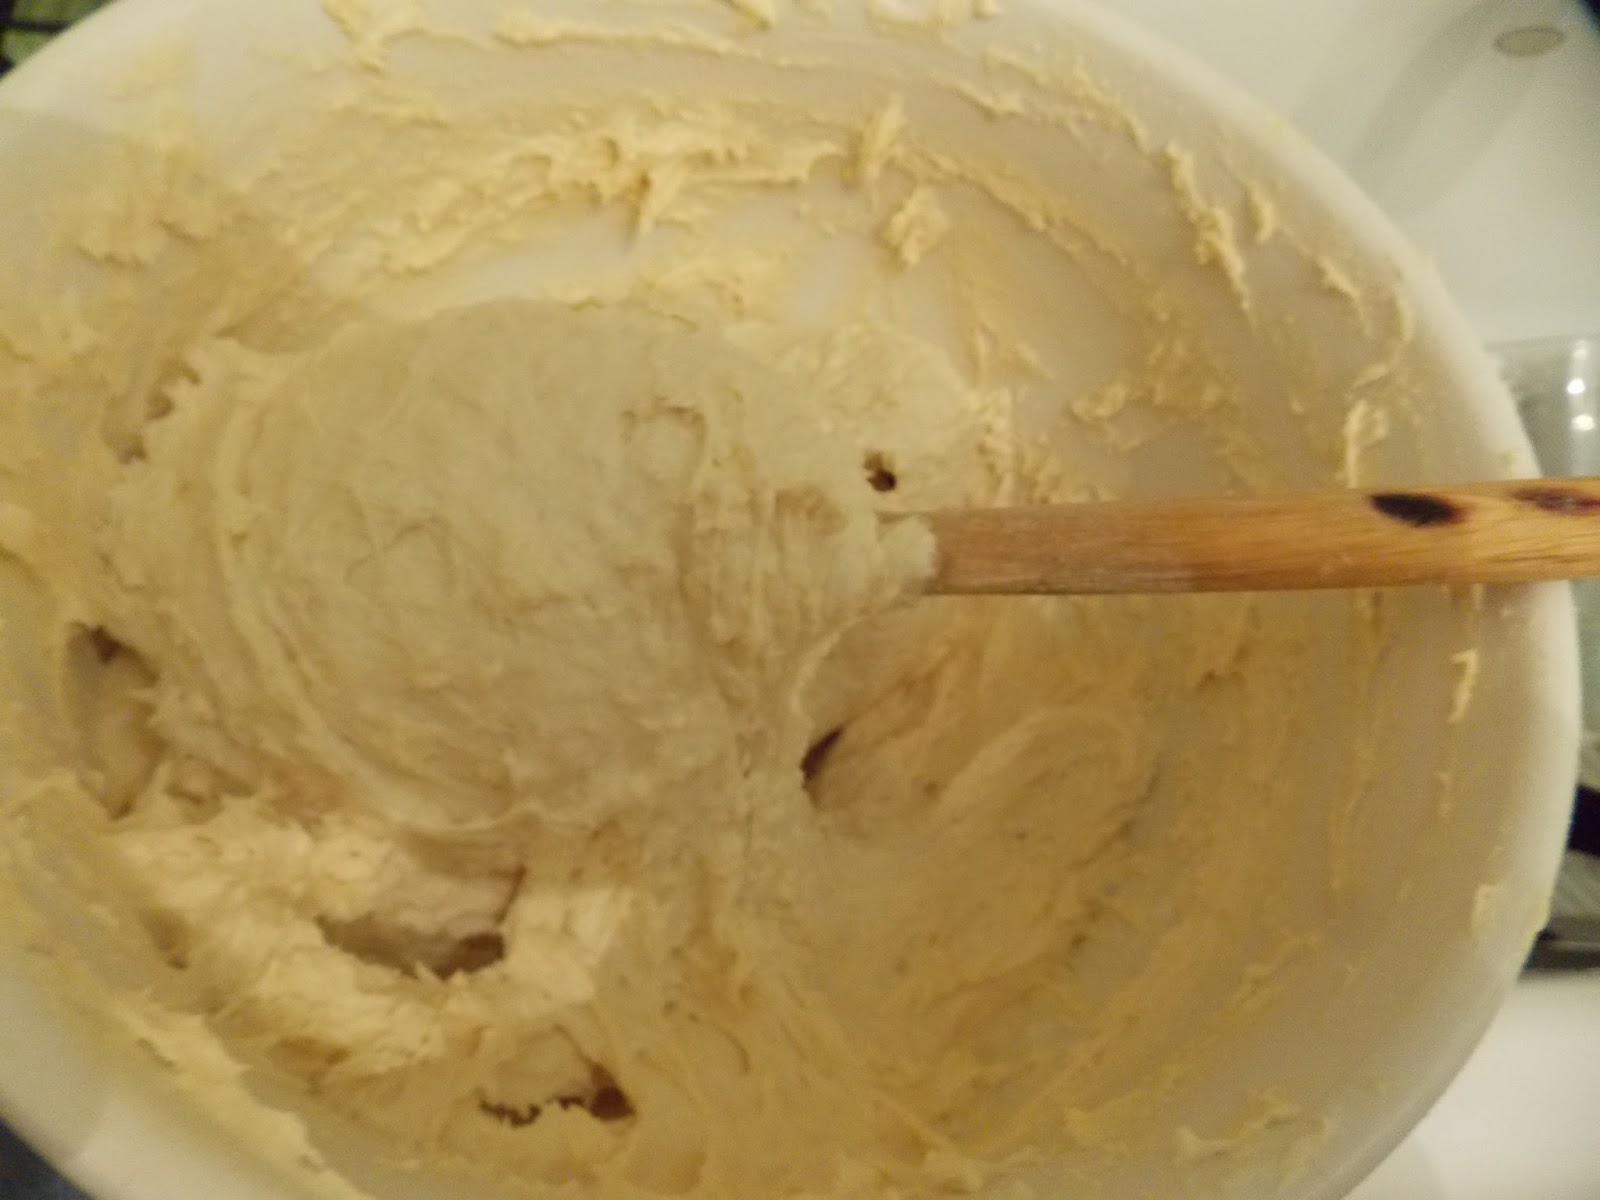
Add the buttermilk and stir until just mixed.
The dough should be very wet....THE DOUGH WILL BE JUST RIGHT IF ONLY 1 CUP OF MILK IS USED! DO NOT USE 2 CUPS...
Place some flour in a shallow bowl.
Spoon a heaping tablespoon of wet dough into the flour.
Flour your fingers and sprinkle flour on the top of the wet dough.
Roll the dough gently in flour just to coat the outside.
 Try not to mix too much extra flour into the dough.

Add a handful of flour on the board or counter, and gently gather your dough patting it lightly into a disk...no rolling is needed at all!
 Shape into biscuits, using floured hands, working the dough as little as possible.Shape into biscuits using 3 inch biscuit cutter, or smaller....3 in. cutter will make 9 biscuits, and smaller will make 12. Use scraps up, gently shaping and cutting it.
Arrange the biscuits, touching each other, on the baking sheets.
Arrange biscuits...DO NOT touch together!
You can brush extra milk on the biscuits (optional) before baking.
 Bake for 15 to 20 minutes, or until just brown on top.


Pumpkin Bread

I'm so excited about my Pumpkin Bread, which I rarely make...my daughter is the Pumpkin Bread 'queen' and also makes the best Pumpkin Pie for Thanksgiving, with her amazing homemade crust.
When I was  a 'kid' I hated pumpkins, and squash...how absurd was that! Even now, it's still not my favorites; but I've learned to adapt a liking to all of these wonderful fall treasures!
I normally would not have even made it, but my daughter and family were away for a long weekend last week, kids were out of school the following Monday. I was happy to  'dog sit' for my favorite little guys that I have spoiled since the last few years and they were so excited to have me around to give them treats and take them for walks. In the meantime, I was treated royally by my son and family to invite me over for dinner each evening, so I didn't even have to cook, and just bring dessert which happens to be my 8yr. old granddaughter's favorite...Pumpkin Bread!...my, how times have changed...tastes have changed since I was their age. Kids are so much more adventurous with their foods and are offered a lot more healthier choices!
Instead of googling for a Pumpkin Bread recipe, I decided to look for one in Martha Stewart's cookbook, which was of course a 'thrift find'...a 1995 edition that has so many great recipes...even if the book does not have any photos...you gotta love anything from Martha Stewart! Instead of making one loaf of bread spending precious time to make it, why not make 2 or 3 loaves? I can't even find this recipe online so I will have to type it out, and the modifications I had to make, that even gave it a nicer and much more flavorful, moist bread!
I was totally looking forward to making the Pumpkin Bread, and have an extra loaf to keep. I love these cute little loaf pans, and they're so perfect and handy being attached instead of separated.

Pumpkin Bread
source; Martha Stewart, from the Martha Stewart
cookbook...1995 edition

my modifications in blue

12 Tbsp. (1 1/2 sticks) unsalted butter, at room temperature
I used 1 stick of butter
3 Tbsp. molasses
I omitted the molasses
2 cups sugar
I used 1 1/2 cups sugar
2/3 cup orange juice or water
I used 1 cup fresh orange juice from 2 oranges
also grated the zest from one of the oranges
2 cups pumpkin or squash puree
I used 1 can (15 oz. 425g.) Libby's pumpkin puree
3 1/3 cups flour
I use 3 cups unbleached all-purpose flour
1/2 teaspoon baking powder
I used 1 teaspoon baking powder
2 teaspoons baking soda
1 teaspoon salt
I used 1/2 teaspoon salt
1 teaspoon ground cinnamon
1 teaspoon ground cloves
I used 1 teaspoon pumpkin spice
1 teaspoon vanilla extract
1 cup raisins or currants
I omitted raisins and currants

Preheat the oven to 350 degrees F. Butter 3- 9x5x3-inch loaf pans.
I sprayed cooking spray (for baking that has flour mixed in) Used 1 used 4 attached mini loaf pans, and 1- 9x5x3 loaf pan.
With an electric mixer, cream the butter, molasses,and sugar until light and fluffy.
I used a metal whisk to cream the butter,eggs and sugar until light and fluffy
Beat in the eggs one at a time.
I added the 4 eggs to the butter, and sugar, the vanilla extract, and whisked it until a light lemony color.
Add orange juice and pumpkin puree and mix well.
Sift the dry ingredients together into a large bowl.
No need to sift...just mix them all together without sifting. 
Add the pumpkin mixture to the dry ingredients with a wooden spoon, stirring well incorporated.
Add the raisins at this time. I omitted the raisins.
Spoon into prepared pans. Bake for 1 hr. or until toothpick inserted comes  out clean. Cool in pans for 10 minutes, then turn out unto racks to cool.
I baked the mini pans for 35 minutes at 350 degrees F. along with the larger loaf pans...took the mini pans out of the oven, leaving the 9x5 loaf pan in the oven...lowered temperature to 325 degrees F. and bake for an additional 20 minutes...tested with toothpick and it was done in 55 minutes.

For Orange Glaze; 2 cups of powdered (icing) sugar, and 1 Tbsp. orange juice...mix it well together, until smooth (you should have a thick paste) ...drizzle on the bread with a soup spoon, or omit the drizzle.

Note: This was the best Pumpkin Bread that turned out so moist, the orange zest and the extra orange juice gave it such a pretty color, and flavor with the vanilla extract addition. The glaze is optional, but you don't have to use it on all the Pumpkin Breads...leave some without it if you prefer!


Hershey's "Perfectly Chocolate"...Chocolate Cake...

Just to prove my point...cloudy, dreary, and rain, rain, rain, every single day, here in South Florida until Oct. 17, the official date for the end of our rainy season. Don't get me wrong that we don't get any sunshine...yes we do, even with all the rain. Clouds form on one side of the sky and it's clear and blue on the other side. The weirdest part is; when it rains on one side....for instance; down the road it is sunny...less than one mile away! I was so determined to take my photo of this classic Hershey's Chocolate Cake...by the time I finished, the clouds were rolling in...so there you have it...my worst best shot!
One hour later...delivered the cake to its destination...(did not realize the small smear taking it out of the carton)...doing yet, another 'photo prop' outside my daughter's back yard patio....little better natural lighting, then, a few minutes later...had to literally run inside with the cake because it started to rain. So there you have it; 'the rain saga'...once more!

While I was visiting and commenting on blogs, I stumbled on this wonderful 'classic' Hershey's "Perfectly Chocolate" Chocolate Cake from a dear new blogger friend, Dottie, @Family Plus Food Equals Love...what a sweet name for a food blog. She is so gracious, and talented; you can also find the Hershey's Milk Chocolate Chip recipe there, as well!

I haven't made this classic cake in a while, and I must say I had to adapt a few things, first...by adjusting the sugar amount and adding a small amount of 'real' butter to the batter, as well.

My modifications are in red

Hershey's "Perfectly Chocolate" Chocolate Cake

Ingredients
  • 2 cups sugar 1 cup of sugar
  • 1-3/4 cups all-purpose flour 2 cups flour
  • 3/4 cup HERSHEY'S Cocoa 1 cup
  • 1-1/2 teaspoons baking powder 2 teaspoons
  • 1-1/2 teaspoons baking soda 1 teaspoon
  • 1 teaspoon salt 1/2 teaspoon salt
  • 2 eggs 3 eggs
  • 1 cup milk 1/2 cup milk boiled
  • 1/2 cup Hershey's semisweet chocolate chips
  • 1/2 cup vegetable oil 1/4 cup veg. oil + 1/4 cup (1/2 stick) unsalted butter softened
  • 2 teaspoons vanilla extract
  • 1 cup boiling water
                                                                                         
    1. Heat oven to 350°F. Grease and flour two 9-inch round baking pans.
    2. Stir together sugar, flour, cocoa, baking powder, baking soda and salt in large bowl. Add eggs, milk, softened butter, oil and vanilla; beat on medium speed of mixer 2 minutes. Stir in boiling water, boiled milk, with chocolate chips added in the milk to melt (batter will be thin). Pour batter into prepared pans.
    3. Bake 30 to 35 minutes or until wooden pick inserted in center comes out clean. Cool 10 minutes; remove from pans to wire racks. Cool completely. Frost with "PERFECTLY CHOCOLATE" CHOCOLATE FROSTING. Makes 12 servings.

    Frost with FLUFFY WHITE (7-MINUTE) frosting

    VARIATIONS:
    ONE-PAN CAKE: Grease and flour 13x9x2-inch baking pan. Heat oven to 350° F. Pour batter into prepared pan. Bake 35 to 40 minutes. Cool completely. Frost.
    THREE LAYER CAKE: Grease and flour three 8-inch round baking pans. Heat oven to 350°F. Pour batter into prepared pans. Bake 30 to 35 minutes. Cool 10 minutes; remove from pans to wire racks. Cool completely. Frost.
    Fluffy White Frosting, or 7- Minute Frosting...or Marshmallow Frosting is a true American 'classic' that has been around for decades...my very first time I tried it, was a Better Homes and Gardens cookbook that was given to me as a gift, in 1974, when it was called...FLUFFY WHITE FROSTING!
    Every recipe I googled called for the addition of light corn syrup added...which I sparingly use...or don't use at all! I have been using McCormick Cream of Tartar instead...for years; which is a powdery substance, a very small amount added to make the frosting fluffy, and add body which the corn syrup adds...which happens to be a stabilizer. A tiny amount of the Cream of Tartar does it all!
    Fluffy White Frosting      

    1 cup white sugar


    1/3 cup water


    1/4 teaspoon cream of tartar


    2 egg whites 
    I used 4 egg whites                                                   


    1 teaspoon vanilla extract


    This method is so much easier than the double boiler method, just make sure that you let the mixture get very bubbly, for a few minutes...it will get thicker, and almost a pale yellow color (after that it will turn amber) and you will have to make caramel sauce with it, adding cream to the amber sugar.
    The choice is yours; just carefully watch over the boiling sugar content!


    1. In a saucepan, stir together the sugar, water and cream of tartar. Cook over medium-high heat until the sugar is dissolved and the mixture is bubbly.
    2. In a medium mixing bowl, whip the egg whites and vanilla to soft peaks. Gradually add the sugar mixture while whipping constantly until stiff peaks form, about 7 to 10 minutes. Frost the cake of your choice. 
    3. I have been making this frosting for my grown children when they were little...and now my 4 grandchildren are enjoying it, and it has become their very favorite. With 4 egg whites you can achieve the same quality...making sure you do the 'finger test'...seriously!

    Chocolate Crinkles

    Happy New Year, to all my blogger friends...(not excluding readers who may not comment)...equal time to all!
    Hope you all had a wonderful, and safe New Year's celebration...as we also did! This post may seem like a 'forgotten' or an 'after thought' post of my Chocolate Crinkles...but let me assure you that it is not a forgotten post of these lovely cookies that everyone loves around the Christmas holidays!

    Chocolate Crinkles
    recipe source: Gold Medal Flour
    • 1/2cup vegetable oil
    • 4 oz unsweetened baking chocolate, melted, cooled
    • 2cups granulated sugar
    • 2 teaspoons vanilla
    • 4eggs
    • 2 cups Gold Medal® all-purpose flour
    • 2teaspoons baking powder
    • 1/2 teaspoon salt
    • 1/2cup powdered sugar

    Directions

    • 1
      In large bowl, mix oil, chocolate, granulated sugar and vanilla. Stir in eggs, one at a time. Stir in flour, baking powder and salt. Cover; refrigerate at least 3 hours.
    • 2
      Heat oven to 350°F. Grease cookie sheet with shortening or cooking spray.
    • 3
      Drop dough by teaspoonfuls into powdered sugar; roll around to coat and shape into balls. Place about 2 inches apart on cookie sheets.
    • 4
      Bake 10 to 12 minutes or until almost no imprint remains when touched lightly in center. Immediately remove from cookie sheets to cooling racks.


    I find it a little odd to be posting a Christmas cookie (now, that Christmas is over) Chocolate Crinkles are so popular here in the U.S. and all over the world by now, I assume. They are so attractive with the light and dark contrast, and most certainly perfect for an interesting addition to a cookie tray or for serving by themselves, any time of the year!

    I did not have a Christmas tree at my small beach condo apartment; but at my daughter Lora's they have a beautiful live and tall tree every year, and I spent time just about every day there to enjoy the holiday festivities, especially at City Place!


    Christmas @ City Place...West Palm Beach, Florida
    Friends, and Family, on Christmas Day Celebration!

    Fresh Peach and Apple Crisp

    Buying the most beautiful and perfect peaches deserves a photo 'prop'...don't you agree?
    The reason that I'm featuring these gorgeous peaches is...we are in the midst of being able to get Georgia peaches here, in S. Florida and they are quite affordable at this time of the year, and also...organic as well.

    Fruit crisps, are the easiest things are to make when you just want a quick dessert to serve with a scoop of ice cream, or just by itself...even, cold!
    It looks like a 'ray of sunshine' all around the dish, made in my vintage pink Pyrex that used to belong to my mother from the sixties. I also have the matching bowl with it. Taking photos of it in the natural light with a 'ray of sunshine' also helps to feature this easy and yummy quick homemade dessert! The recipe is so very simple and easy, you just have to remember the basic equivalent measurement of everything ...except the butter.

    I served this right out of the oven and the aroma with the apple, peach, cinnamon and brown sugar was totally incredible and intoxicating. Actually you have to wait at least 15 minutes for the fruit crisp to settle and the juices thicken as it cools, otherwise it gets so juicy...which is not a bad thing as long as the topping stays crunchy!

    Topping it with your favorite ice cream really is scrumptious and heavenly!

    After a few minutes, the ice cream starts to melt over the warm crisp and you'll also need a spoon with your for...better yet, just scoop up all the yummy goodness with your spoon!

    Fresh Peach and Apple Crisp
    recipe by; Elisabeth

    1/2 cup quick cooking rolled oats
    1/2 cup packed brown sugar
    1/2 cup all-purpose flour
    1/2 tsp. ground cinnamon
    dash of salt
    1/3 cup butter
    zest and juice of 1 lemon
    4 medium peaches peeled and sliced
    3 medium apples peeled and sliced thin


    In mixing bowl, combine oats, flour, cinnamon, salt, and brown sugar (leave 1 Tbsp. sugar for mixing into the fruit.) Cut the butter into small pieces and crumble them into the flour and oats mixture. Set aside

    In a large bowl, add the peeled, sliced peaches, the peeled slice apples, the grated lemon zest, the juice of the 1 lemon, and the 1 Tbsp. brown sugar. Place fruit in a 10x6x2 inch baking dish, Sprinkle the flour mixture over the fruit, Bake in a 375 degree F. oven for about 45 minutes or until fruit liquid starts to bubble.
    Serve warm over ice cream.

    Here are some photos to share with you from this past weekend...

    Linking to:Thursday Favorite Things @ Katherine's Corner

    sail boat on the beach...
    view from our private beach...
    view of the moon in the background...
    at sunset, across the street on the Intracoastal water...
    just down the street from me...
    well manicured public lawn, and well kept trees...Palm Beach
    Gabby taking photos...as well!


    Brioches in Mini Pans

    As you can see, judging from the photos...the brioches have a mind of their own; leaning 'every which way'...swaying from left-to-right, right to left' ...looks like they're falling over; but don't be fooled! They are golden brown, light-as-a-feather texture, and that's what counts!
    I have an amazing recipe from my 1986 version of The Good Housekeeping Cookbook which I think is the BEST of all the other 3 that I compared it with...although they are quite similar. You can make Brioches in loaf pans which is a simple solution verses the perfect mini tin pans!

    I did order the Good Housekeeping Cookbook 125th edition (2010) from Amazon, for $5.19 ...a book that retails for at least $30.00. Did you know that Goodwill Industries sells books on Amazon?...well, they are the seller; the book is almost new...shipping cost is $3.99 and I will be receiving it by next week. The new book suggests you make the Brioche in a loaf pan, which is more ideal.

    I used RED STAR YEAST...this time, the Quick Rise Gluten Free, and I had great results...no doubting if the yeast will rise or not!

    Brioches
    from the New Good Housekeeping Cookbook
    1986

    1/2 cup sugar
    1/2 teaspoon salt
    2 packages active dry yeast
    3 1/2 cups all purpose flour
    3/4 cup butter or margarine (1- 1/2 sticks)
    1/2 cup milk
    1 teaspoon grated lemon peel
    5 eggs

    In a large bowl, combine sugar, salt, yeast, and 1-1/2 cups flour. In a 1-quart saucepan over medium heat...heat butter or margarine and milk. until very warm. Butter or margarine does not need to melt.

    With the mixer at low speed, beat liquid into dry ingredients, just until blended. Increase speed to medium; beat 2 minutes. Beat in grated lemon peel, 4 eggs, and 1 cup flour to make a thick batter; continue beating 2 minutes, scraping bowl often.


    Stir in 1 cup of flour to make a very soft dough, beat with spoon for 5 minutes.


    Place dough in grease, large bow. Cover; let rise in a warm place until doubled about 1 hour. Stir down dough, cover, and refrigerate for at least 2 hours, or overnight.

    About 2 hours before serving, punch down dough, turn onto lightly floured surface, cover and let it rest for 15 minutes. Grease 12 (I only had 10) brioche pans

    Cut off one-sixth of dough; set aside. Cut remaining dough into 12 pieces; shape each into small balls. Make a depression in center of each small ball; place the small balls in the depression; cover, let rise in a warm place until doubled, 1 hour.

    Preheat oven to 375 degrees F. In cup, beat remaining egg; use to brush brioches. Bake brioches for 20 minutes or until golden and brioches test done. Remove from pans.


    Serve warm, fresh from the oven, or cool on wire racks. Ideal to serve with fruit spread, or butter!

    Cleveland Winter 2017

    Hello my friends, I hope you all had a great holiday. I just got back from Ohio and I thought it would be nice to put together a post to s...