Showing posts with label Flour. Show all posts

Brioches in Mini Pans

As you can see, judging from the photos...the brioches have a mind of their own; leaning 'every which way'...swaying from left-to-right, right to left' ...looks like they're falling over; but don't be fooled! They are golden brown, light-as-a-feather texture, and that's what counts!
I have an amazing recipe from my 1986 version of The Good Housekeeping Cookbook which I think is the BEST of all the other 3 that I compared it with...although they are quite similar. You can make Brioches in loaf pans which is a simple solution verses the perfect mini tin pans!

I did order the Good Housekeeping Cookbook 125th edition (2010) from Amazon, for $5.19 ...a book that retails for at least $30.00. Did you know that Goodwill Industries sells books on Amazon?...well, they are the seller; the book is almost new...shipping cost is $3.99 and I will be receiving it by next week. The new book suggests you make the Brioche in a loaf pan, which is more ideal.

I used RED STAR YEAST...this time, the Quick Rise Gluten Free, and I had great results...no doubting if the yeast will rise or not!

Brioches
from the New Good Housekeeping Cookbook
1986

1/2 cup sugar
1/2 teaspoon salt
2 packages active dry yeast
3 1/2 cups all purpose flour
3/4 cup butter or margarine (1- 1/2 sticks)
1/2 cup milk
1 teaspoon grated lemon peel
5 eggs

In a large bowl, combine sugar, salt, yeast, and 1-1/2 cups flour. In a 1-quart saucepan over medium heat...heat butter or margarine and milk. until very warm. Butter or margarine does not need to melt.

With the mixer at low speed, beat liquid into dry ingredients, just until blended. Increase speed to medium; beat 2 minutes. Beat in grated lemon peel, 4 eggs, and 1 cup flour to make a thick batter; continue beating 2 minutes, scraping bowl often.


Stir in 1 cup of flour to make a very soft dough, beat with spoon for 5 minutes.


Place dough in grease, large bow. Cover; let rise in a warm place until doubled about 1 hour. Stir down dough, cover, and refrigerate for at least 2 hours, or overnight.

About 2 hours before serving, punch down dough, turn onto lightly floured surface, cover and let it rest for 15 minutes. Grease 12 (I only had 10) brioche pans

Cut off one-sixth of dough; set aside. Cut remaining dough into 12 pieces; shape each into small balls. Make a depression in center of each small ball; place the small balls in the depression; cover, let rise in a warm place until doubled, 1 hour.

Preheat oven to 375 degrees F. In cup, beat remaining egg; use to brush brioches. Bake brioches for 20 minutes or until golden and brioches test done. Remove from pans.


Serve warm, fresh from the oven, or cool on wire racks. Ideal to serve with fruit spread, or butter!

Red Velvet {Birthday} Cake with Cream Cheese Icing

As you may know we've had a very stormy week, starting last Wednesday, and expecting the worst by Thursday, and Friday...kids having half a day of school on Thursday, and off on Friday, due to Hurricane 'Sandy' lurking around our area in S. Florida...leaving a mess behind in Cuba, and Haiti. Now, heading up to the east coast...already causing havoc in North Carolina! Luckily, we escaped a lot of what could have been really bad damage, just heavy winds, to deal with and a lot of downpour of heavy rains.
The only time you will see a frosted cake posted on my blog, when I make one for a special occasion...and this certainly was! My granddaughter Sophia just turned 11...the second oldest of the 4 grandchildren that I have. Gabriella had her 11th birthday in August. This was a special request from Sophia, she's such a 'sweetheart' and knows exactly what she wants. Red Velvet Cake is an 'all American' Southern cake...and don't let anyone convince you...otherwise:) Some like it 'ruby red'...but since there's cocoa powder used, I like to have a dark reddish/brown
version of this famous cake!
Most recipes call for cake flour, but the recipe that I adapted this from called for all-purpose flour. When using cake flour, you do not add baking powder, just baking soda, but I figured baking powder addition to the all-purpose flour would lighten it up...and it did; so moist, perfect, and yummy. Also, I cut down on the sugar, as well!
My two 'angels' Sophia on the left...and Gabby (cousins)...but more like sisters!


I don't like my Red Velvet Cake to be a
bright red color...so I added the special dark Hershey's cocoa, instead of the regular one. When you chill the cake, you can cut a perfect slice, just like this! I will share this 'failproof' and perfect recipe with you, step-by-step, so READ on!

Red Clam Sauce with Linguine

I'm at the point where I feel like 'throwing in the towel'...and take a 'blogging break'...I'm totally discombobulated, disconnected, so not on the 'ball' with my blogging, and keeping up with my posts that would actually amount to something or feel I have a connection to the proper groups, blog hops, social networks. I'm probably the only food blogger that hasn't used STUMBLE! Even my Google+ is sitting there all lonely and not properly attended to. I was one of the last ones that stayed on the old Blogger format, until they finally discontinued the old format! Good thing I'm able to figure out the new Blogger format, which is really great:)

As I mentioned the last time that I don't take photos of the things I make every day...but then, if I don't have a plan for something special, than I have no other choice but sprucing up my dish to take some photos, mostly in my kitchen, for the best light at night... if I want to have a new post.

This is a classic Italian Clam Sauce with Linguine, but one rule is that, it's either 'White Clam Sauce'...not a white cream sauce, but a simple extra virgin olive oil, garlic, and lots of fresh parsley; and don't forget the lemon. In case of the 'Red Clam Sauce'...not drowning the clams in a heavy red sauce, but the same format, leaving out the lemon juice and lemon slices, and using white wine. As for the tomato sauce, it really is just Hunt's diced tomatoes in their natural juices, or you can you fresh diced tomatoes, just don't overcook them so they keep their diced shape.

My recipe is from 'scratch'...from memory of a 70's classic that I still remember, only adding the diced tomatoes to it! The best way to make this even special, is to add fresh steamed whole baby clams, to add more flavor, and for presentation.

Red Clam Sauce with Linguine
recipe by; Elisabeth

2- 7 oz. cans of chopped clams
1/2 cup extra virgin olive oil
3 or 4 cloves garlic chopped
a handful of Italian fresh parley chopped
1-15 oz. can diced tomatoes (I used Hunt's with sweet onions)
1/2 cup white wine (real wine, not cooking wine)
1 teaspoon chili pepper flakes
freshly ground pepper to taste
salt (use sparingly, clams are salty enough)
1 dozen, fresh baby clams (I used 10 for two serv.)
1 lb. linguine, or spaghetti


In a medium saucepan, add the 1/2 cup extra virgin olive oil (don't worry about the amount, you need a lot of oil to soak up the clams and pasta)

On medium high heat, add the oil, the chopped garlic, the red pepper flakes, and heat up till the garlic sizzles, just don't let it get brown. Add the half cup wine, a good portion of chopped parsley, and the juices from the canned clams. Do not add the clams at this time.

Add the canned tomatoes with the liquid, and heat to a slow boil. Simmer for about 10 minutes, and at the very end, add the canned clams. Just gently stir, and simmer on low for a about another 5 minutes. Keep it on warm, while you're boiling the water for the linguine. For the fresh clams, In a skillet, add a small amount of chili red pepper and more garlic if you like, add another 1/2 cup of white, a small portion of parsley, Cover with a lid, and boil until all the clams open up, which should take no longer than a few minutes.

Important to note: Do not try to pry open any clams that do not open up by themselves. In my case, 2 clams did not open up...so I had to discard it. (discard any that do not open up)

To serve: In a serving bowl, add the linguine, and ladle the sauce with the clams, and mix gently together. Garnish with additional parsley, and carefully surround the bowl with the opened fresh clams. (As a rule, do not add grated Parmesan cheese) Serves 4.

Linking to: Thursday Favorite Things Blog Hop, @ Katherines Corner
Enhanced by Zemanta

Pumpkin-Banana-Cranberry Mini Bundt Cakes #BundtaMonth

Notice something different?...I figured out how to use 'text' in my photos! So thrilled to start out for the #BundtaMonth Challenge, and the theme for October is Pumpkin!

Vintage 'Vera' table cloth, (brand new $1.99) ...a 'thrift find' from Goodwill
Hi everyone! I have so much to share with you starting with this post...which is so exciting because, it is the month of October, a very favorite month of mine which spells FALL, AUTUMN...HALLOWEEN, the crisp cool fall weather...of course; I'm not talking about S. Florida, but in our northern states, and everywhere else where they celebrate the beautiful fall season. I mentioned before that this is one of my all-time favorite season with the beautiful changing of the gorgeous autumn colors of the leaves...weaving its magical bright orange, yellow, brown, burgundy colors. So mesmerizing and enchanting, that I would want to enjoy this for more than just a short time!

I've been wanting to link up with such great 'blog hops' ...but for me, the easiest ones are the ones where I can link up whatever I have on my blog for that chosen day...but as for the #BundtaMonth link, I cannot resist it not just because my daughter Lora and Anuradha are the partners in crime of this fabulous 'bundt' challenge...and I just happen to love bundt cakes. I have been baking bundt cakes since the seventies when they were so ultra-popular.

I still have my original dark orange color seventies bundt pan along with a couple newer ones, and an awesome mini heavy duty pan, a 'thrift find'...which I love to bake in. I didn't want to take time browsing for a recipe, so I just used my 'trusted' basic banana bread recipe that I have memorized, modified it, and added the pumpkin and the fresh/frozen cranberries from Whole Foods.

What is #BundtaMonth all about?

Here’s the challenge:
Anuradha (Baker's Street) and Lora (Cake Duchess) will pick an ingredient and announce it the first week of every month. All you Bundt loving bakers need to do is use your imagination on how you’d like to incorporate it and bake a Bundt – mini Bundt or large Bundt – and link it up to our blogs throughout the month. It's that simple!

They decided to bake with pumpkin in their October Bundts.

If you're out of ideas and are looking for inspiration you should check out their Pinterest board that has 100+ bundt cake recipes.

Pumpkin-Banana-Cranberry Mini Bundt Cakes
recipe by; Elisabeth

1 cup all-purpose flour
 (I used King Arthur unbleached all-purp)
1 cup whole wheat flour
1 teaspoon baking powder
1 teaspoon baking soda
1 can (15 oz) pumpkin (I used Libby's
2 ripe bananas
2 large eggs
1/4 cup vegetable, or canola oil
1 bag (12 oz) fresh, or frozen cranberries
(you can use dried cranberries, in place of fresh
or frozen...1 cup)
1 teaspoon salt
1/2 cup granulated sugar
1/2 cup light brown sugar
1 teaspoon vanilla extract
1 teaspoon cinnamon
1/4 teaspoon nutmeg (I used a sm. amt. of fresh grated)
3 or 4 pieces crystallized ginger
(you can use 1/2 teaspoon powdered ginger instead)


Preheat oven to 375 degrees F. Get 3 bowls ready for your ingredients. (1 large, 1 medium, and 1 small)
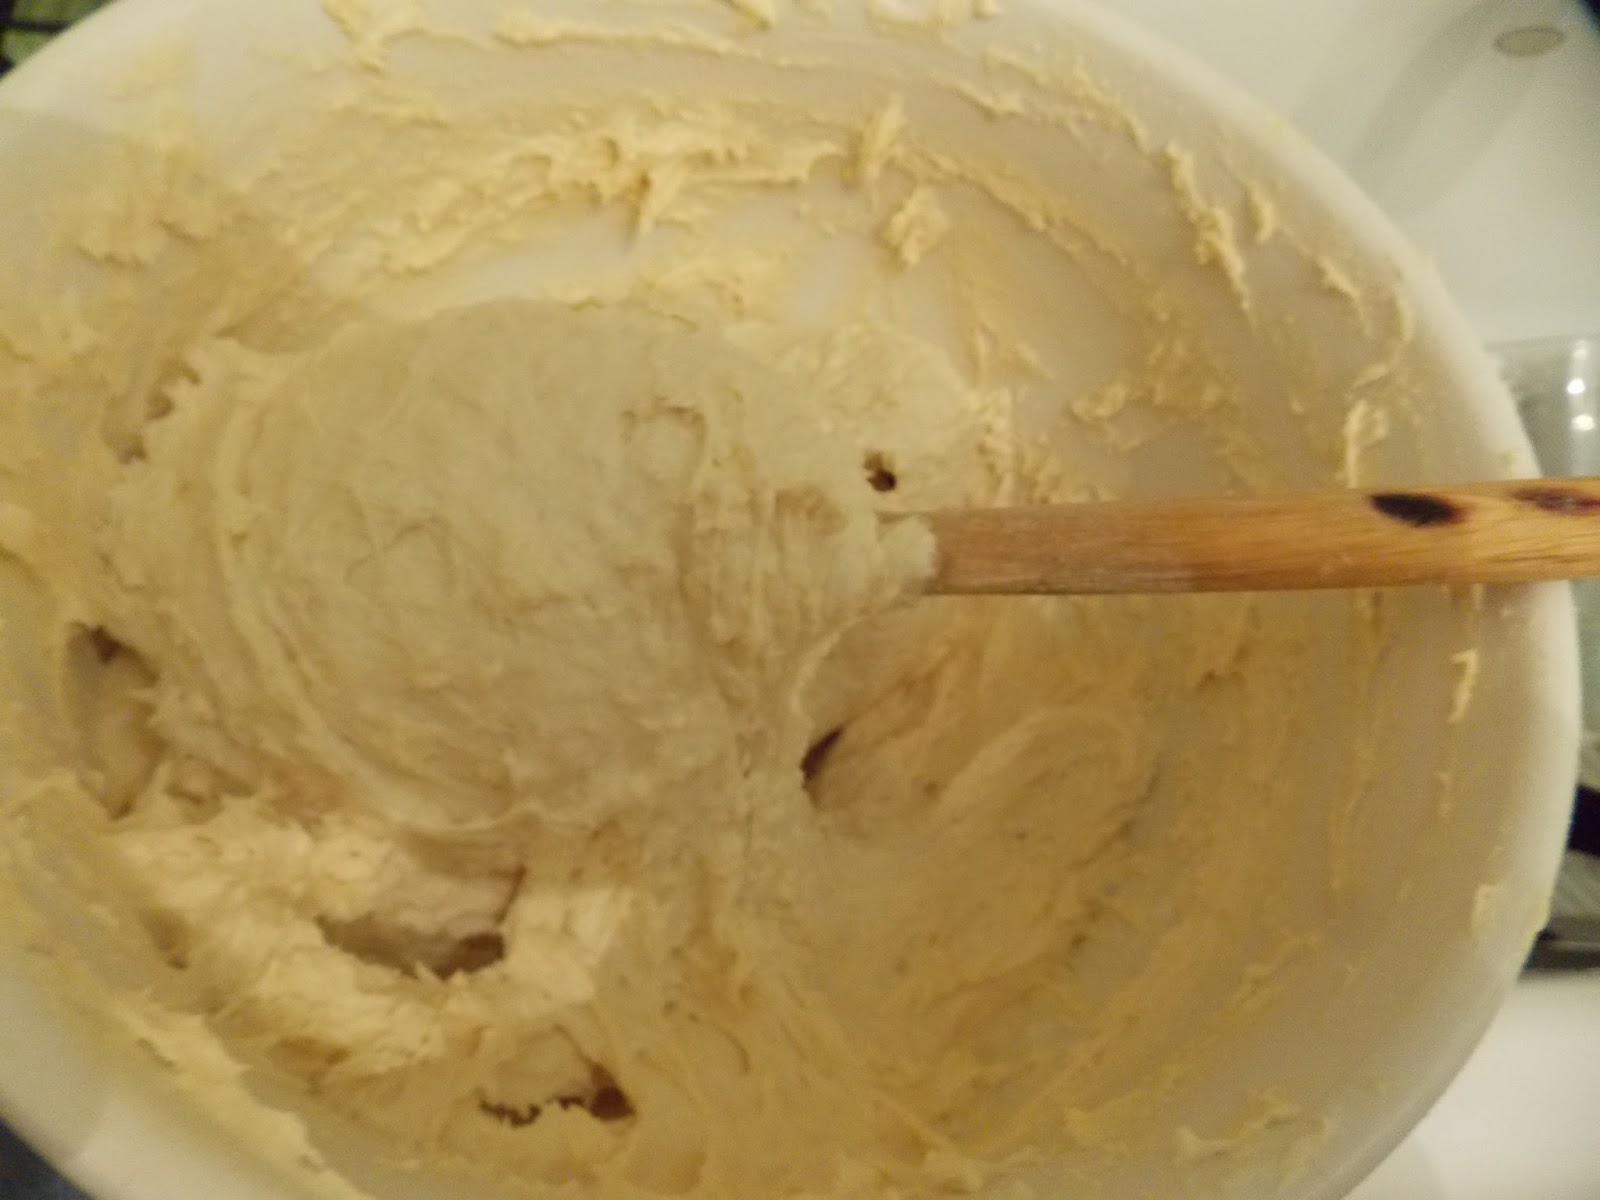
On the top right photo...in the large bowl,
add the canned 15 oz. pumpkin puree, the 2 sugars,
the cinnamon, the grated nutmeg, the 2 bananas, and mash coarsely with a potato masher.

In a small bowl, add the 2 eggs, and 1/4 cup vegetable, or canola oil, and whisk with a fork.


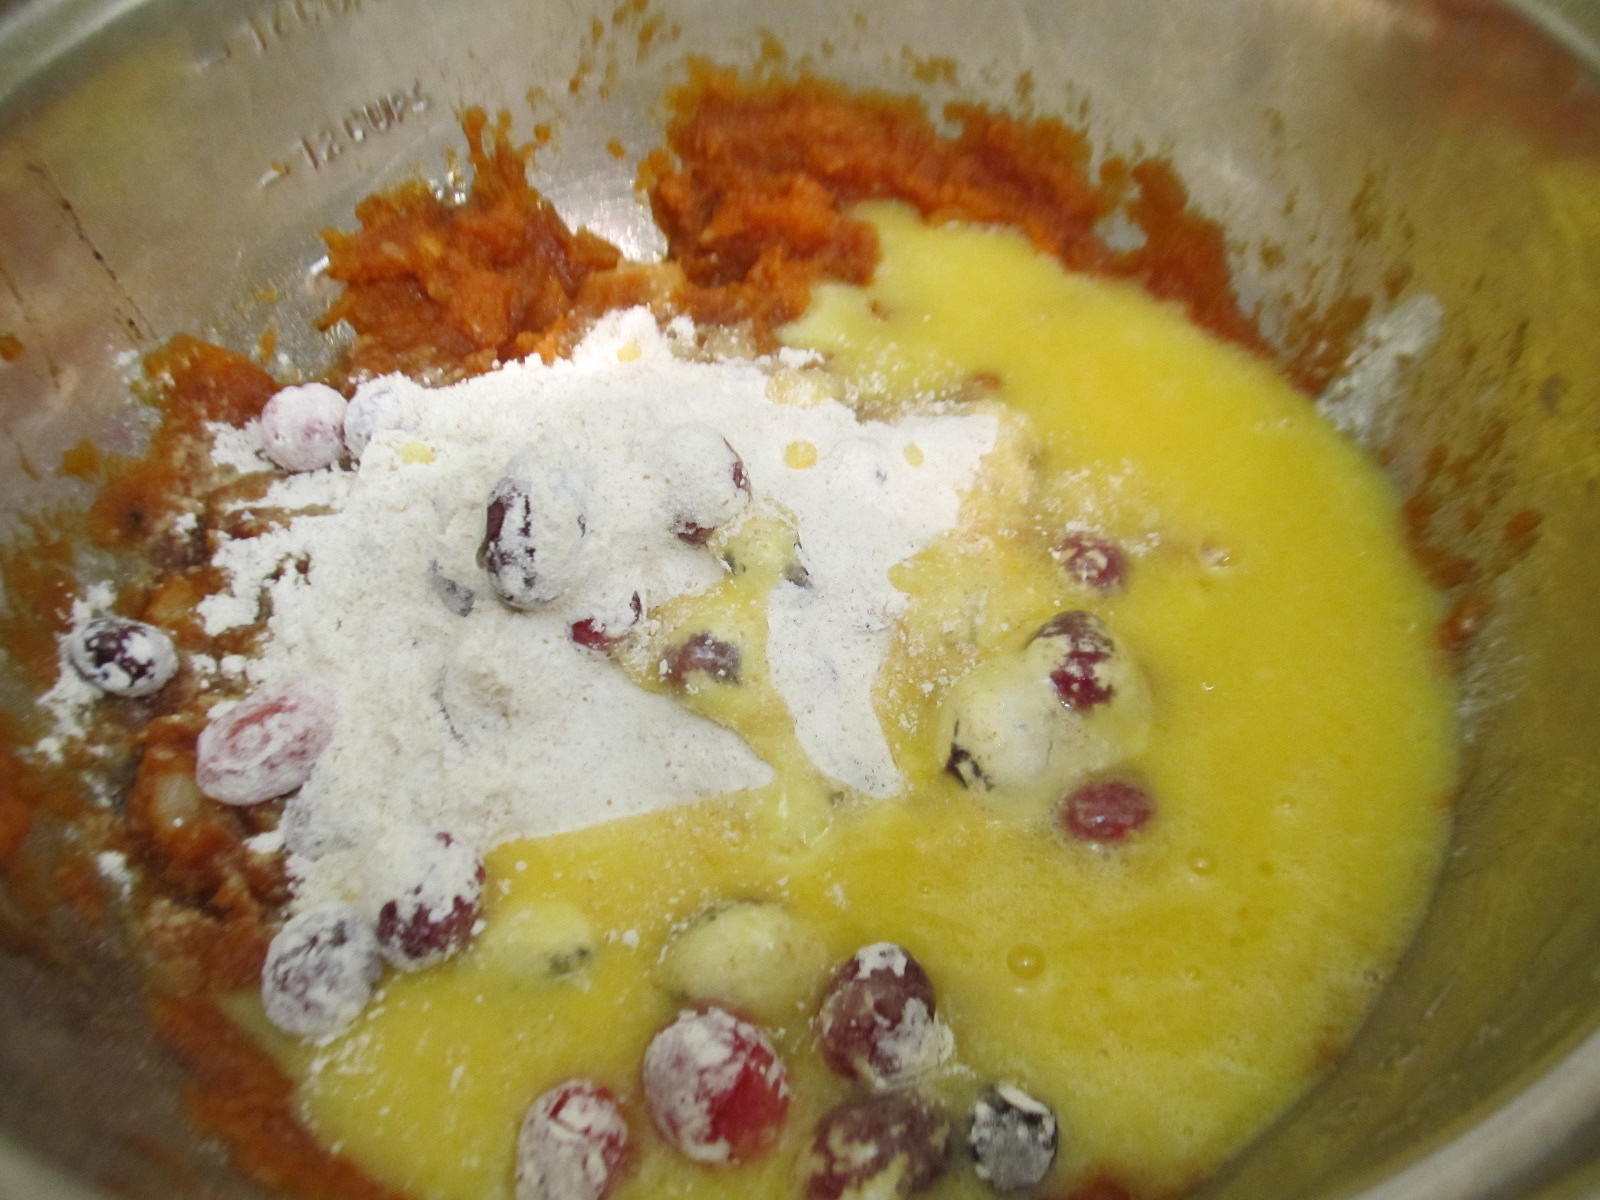
In the medium bowl, combine the flours, salt, baking powder, and baking soda. Mix together.


Add the cranberries, and the crystallized ginger to the flours and mix gently together. The importance of this method is; so that they don't sink to the bottom of the batter when baking.


Now, you can add half of the fruit and flour mixture to the pumpkin mixture, in the large bowl. Also the the egg mixture to that, and fold in gently.
Now, finish adding the second half of the fruit and flour mixture, and fold that into the large bowl, again.

Finish, by gently incorporating everything, so that you don't smash the cranberries.


Spray a a mini bundt pan, and a 6 cup muffin pan with cooking spray, and add the batter carefully, about 3/4 full  in the bundt pan, and halfway full in the muffin pan

 Bake at 375 degrees for 20 minutes...remove the muffin pan, which will be done...Lower temperature to 350 degrees F. and finish baking the mini bundts for another 20 to 25 minutes (total 45 minutes for the bundt cake) Cool on metal rack for about 15 minutes before inverting the bundt cakes.


As you can see, I've worked very hard on this challenge, planning, working on re-constructing the actual 'memorized' banana bread recipe from 'scratch' taking step-by-step photos...trying to capture a good natural light with a 'speck of sun'...virtually, never using 'props'...just 'thrift finds' items I have on hand.

I almost forgot the glaze recipe!

2 cups powdered sugar
1 teaspoon light rum
1 teaspoon (maybe 2, if needed)


Mix all the ingredients with a fork, making sure there are no lumps, and to have it at a fairly thick consistency. (finger testing)...making sure it stick to your finger when you test it. Drizzle on with a teaspoon, since these are small cakes.

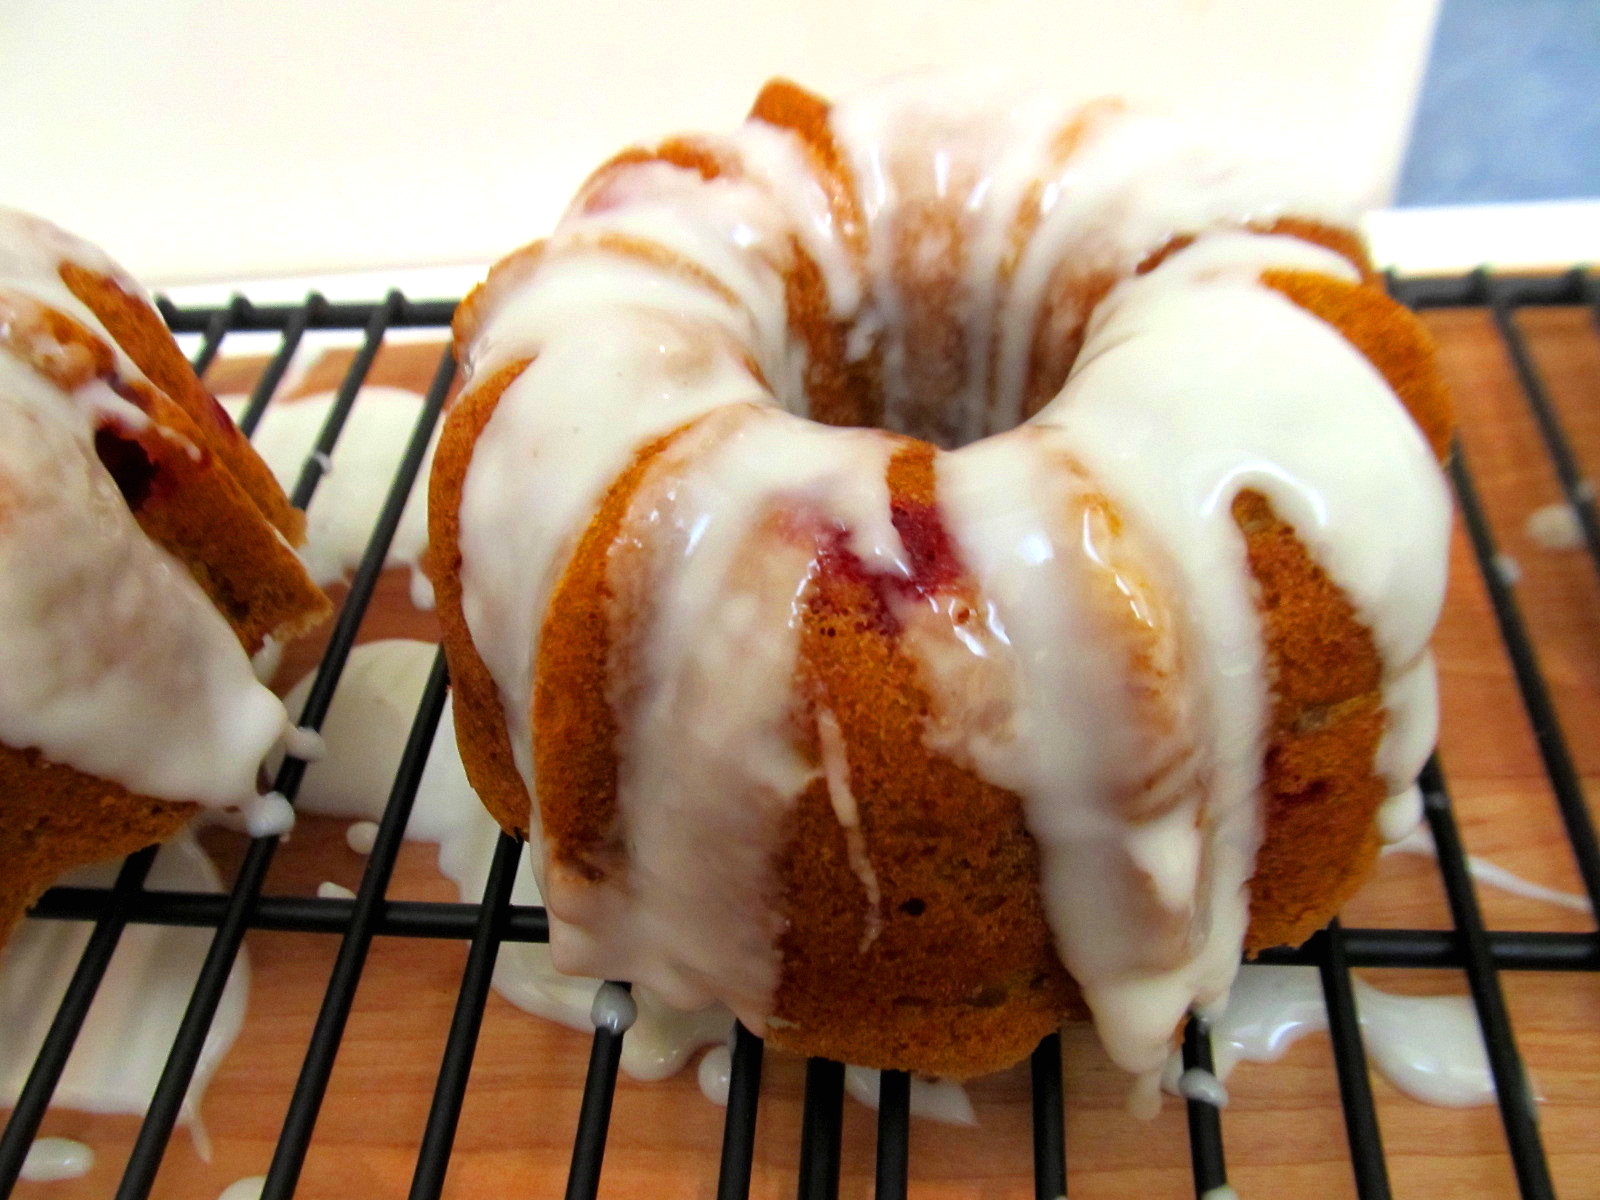
Just look and see how incredibly moist is the texture. Your taste buds are in for a huge surprise when you bit into the sour taste of the cranberries, and the sweet tangy taste of the crystallized ginger.

As for kids under 6...I recommend using dry cranberries, that have been soaked in boiling water for a few minutes before mixing it in the batter. (my little 6yr. granddaughter literally picked out each cranberries before she ate the cake, which she did like, but not approved of the sour taste, which actually mingles with the sweet cake and a surprise of the slightly spicy crystallized ginger!
Enhanced by Zemanta

White Chocolate Chip, Chocolate Cookies


While I'm trailing behind everyone else, on the 'food blogger scene,' I still try to come up with decent photos and different type of recipes. I must admit that I could actually post something every-other day...even every day; let's face it, we all have to eat every day 3 meals a day... but who actually wants to take photos of everything you make?...not me; although I should have taken a picture of my awesome homemade 'nokedli=spaetzli'...or even, my northern bean-vegetable soup cooked in my slow-cooker last week, but then I would have to stop and measure everything from the start because it's from 'scratch' and memory...scratch that, and let's start with my cookies.

Even with the cookies...when you don't have semi-sweet chocolate chips, or any other chocolate chips; just white, what do you do?...well, you make a 'White Chocolate Chip, Chocolate Cookies'...duhh...how easy is that to figure out?

Luckily, I always save the empty bag from the Nestle Semi-Sweet morsels, the 12. oz bag, and follow the recipe on the back, but just alter it a little to make it dark chocolate, with white chocolate chips...no problem...done!


Homemade cookies are so much more appreciated and it is much better than store-bought with all the preservatives, unless it's 'OREOS'..but that is always saved for emergencies.

You can make any kind of 'chip' cookies with the basic Toll House cookies recipe from Nestle's, just keep that in mind. Next time it will be with peanut butter chips with dark chocolate...just switching around the white chocolate chips.

Good thing I have another batch in my fridge...ahh thought you would be wondering why do a have a 'second batch' in my fridge?...saving it for a 'rainy day'...not such a bad idea! Today was actually a rainy day, and I had to be at my service station at 9:00AM sharp to get an oil change, and walk over to Goodwill with my umbrella, while car was being serviced. (didn't really find anything,) or at least nothing that I wanted to carry back on foot to pick up my car...so now, here's the slightly adapted recipe for a different chocolate chip cookie!

White Chocolate Chip Chocolate Cookies
adapted from Nestle's Toll House Cookies

2 cups all-purpose flour
1/4 cup Hershey's or another good brand cocoa powder
1-1 oz block of semi-sweet baking chocolate
1 teaspoon baking soda
1 teaspoon salt
1/2 cup butter (1 stick) melted with the 1 oz. of the semi-sweet chocolate, and cooled
1/2 cup (1 stick margarine) or 1/2 cup shortening
3/4 cup granulated sugar
3/4 cup brown sugar
1 teaspoon vanilla extract
2 large eggs

2 cups (12 oz. pkg.) white chocolate chips or dark chocolate chips

Preheat  oven to to 375 degrees F.

Line a baking pan with parchment paper. Combine flour, baking soda and salt in a small bowl.In a large bowl, beat cooled down melted chocolate and butter mixture, the 1/2 cup (1 stick margarine)...or the 1/2 cup shortening with the granulated sugar and brown sugar, and vanilla extract until creamy. Add eggs one at time, beating well until each addition.

Gradually beat in flour and cocoa mixture. Stir in chocolate morsels.

Drop by rounded teaspoon onto parchment paper lined baking sheets, keep them 2 inches apart. Bake for  9 to 11 minutes. Cool on baking sheet for 2 minutes.

Note: on the photos above, I saved more than half the portion of the dough, patted it down, wrapped it in plastic wrap...then aluminum foil, and took out more as needed the next few days. Score them first, then cut equally, shape into a walnut size ball and press down lightly; follow baking instructions.


Have a cookie...or two...or three:) You'll love these...yumm!
Linking to: Hearth and Soul Blog Hop @ Zesty South Indian Kitchen
                Thursday Favorite Things Blog Hop @ Katherines Corner
                 Full Plate Thursday @ Miz Helen's Country Cottage


Enhanced by Zemanta

My 'Award' Winning Pizza for #Twelve Loaves September

Does it seem like I'm the only 'oddball?'...seriously! I do everything differently than the other fellow food bloggers. I'm so 'lame' when it comes to joining a group, or even linking up something. Not consistent, and certainly always falling behind schedule. I did try to link up last week with my Cheddar Cheese bread for Lora's #Twelve Loaves September, which required a cheesy bread, but did not know that pizza applies...and I did make my own dough this time with the most amazing yeast from RED STAR, called PLATINUM!

linking to:#Twelve Loaves September @ Cake Duchess
              Hearth and Soul Blog Hop @ Zesty South Indian Kitchen
              Full Plate Thursday @ Miz Helen's Country Cottage
              Thursday Favorite Things Blog Hop @ Katherines Corner

Mango-Strawberry Cobbler

Some cobbler have toppings that are actually as thick as biscuits, but to me it's patches of a crusty dough that has a cake-like flavor on the inside. I've been making all kinds of cobblers that is so easy, and so nice with fresh fruit that you want to use up.
Although, I did just state in my previous recent post that mango season is over in S. Florida...it really is over! This was the best mango season for us in years, and we were so blessed with all the abundance of these lovely tropical fruit, that we just had to use it in so many ways.

Last week, the final 4 mangoes fell down from the top of the tree and they were almost too ripe. Didn't want to use them for smoothies...it would be so selfish when we had smoothies just about every day for one month. I have not made a cobbler, since about one year ago, and it's time that I make one.

I made the cobbler this afternoon, and I was so very happy that we had beautiful sunshine today, but very, very, hot. Today was the first day of school for most of the kids in our area, and both my grandchildren started back! The weekend also went so nice with perfect Florida weather...rain again, in the late afternoon, but during the day was gorgeous and sunny!

Cobbler has got to be the easiest and fastest dessert to make...you just have to remember, that it starts out with 1 cup of flour, a little sugar, dash of salt, and don't forget the baking powder, and of course, a little butter, moisten it with either a little bit of milk to form a dough, or a little over 1 cup to be able to drop the dough on the fruit, and bake for 35 minutes...Let me tell you, the best way to eat this amazing cobbler; while it's still warm. This was gone so fast that I must say I will be making it more often now, with different fruits!
 I wanted to show you close up how juicy the fruits are (I have a little secret for that)...and for the cobbler, you can see the thickness, which is just right, and see how moist it is, yet has a crusty top!
This is my favorite photo...Gabby enjoying her cobbler, for an afternoon snack. She had her first day of school, 6th grade, and she came home so happy...all smiles, and such positive energy and lots of stories.If you want to make your family happy, with the most perfect, easy, afternoon snack...make them a fresh fruit cobbler...they will love it, and 'thank you' for it!  Now, on to the recipe...click on read more...(as if you didn't know it!?)

linking to: Hearth and Soul @ Zesty South Indian Kitchen

Blueberry-Peach Bread...for "Twelve Loaves"

I decided to make some fruit filled bread, since we are in the midst of the summer season, with plenty of summer fruits available and at such cheap price. Blueberry happens to be one of my all-time favorite berries, and to combine it with juicy ripe peaches, is the first time for me...although I have seen it on other food
bloggers site.

Summer Strawberry Cake....a Guest Post

We are so happy and honored to guest post for our friend Lizzy, from That Skinny Chick Can Bake!!! 

It’s a joy to be here guest posting with my daughter Lora, from Cake Duchess.
We have known Lizzy for nearly two years and she has always been such a great friend to the both of us. She is always ready to help in any way possible. Lizzy really needs no introductions since she has so many followers and friends who frequent her amazing and delicious baking blog. I’ve often mentioned about her having little elves that help her in the kitchen baking in her little baking factory. Thank you, Lizzy, for asking Lora and I to team up for a guest post. You are a sweet friend. 


Mango Jelly Roll...a Guest Post

I finally have the privilege of introducing my sweet daughter, Lora @ Cake Duchess ...who is so kind to guest post for me, which I have already mentioned about 1 month ago when I had my hand injury. She already had this wonderful jelly roll ready for me but we just could not get together on the same day to post it. Be sure to check out Lora's lovely blog...and probably know her and follow her blog!

She is so very busy...like all young moms with work, kids, school, and all her own cooking and baking projects.
Lora, I'm so thrilled, and honored to have you guest post for me, and taking time out from your busy schedule and your amazing blog. I'm so proud to have you as my daughter!
xoxo

I have totally forgotten about my mango jam, that I make every summer, and it lasts for several months the way I carefully can it, and to make sure that it's properly sealed. Without further hesitation, here is Lora, and in her own words!


It’s such a pleasure to be guest posting on my mom’s blog. She’s an amazing woman and she was my first cooking inspiration.  She still inspires me every day with her creativity in cooking and in baking. I owe my love of cooking to my sweet mom. She’s taught me invaluable lessons in the kitchen that I am now teaching to my children.

The jelly roll is a recipe that brings back many memories for me. My mother’s aunt from Hungary used to make it very often. It was light as a feather and filled with her wonderful homemade jams. She was an expert at baking delicious Hungarian desserts. I have sweet memories of baking alongside my great-aunt with my mom.

Every summer my mom makes the most wonderful mango jam with the mangos from our tree. I thought it was about time to bake with some of it as our tree is filled again with more glorious mangos. You can fill the cake with your favorite jam or even some whipped cream and fresh berries.

Thank you very much for having me guest post today, mom. It’s a joy to be a part of your delicious blog.

Elisabeth's home made mango jam


Mango Jelly Roll:
 
This recipe makes enough for one 18″ x 13″ sheet  or one 9″ cake. Here’s the formula:
5 ounces (1 cup) all-purpose flour
4 tablespoons butter (preferably clarified)
½ teaspoon salt
6 eggs
7 ounces (1 cup) sugar
1 teaspoon vanilla extract 
Filling:
1 cup mango jam (or your favorite preserves)
Preheat your oven to 350. 
Set a saucepan big enough to hold your mixer bowl on the stove with an inch of water in it. Bring it to a simmer. Meanwhile, sift the flour and salt together into a medium bowl. Melt the butter in a small saucepan and set aside. 
Pour the sugar into the mixer bowl, add the eggs and whisk to combine. Set the mixer bowl over the pan of water and heat the mixture until it’s warm to the touch (no more than 120 degrees). What you’re trying to do is simply melt the sugar…don’t cook the eggs! It’ll only take a minute or so. 
Remove the bowl from the heat and, using the paddle attachment, beat the mixture on medium high until it’s very light and foamy, about triple its original volume (this will take up to ten minutes with a stand mixer). Add the vanilla and beat an additional 10-15 seconds. 
Pour a cup or so of the egg foam into the cooled melted butter and stir it until it’s completely incorporated, then gently pour the mixture back into the mixer bowl (this eases the incorporation of the butter into the batter). Next, sprinkle the flour mixture into the mixer bowl and carefully fold until the flour mixture and the butter mixture are completely incorporated. Gently pour the batter into the prepared pan.
Bake until the cake is a pale gold color and springs back lightly when touched. Bake cake until golden brown and springy to the touch, 6 to 7 minutes. Run a knife around sides of cake. Invert onto prepared towel, and remove parchment. 
While the sheet cake is still warm, gently roll, starting from one short side, into a log, incorporating the kitchen towel. Let the cake cool completely, rolled. (This will give the cake a "shape memory," so it will be easier to roll again with filling.)


Time to fill: Unroll cake.
Spread filling over cake leaving a 1/2-inch border all around. Carefully roll cake to enclose filling (without towel), starting at a short end. Refrigerate 30 minutes (or up to 3 hours). Dust with confectioners' sugar before serving.
Enhanced by Zemanta

Cleveland Winter 2017

Hello my friends, I hope you all had a great holiday. I just got back from Ohio and I thought it would be nice to put together a post to s...