Showing posts with label Lemon. Show all posts

Roasted Paprika, Lemon, and Pepper Chicken

The aroma of homemade roasted chicken and the flavors, so crispy on the outside, and moist and juicy on the inside. I decided to roast two chickens...since I found the most beautiful organic young chickens in my local supermarket. They are about 5 lbs each. I have a generous and large roasting pan with a removable rack, so the chickens could easily be removed when they are done. I also added a few whole, peeled carrots, split a whole, peeled onion and stuffed it in the cavity of each chicken, along with half of 1 lemon for each chicken, and another whole lemon zest, and juice on top of chickens.

ROASTED PAPRIKA, LEMON, and PEPPER CHICKEN
recipe by: Elisabeth
 

2 roasting chickens (4 1/2-5 lbs.each)
1 tsp. coarse salt
1 tsp. black pepper
1 Tbsp. Hungarian paprika
1 tsp. dry thyme
1 medium onion peeled, and cut in half
zest of 1 whole lemon, and juice of the same lemon
2 Tbsps. vegetable oil
1/2 cup chicken broth
1 extra lemon cut in half
stalks of 3 or 4 carrots (optional)
1 whole sweet, or hot pepper (optional)
 
Preheat oven to 425 degrees. Set rack in pan; pour the chicken broth on the bottom of the roasting pan. Remove giblets and neck from inside chicken. Rinse chicken under running cold water and drain well, and pat dry. Tuck wings under. Place chickens breast- side up on rack, in the roasting pan; rub with the vegetable oil on both. With dry hands sprinkle with the spice mixture, and the lemon zest. Stuff the cavities with half of onion, and half of the extra lemon. Cover pan with the cover, or heavy duty aluminum foil. Roast for 25 minutes covered, and reduce heat to 350 degrees. Uncover the roasting pan, and continue to roast for and additional 1 1/2 hours or until juices run clear, when pricked with a fork in the thigh area. Let rest for 5 minutes before carving. Pour pan juices into a bowl, and save to serve as sauce for the chicken.

Serve with baked, roasted, or mashed potatoes, with side of your favorite vegetables. You can use the same method for 1 whole chicken...just cut down on the amount of spices. Leftover chicken is great for making chicken salad, great for slices of chicken breasts cold...for sandwiches; it can also be reheated for leftovers...or, as I did (give one to family, or friend; which I did)


Thank you for all your kind comments; sorry for not keeping up with commenting back to some of you dear friends; I've had quite a rough week...it's 'breast cancer awareness month'...my dear departed mom's birthday a couple days ago... (lost her to the same disease decades ago)...also been losing sleep since last week, my remaining kitty Mush is still mourning the loss of her companion Prince, and it's been over 1 year now; she is just not so happy these days, always meowing in the middle of the night, pacing up-and-down few times... looking for Prince! I need to get answers for the way she is acting...I know one of us will need 'therapy'...and some much needed sleep! Hugs,

Fresh Peach and Apple Crisp

Buying the most beautiful and perfect peaches deserves a photo 'prop'...don't you agree?
The reason that I'm featuring these gorgeous peaches is...we are in the midst of being able to get Georgia peaches here, in S. Florida and they are quite affordable at this time of the year, and also...organic as well.

Fruit crisps, are the easiest things are to make when you just want a quick dessert to serve with a scoop of ice cream, or just by itself...even, cold!
It looks like a 'ray of sunshine' all around the dish, made in my vintage pink Pyrex that used to belong to my mother from the sixties. I also have the matching bowl with it. Taking photos of it in the natural light with a 'ray of sunshine' also helps to feature this easy and yummy quick homemade dessert! The recipe is so very simple and easy, you just have to remember the basic equivalent measurement of everything ...except the butter.

I served this right out of the oven and the aroma with the apple, peach, cinnamon and brown sugar was totally incredible and intoxicating. Actually you have to wait at least 15 minutes for the fruit crisp to settle and the juices thicken as it cools, otherwise it gets so juicy...which is not a bad thing as long as the topping stays crunchy!

Topping it with your favorite ice cream really is scrumptious and heavenly!

After a few minutes, the ice cream starts to melt over the warm crisp and you'll also need a spoon with your for...better yet, just scoop up all the yummy goodness with your spoon!

Fresh Peach and Apple Crisp
recipe by; Elisabeth

1/2 cup quick cooking rolled oats
1/2 cup packed brown sugar
1/2 cup all-purpose flour
1/2 tsp. ground cinnamon
dash of salt
1/3 cup butter
zest and juice of 1 lemon
4 medium peaches peeled and sliced
3 medium apples peeled and sliced thin


In mixing bowl, combine oats, flour, cinnamon, salt, and brown sugar (leave 1 Tbsp. sugar for mixing into the fruit.) Cut the butter into small pieces and crumble them into the flour and oats mixture. Set aside

In a large bowl, add the peeled, sliced peaches, the peeled slice apples, the grated lemon zest, the juice of the 1 lemon, and the 1 Tbsp. brown sugar. Place fruit in a 10x6x2 inch baking dish, Sprinkle the flour mixture over the fruit, Bake in a 375 degree F. oven for about 45 minutes or until fruit liquid starts to bubble.
Serve warm over ice cream.

Here are some photos to share with you from this past weekend...

Linking to:Thursday Favorite Things @ Katherine's Corner

sail boat on the beach...
view from our private beach...
view of the moon in the background...
at sunset, across the street on the Intracoastal water...
just down the street from me...
well manicured public lawn, and well kept trees...Palm Beach
Gabby taking photos...as well!


End of the Mango Season in S. Florida

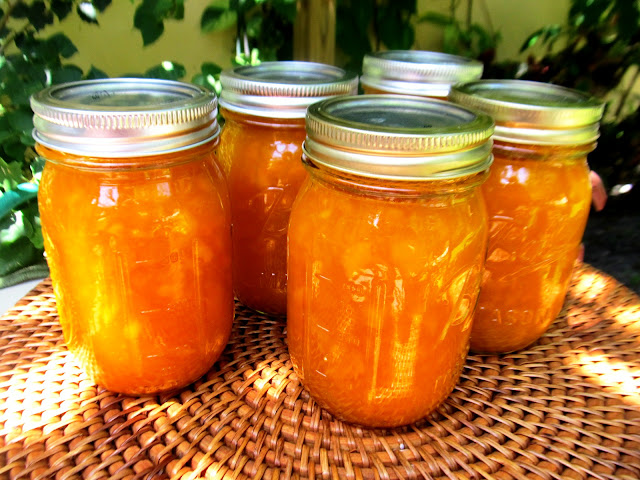
I'm not trying to bore you with more mangoes...but this time, I just want to share with you the last of our mangoes and the  Mango Jam recipe that my daughter Lora and I share. My recipe calls for lemon juice, which her Italian recipe does not, but from the last batch that I made she like the slight tangy lemon taste...this time, I used the juice of fresh lime, and that even made it taste better!
I'm going to share my little secret of how to can jams perfectly and to make sure they stay sealed, tight. You have to hear that 'pop sound' when you twist the jar to open...otherwise its not sealed right! I could never do this kind of work in my tiny beach condo kitchen, now you can understand why I spend just about every day at my daughter's house...not so much because she has a much larger kitchen, but because they have plenty of counter space and the kitchen is open and well lit! Also, the patio has ample natural lighting as well. I made this batch last week, and hoped I would catch a little sunlight that was 'sneaking around' for a short time...then the rain came!

I will guide you through the easy process...although a little time consuming, but I promise you that you can make this with the half of the amount from the full recipe!

This is what 1 kilo (2.2 lbs) of fruit will allow you to make. These are 12 oz canning jars with lids, that have to be sterilized (just run it through the dishwasher cycle lid too) or boil in a large pot of water, and let it cool to the touch.

You can make this with other fruits...peaches is what I would love to make it with, hoping that the price will come down from $1.99 a pound, we will probably get it less at our local produce market. Plums would work well also, for this recipe.

I used Sure-Jell pectin for my previous batch, but this time I use my daughter's Italian pectin that comes in a big pouch, so I counted out how many Tablespoons it requires, and marked down everything on paper to be saved, so good thing that I'm actually typing up this recipe and method to save for myself too!

With a jar of leftover mango jam, I also made cream cheese bars filled with mango jam

Mango Jam
adapted from Italian basic jam recipe

2 kilo (4.4 lbs) mango, or other fruit
750 g.(about 2 1/2 cups sugar
juice of 2 lemons, or limes
5 Tablespoons pectin (I used Italian import)

note: you can cut the amount exactly in half if you
want to make less jam.

Wash, peel, and dice the mango, or other fruit, and put into a large bowl. With a potato masher mash it well, but leaving little chunks of fruit which is really very tasty.


Add the pulp of the fruit to a large heavy stainless steel, or other heavy duty pot. Add the sugar, the pectin and the juice of the lemon or lime, and simmer constantly, over med. high heat.


Make sure you keep stirring, constantly, until it comes to a bubble and a slow boil. You must take it off the heat as soon as it does that, and start getting your jars ready to be filled by the hot jam. Don't be alarmed that it looks liquidy, because it will start to jel, as soon as it starts to cool a little.


With a ladle, carefully spoon the jam up to about where the neck of the jar is, to assure it will not spill over...do not fill to the very top!


Just set them on a dish towel making sure the lids are well sealed, and here comes the tricky part that will assure double seal!


Turn the filled jars upside-down, and leave them sitting like that for about 10 minutes to assure safe sealing for the lids. You can also do a water bath in a large pot with water only up to half way, and simmer for 10 minutes, or just follow this method!

note: if you are planning to leave jams in a cool place in your cupboard, then you have to do the water bath method...otherwise just proceed with this method, but you must refrigerate after opening the jar...either way, when you open a jar of jam you must refrigerate it!

Jam is done...now you can go 'jamming along'...a cool song of Bob Marley...Jammin!

Enjoy the jam...and share, sparingly...it's that GOOD!

Linking to: Thursday Favorite Things @ Katherines Corner

Broiled Grouper with Mango, Papaya Salad

Broiled sea food is one of the best ways to make it, next to grilling. I just use simple mix dry spices, fresh grated lemon zest, fresh juice of 1 lemon, and also use the same on the unpeeled large shrimp. drizzle extra virgin olive oil on it, line the broiler pan with the dull side of the aluminum foil, poke a few holes with a fork right through the aluminum foil just maybe about 3 places, an broil on the very top for about 10 minutes for the grouper, and just a few minutes for the shrimp, as soon as they turn pink, it's done.
I saved the juices from the fish, and added a little white wine to it, and added juice of 1 lemon on top.No need for extra lemon on the side.
The mango, papaya, romaine, and radicchio salad is another fresh and simple, yet bursting with color and flavor. A perfect combination with fresh Florida seafood. I also added sliced fresh jalapeno peppers, scallions, and drizzle extra virgin olive oil, and a good squeeze of fresh lime juice. Couldn't get any better.
Enhanced by Zemanta

Cleveland Winter 2017

Hello my friends, I hope you all had a great holiday. I just got back from Ohio and I thought it would be nice to put together a post to s...