Hershey's "Perfectly Chocolate"...Chocolate Cake...

Just to prove my point...cloudy, dreary, and rain, rain, rain, every single day, here in South Florida until Oct. 17, the official date for the end of our rainy season. Don't get me wrong that we don't get any sunshine...yes we do, even with all the rain. Clouds form on one side of the sky and it's clear and blue on the other side. The weirdest part is; when it rains on one side....for instance; down the road it is sunny...less than one mile away! I was so determined to take my photo of this classic Hershey's Chocolate Cake...by the time I finished, the clouds were rolling in...so there you have it...my worst best shot!
One hour later...delivered the cake to its destination...(did not realize the small smear taking it out of the carton)...doing yet, another 'photo prop' outside my daughter's back yard patio....little better natural lighting, then, a few minutes later...had to literally run inside with the cake because it started to rain. So there you have it; 'the rain saga'...once more!

While I was visiting and commenting on blogs, I stumbled on this wonderful 'classic' Hershey's "Perfectly Chocolate" Chocolate Cake from a dear new blogger friend, Dottie, @Family Plus Food Equals Love...what a sweet name for a food blog. She is so gracious, and talented; you can also find the Hershey's Milk Chocolate Chip recipe there, as well!

I haven't made this classic cake in a while, and I must say I had to adapt a few things, first...by adjusting the sugar amount and adding a small amount of 'real' butter to the batter, as well.

My modifications are in red

Hershey's "Perfectly Chocolate" Chocolate Cake

Ingredients
  • 2 cups sugar 1 cup of sugar
  • 1-3/4 cups all-purpose flour 2 cups flour
  • 3/4 cup HERSHEY'S Cocoa 1 cup
  • 1-1/2 teaspoons baking powder 2 teaspoons
  • 1-1/2 teaspoons baking soda 1 teaspoon
  • 1 teaspoon salt 1/2 teaspoon salt
  • 2 eggs 3 eggs
  • 1 cup milk 1/2 cup milk boiled
  • 1/2 cup Hershey's semisweet chocolate chips
  • 1/2 cup vegetable oil 1/4 cup veg. oil + 1/4 cup (1/2 stick) unsalted butter softened
  • 2 teaspoons vanilla extract
  • 1 cup boiling water
                                                                                         
    1. Heat oven to 350°F. Grease and flour two 9-inch round baking pans.
    2. Stir together sugar, flour, cocoa, baking powder, baking soda and salt in large bowl. Add eggs, milk, softened butter, oil and vanilla; beat on medium speed of mixer 2 minutes. Stir in boiling water, boiled milk, with chocolate chips added in the milk to melt (batter will be thin). Pour batter into prepared pans.
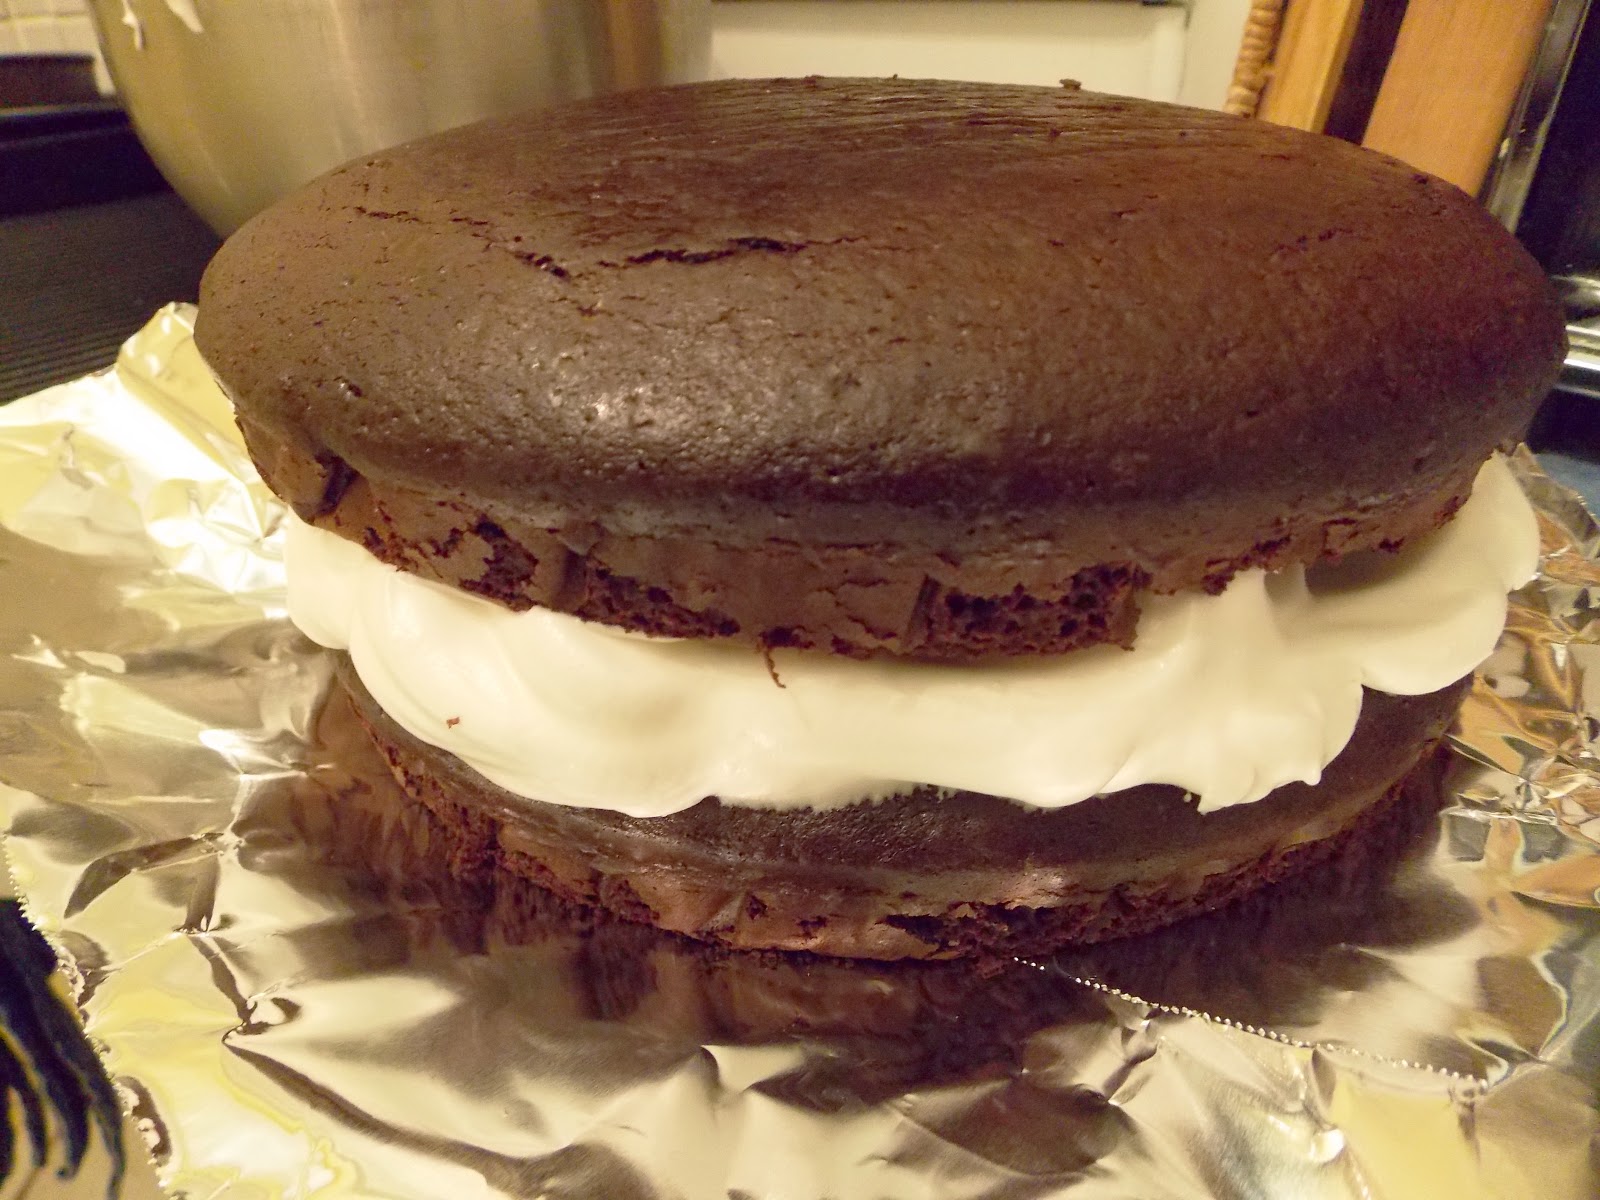
    3. Bake 30 to 35 minutes or until wooden pick inserted in center comes out clean. Cool 10 minutes; remove from pans to wire racks. Cool completely. Frost with "PERFECTLY CHOCOLATE" CHOCOLATE FROSTING. Makes 12 servings.

    Frost with FLUFFY WHITE (7-MINUTE) frosting

    VARIATIONS:
    ONE-PAN CAKE: Grease and flour 13x9x2-inch baking pan. Heat oven to 350° F. Pour batter into prepared pan. Bake 35 to 40 minutes. Cool completely. Frost.
    THREE LAYER CAKE: Grease and flour three 8-inch round baking pans. Heat oven to 350°F. Pour batter into prepared pans. Bake 30 to 35 minutes. Cool 10 minutes; remove from pans to wire racks. Cool completely. Frost.
    Fluffy White Frosting, or 7- Minute Frosting...or Marshmallow Frosting is a true American 'classic' that has been around for decades...my very first time I tried it, was a Better Homes and Gardens cookbook that was given to me as a gift, in 1974, when it was called...FLUFFY WHITE FROSTING!
    Every recipe I googled called for the addition of light corn syrup added...which I sparingly use...or don't use at all! I have been using McCormick Cream of Tartar instead...for years; which is a powdery substance, a very small amount added to make the frosting fluffy, and add body which the corn syrup adds...which happens to be a stabilizer. A tiny amount of the Cream of Tartar does it all!
    Fluffy White Frosting      

    1 cup white sugar


    1/3 cup water


    1/4 teaspoon cream of tartar


    2 egg whites 
    I used 4 egg whites                                                   


    1 teaspoon vanilla extract


    This method is so much easier than the double boiler method, just make sure that you let the mixture get very bubbly, for a few minutes...it will get thicker, and almost a pale yellow color (after that it will turn amber) and you will have to make caramel sauce with it, adding cream to the amber sugar.
    The choice is yours; just carefully watch over the boiling sugar content!


    1. In a saucepan, stir together the sugar, water and cream of tartar. Cook over medium-high heat until the sugar is dissolved and the mixture is bubbly.
    2. In a medium mixing bowl, whip the egg whites and vanilla to soft peaks. Gradually add the sugar mixture while whipping constantly until stiff peaks form, about 7 to 10 minutes. Frost the cake of your choice. 
    3. I have been making this frosting for my grown children when they were little...and now my 4 grandchildren are enjoying it, and it has become their very favorite. With 4 egg whites you can achieve the same quality...making sure you do the 'finger test'...seriously!

    Tuna Salad-Stuffed Tomatoes with Arugula

    I've always loved and enjoyed fresh salads and lately I have gotten bored with the simple 'hum-drum' salad with just cucumbers, tomatoes, and sliced or chopped onions (which I love all kinds, but mostly the red onions.) As for the dressing, just a simple extra virgin olive oil, and white balsamic vinegar.
    Sometimes I just run out of ideas what type of salads I should make, and I simply grab one of my cooking magazines...especially my newest subscription; Eating Well, which I share with my daughter among our other great cooking magazines the she and I subscribe to. The best kind of inspirations you get are of course...the ones with photos, and also knowing you don't have to run out to purchase so many ingredients just for that recipe.
    Here in the U.S. we tend to eat lunch 'on the run'...sometime just grabbing some 'takeout' fast food,
    if you happen to eat at home; maybe leftover stuff from the night before...or if you happen to be in 'luck'...a friend might take you out to a nice restaurant or eatery place not too expensive. You can of course split the bill! Well, I don't seem to fit any of these categories, because most of the time I skip lunch (not good)...eating breakfast too late, and I would be 'starving' by dinner time, which is so unhealthy!
    The only ingredient that I had to buy was the baby Arugula...also known as Roquette, or Rocket. I like to buy it in the small plastic bags, already sealed and the leaves are perfect, and tender...just love the peppery taste when you take a bite, it almost burns your tongue; but mixed with other ingredients, it blends so well!

    Tomatoes, stuffed with tuna salad is a classic elegant lunch dish...now, there's a healthier twist to it, just leaving out the mayo, and adding oil and vinegar, salt and pepper. I must tell you, this was such an amazing light and enjoyable lunch for 2, or 4 people. Did not even require bread or rolls!

    Hope you are all having a beautiful weekend, with most of you starting your Fall Season...oh, how I miss the beautiful fall colors of yellow, orange, red, brown, and burgundy leaves adorning the trees...only to be falling so quickly.

    Before you know it, Halloween is around the corner! xo

    Tuna Salad-Stuffed Tomatoes with Arugula

    July/August 2014           

    The tuna in this great-looking stuffed tomato recipe isn’t your typical mayo-based affair. The sherry vinaigrette does double duty: it adds fresh flavor to the tuna filling and also dresses the baby arugula and white bean salad.

    My modifications are in red

    Ingredients   

    • 3 tablespoons extra-virgin olive oil
    • 3 tablespoons sherry vinegar I used white balsamic vinegar...you can use your favorite
    • 1/4 teaspoon salt
    • 1/4 teaspoon freshly ground pepper
    • 4 large tomatoes  I used 2 large beefsteak tomatoes (for 2)
    • 2 5-ounce cans chunk light tuna in olive oil, drained I used 1 can of same tuna
    • 1/3 cup chopped celery
    • 1/4 cup finely chopped red onion
    • 1/4 cup chopped Kalamata olives
    • I also added 1 Tbsp of rinsed small capers
    • 1 teaspoon dried thyme
    • 1 15-ounce can great northern beans, rinsed Navy Beans are almost the same; I used 1/2 the amount.
    • 8 cups baby arugula  4 cups
    • You can cut down on the ingredients, or just 'eyeball' it...use your own judgement
     Preparation
    1. Whisk oil, vinegar, salt and pepper in a medium bowl. Transfer 3 tablespoons of the dressing to a large bowl and set aside.
    2. Slice enough off the top of each tomato to remove the core (1/2 to 1 inch). Chop enough of the tops to equal 1/2 cup and add to the medium bowl. Scoop out the tomato pulp using a teaspoon or melon baller. (Discard the pulp or save for another use.)
    3. Add tuna, celery, onion, olives and thyme to the medium bowl; gently toss to combine. Fill the hollowed tomatoes with the tuna mixture.
    4. Add beans and arugula to the dressing in the large bowl and toss to combine. Divide the salad among 4 plates and top each with a stuffed tomato.

    Nutrition

    Per serving: 353 calories; 18 g fat (2 g sat, 11 g mono); 7 mg cholesterol; 30 g carbohydrates; 0 g added sugars; 9 g total sugars; 20 g protein; 11 g fiber; 476 mg sodium; 878 mg potassium.
    Nutrition Bonus: Vitamin C (70% daily value), Vitamin A (63% dv), Potassium (25% dv), Folate (21% dv), Magnesium (16% dv), Vitamin B12 (15% dv)


    Nectarine and Almond Tart

    
    As you know, we're still enjoying our summer months here in South Florida, with temperatures still in the upper 80's degrees...but meanwhile, in South Dakota, they got their early 'first snow'...so bizarre!
    We are still able to buy peaches and nectarines in our supermarkets, and produce markets, and enjoying the last of the summer's fruits. I decided to make an easy tart with the nectarines, using puff
    pastry...which is so versatile and so quick; the possibilities are 'endless'.
    Here's a little 'hint' when making tarts, galettes, open faced pies, or even on cakes, featuring your favorite fruits, or berries...always brush them with a nice glaze that you make yourself, from heating up preserves that compliment the fruit, and straining them before brushing them on the fruits. You have to work fast, or the glaze will harden and then you have to start all over by heating it to a boil!
    When I made the guava pastries is how I got inspired to want to keep a package of puff pastry in my freezer which would be handy at the last minute's notice...and sure enough it was. You just take one of the pastry rolls (of 2) out, about 30 minutes before starting, and it will thaw out perfect just on your counter. I will walk you through...step-by-step to demonstrate how I made this delicious...just not so 'pretty layers' which should have been standing like 'perfect little soldiers'!
    Very little sugar is used to sweeten this yummy pastry; the hardest part is slicing them evenly, and lining them...slightly overlapping. I had to discard some of the slices, at least half of them which were turning brown inside...sigh!
    So here's my version of this easy, and fast recipe. (The almond filling was adapted by another source)

    Nectarine and Almond Tart
    recipe by; Elisabeth

    8 medium nectarines
    1/2 cup toasted sliced almonds
    1/4 cup sugar
    2 Tbsp. all-purpose flour
    4 teaspoons unsalted butter, softened (not melted)
    1 large egg
    1/2 teaspoon vanilla extract
    1 sheet frozen puff pastry thawed
    1/4 cup peach, or apricot preserves, heated to a boil, and strained


    Preheat oven to 400 degrees F.


    Cut nectarines in half, remove pit, and slice them
    into 1/4 in. to 1/2 in. slices. In a food processor.
    ( a small is OK to use.)


    Pulse almonds, flour, and sugar.


    Pulse a few times making sure to finely grind.


    Add the 4 Tbsp softened butter, the 1 large egg, and the vanilla. Process until it forms into a smooth thick creamy paste.
     
    Unfold pastry to parchment lined baking sheet.
    Spread almond mixture, leaving 1/2 inch border.
     
    Line the fruit slices closely, by overlapping them. (I didn't have enough slices, so I lined them as closely as possible.)
     
    Bake at 400 degrees F. for 20 minutes, and lower the temperature to 350 degrees for another 15 more minutes, to keep from burning.


    Pastry should be golden, puffed, and fruit, tender.


    Brush the fruit with the strained preserves, while it's hot, and let it cool for 20 minutes. before cutting.
     
    Very good as a light dessert, or a morning or afternoon snack!


    13th Anniversary of the Sept. 11 Terror attacks...


    Spicy South Florida Salsa

    Hi everyone! I'm not trying to promote a product...but I must admit that I do love Tostitos Tortilla Chips, especially the new one which is infused with a 'hint of lime'!
    I've been away for another 2 weeks at least...family obligations, and 'life in general' which really kept me from even opening my computer!
    I have so much to share with you; but I've been really 'slacking off' with my food photography these days. I have made some really fabulous dishes for my family...but the only problem was... the photographic side of it...which I was unprepared for... to take,  before...or during!
    I could not resist sharing this yummy, fresh and healthy Salsa...the spices are just right, just dig into all that goodness with a great sturdy and crunchy chip!

    I hope you all had a wonderful Labor's Day weekend holiday...as we also enjoyed, with partial rain, and of course sunshine right after that! ...'typical South Florida weather.

    Spicy South Florida Salsa
    recipe, by; Elisabeth

    6 -8 Roma, or Plum tomatoes diced
    2 jalapeno peppers, seeded, and diced
    1 bunch of scallions, cleaned, and sliced
    juice of 2 limes
    1 teaspoon cumin powder
    dash of hot pepper
    salt and pepper to taste
    a handful of fresh cilantro, cleaned of stems


    Add all the ingredients in a large food processor container.


    Pulse...(do not process!)...just pulse for 2 times, short, making sure that some chunks remain! Finish, by adjusting seasoning, if needed. Ready to serve with tortilla chips of your choice!


    I visited a Goodwill thrift store...other than my local area...and 'lo and behold'...hit the 'jackpot'! September 2014 issues (except or the Eat Smart, which was from June 2014)
    I could not believe my eyes...who would donate a 'brand new issue' of these popular magazines!...especially when they cost at least $5.99...and Goodwill price is 79 cents for all paper backs!...sure will have fun reading them and checking for new ideas and recipes!
    Here's how part of our Labor Day went...rain for about an hour, (view from my balcony)...and a perfectly beautiful sunshine for the rest of the day!
    The rest of the day turned out to be beautiful, sunny, and perfect 'beach weather'...enjoyed by my family!
    Hope you all had a wonderful Labor Day weekend! xoxo
    (not making excuses for staying away, and not posting and commenting!...long story)

    Baked Potato Soup

    Hi Everyone! I'm back again with a (not so exciting) new post...which you're probably asking "what's with the Baked Potato soup?" After all these weeks of absence, you would think I would come back with some exquisite, and amazing food to show off....hey, but just look at the gorgeous 'hand stitched' Italian table cloth (never used), the antique silver plated soup spoon, and the Italian napkin...all these things handed down to my daughter from her sweet M-in-law from Italy...except for the soup spoon which an entire set inherited from my Hungarian aunt (Mariska)
    
    This is truly an amazing comforting soup...'for the soul'...just look at the crispy yummy bacon bits, and the chunky pieces of 2 boiled potatoes, which was an addition to the homemade vegetable broth that it was boiled in, and added 2 peeled leftover baked potatoes...all mixed together in the blender, heated up and added 1/2 cup sour cream at the end. You can substitute Greek yogurt instead! Creamy soups are so easy to make...all you need is a blender, food processor, or even a 'hand held immersion blender/mixer) and your creativity!

    I missed so much opportunity to be posting so many different foods that I actually made in the last weeks that just flew by...not photographing anything...could also have had the chance to do a few Restaurant Reviews...(no photos)...well, could've...would've...should've...all have gone by, not focusing on it. I admit, I do regret procrastinating, and feeling 'down in the dumps' (no excuse)...can't take everything to 'heart' that we have no control over!
    As you know, I'm a huge Pinterest fan...love, love, finding some awesome things on Pinterest...especially foods, fashion, home décor, and travel...my oh, my...the amazing places we could go to...just have the $$$!
    Well, as you may, or may not know, but I have a board on Pinterest called #soup love where I found this most gorgeous and yummy Fully Loaded Baked Potato Soup and decided that I want to make it, just did not have 6 slices of bacon...only 3~ I did not follow their recipe all the way thru...so I made it my own...next time I will follow through the step-by-step recipe. When you see a photo on Pinterest, just click on the photo and it will lead you to the 'source' and most likely you will find the recipe, or the 'link' that it came from. In this case, I did find the source; which is called...
    Tasty Kitchen...you will find the step-by-step recipe for this amazing soup!
    Here's the recipe and my adaptation in blue:

    Fully Loaded Baked Potato Soup

    Ingredients

    • 4 whole Extra Large Baked Potatoes Or 8 Regular Baked Potatoes (I used 2 med. leftover baked potatoes and 2 med. peeled, and diced potatoes boiled in 2 cups of 'homemade veg. broth)
    • 6 slices Bacon, Diced (I used 3 slices of bacon)
    • 6 Tablespoons Butter (no butter used)
    • ½ whole Onion, Chopped (1 med. onion chopped)
    • 2 cloves Garlic, Minced
    • ⅓ cups All-purpose Flour (2 Tbsp. all-purp. flour)
    • 4 cups Chicken Stock (2 cups homemade vegetable stock)
    • ½ teaspoons Sea Salt (or To Taste)
    • 2 teaspoons Ground Pepper, Or To Taste
    • 2 Tablespoons Olive Oil (I used 3 Tbsp. olive oil)
    • 3 cups Shredded Cheddar Cheese (no cheese)
    • 4 whole Scallions (Green Onions), Sliced (no scallions) used sprig of parsley
    • 1 cup Greek Yogurt (1/2 cup sour cream)

    Preparation Instructions

    Scoop the white insides out of the baked potato skins. Roughly chop the white insides and set them aside. Chop potato skins and set aside.
    In a large stock pot brown the diced bacon over medium heat. Once it’s crispy, remove bacon from the pan and drain off the grease.
    Add 4 tablespoons butter to the brown bits at the bottom of the stock pot. Add onion and continue to cook over medium heat until onion is caramelized. Add minced garlic and flour. Stir flour until absorbed by the butter and cooked, about 1-2 minutes.
    While stirring, slowly add chicken stock to the flour mixture to prevent lumps. Bring to a simmer then turn heat to low. Add the insides of the diced baked potato. Add sea salt and pepper. Cover pot and continue to cook over low heat.
    In a large saute pan add 2 tablespoons of butter and 2 tablespoons olive oil over medium-high heat and heat until all of the butter is melted. Add the chopped potato skins and fry them until crisp and heated through.
    Add 1/2 of the crumbled bacon, 2 cups of cheddar cheese, 2/3 of the scallions and Greek yogurt into the pot of soup. Stir well and continue to cook over low heat until heated through and cheese is melted.
    Serve soup topped with remaining bacon, cheddar cheese, scallions and crisp potato skins.
     

    OK...now that this recipe is out of the way...I'd like to share with you our typical S. Florida cloudy skies...so close that you can almost touch it...followed by a super storm immediately after the clouds, lasting for about an hour and followed by sunshine, or again more storms!
    A typical Sunday afternoon...4:00PM; returning from the PGA Mall w/family...going over the Southern Blvd. bridge in West Palm Beach...stopped at the red light on the bridge, when suddenly realizing the huge rain cloud hovering over our heads.
    Got out of the Jeep...so did other people, to snap photos of the storm cloud!
    You would think this is a 'black and white' photo...but it's not; it is actually the grey color that it was taken with color!
    Ten minutes later at my destination...on the beach! The clouds look like they could just 'devour you'...a bit 'scary'!
    Another 10 more minutes later; have you every seen clouds like that?...as they say..."this is South Florida"...indeed it is...a 'typical S. Florida weather'! (just an hour earlier, it was sunny, with a few scattered clouds)

    Have a beautiful week, my dear friends! (readers, followers, and all!) ...xoxo


    Pasteles de Guayaba-(Cuban Guava Pastries)

    Hi Everyone! You may be wondering, or not...where I could have been; so unlike me, to disappear for one month and not announce where, or why?...or perhaps what happened to my untimely disappearance, when I have always seemed to share my routine activities on my blog. Well, it hasn't been the best of my last month, being without my family; missing them, terribly...both my 2 children and my 4 grandchildren away on their respective vacations...and me; left behind...a first time, in 12 years!

    Also, for the last 2 years, I have stopped celebrating birthdays, anniversaries, and special events, that have been bringing happy memories in my life...the past entire month have been bringing up such 'bittersweet' memories for me...thinking about my past 2 year losses of loved ones I lost; including my 2 beloved cats, Prince and Mush and my son's beautiful Black Lab beloved family dog named Thai...all gone in the last 2 years! Sometimes feelings get so overwhelming when you stop to think about recent losses, and sad 'world events'...you just have to take a step-back...take a 'break' away from a 'routine' and pray in silence... for better 'tomorrow' and PEACE for our future!
    For the last two weeks, I've been wanting to post my 'new found' amazing, and ridiculously easy dessert that I made, but been putting it off, thinking that I may have lost my food blogger friends...since I have not commented to all of you, since the last time I posted. I really appreciate all your friendship and I hope I did not offend you in any way! Well, after hesitating to even look into my own blog...I'm back, and starting my 4th year blogging, this month...it's either 'Do, or DIE' so; no party, no celebration...just a quiet return for more, and hopefully better year!
    "Ay Que Rico"...as they say in Spanish..."Oh, How Good"...and it certainly is, this magical Guava paste, which is made from Guava fruit, that we are so fortunate to have it growing in South Florida.

    To be perfectly honest, I have never made this pastry in all my years living in South Florida; always buying it in our local supermarket, fresh, and warm to savor with a 'Cafecito'...which is a Cuban espresso, or 'Café con leche' the Cuban coffee with milk...a match made in 'heaven' for coffee lovers like myself! Here, in West Palm Beach, you can also find these yummy pastries in Cuban restaurants, and Cuban bakeries...and even at a local Cuban gas station; always served warm, and oozing with the guava paste that is naturally sweet, and is so good for you...rich with Vitamin C!
    Photo...courtesy of  the Internet
    This is what a ripe Guava fruit looks like on a Guava tree! Although, most of the trees are found in Miami, I have not seen them in anyone's yard, other than on a Guava Farm.
    2

    Welcome to Silver Palm

    Thank you for visiting our website.  Our farm is located in the Redlands, a small farming community in Southwest Miami-Dade county. We encourage everyone that is in the area to stop by, however , we do not keep consistent hours so if our gate is open, welcome! We are located at:
    23450 Sw 167 Avenue Redland, Florida 33031


    Pasteles de Guayaba-Cuban Guava Pastries

    source; adapted from 3 different Internet recipes

    1 package of puff pastry
    1 package of Guava Paste
    1 egg and 1 Tbsp. cane sugar for sprinkling


    Preheat oven to 375 degrees F.
    Thaw puff pastry according to package directions.
    Line a baking sheet with parchment paper, and unfold one of the pastry sheets onto the pan.


    Slice the guava paste into 1/2 inch slices, and place evenly over the pastry sheet.


    Top with second puff pastry sheet and cut into desired slices. I cut mine into 4x6 inches.
    ( Use a pizza cutter for easier cutting.)


    With a sharp knife, cut small slashes for air vents. Beat egg in a small bowl, and brush the top of the puff pastries, and sprinkle the cane sugar over it.


    Bake at 375 Degrees F. for 25 minutes, or until golden brown. Cool to room temperature, and serve. Refrigerate leftovers (if any) very nice reheat!


    So delicious as a breakfast/brunch treat, or an afternoon snack, paired with your favorite coffee or tea, or just with an ice cold glass of your favorite milk.

    Note: In my 40 yrs of living in S. Florida, this is the first time I have made this super easy and delicious Guava Pastries...my family loved it, and have requested to keep making it. Next time, I will spread cream cheese over the guava paste...yumm


    Ingredients
    • 1 Package of Puff Pastry
    • 1 Package of Guava Paste
    • 1 package of Cream Cheese (optional)
    • 1 Egg & Cane Sugar
    Instructions
    1. Preheat oven to 400 Degrees F
    2. Thaw Puff pastry according to package directions.
    3. Line a baking sheet with parchment paper and unfold one of the pastry sheets and place on pan.
    4. Slice guava into ¼ inch slices and place evenly on the pastry sheet.
    5. Spread cream cheese over guava paste slices (optional)
    6. Top with second puff pastry sheet and cut into desired pastry size. I cut mine in 2 inch squares.
    7. Beat egg in a small bowl and brush over the top of the pastries. Sprinkle with cane sugar.
    8. Bake at 400 degrees F for 25 minutes or until golden brown. Cool and serve.
    - See more at: http://afewshortcuts.com/2013/07/easy-guava-pastries-recipe/#sthash.nKPDe7Sy.dpuf

    Cleveland Winter 2017

    Hello my friends, I hope you all had a great holiday. I just got back from Ohio and I thought it would be nice to put together a post to s...